Marine lumber is easy to machine with carbide-tipped router bits.
If you need to replace wood, plastic laminate, or plastic parts on your boat, consider using Marine Lumber. Sometimes called “StarBoard®” (a registered trademark of King Plastics), marine lumber is ideal for cutting boards and bait boards, shower floors, companionway hatch boards, sink covers, cabinets, electronics boxes, bait wells, table tops, and hundreds of other applications.
Available in thicknesses of 1/4”, 1/2”, and 3/4”, this polyethylene polymer sheet product will not rot, splinter, swell, or delaminate. Marine lumber can be machined with standard woodworking tools and needs no painting, finishing, or maintenance. It is widely used by professional boatbuilders — if your boat was built in the last 15 years, it probably has marine lumber parts somewhere onboard.
- General Characteristics
- Fastening Marine Lumber
- Project Ideas
- Tools and Supplies
- Plan Your Project
- Create Your Accessory
- Installation
- Care and Maintenance
- FAQs
General Characteristics
Marine lumber is not a structural building material. Do not consider replanking a wood boat, replacing a plywood deck, or installing engine stringers with marine lumber. It needs to be supported every 15” to 18” in every direction and does not have the stiffness or strength of good marine plywood.
Marine lumber is FDA approved and safe for food preparation. It has a non-stick matte finish, is nearly impervious to UV radiation, and does not absorb water. It cannot be painted, must be mechanically fastened, and is very difficult (or nearly impossible) to glue. It can be thermoformed — bent to a desired curve — by heating both sides to 210–220°F at the point of bending. Clamp it on a workbench with the end you want to bend hanging over the edge. Pass a heat gun back and forth while bending the marine lumber down. It can also be welded using standard HDPE welding equipment.
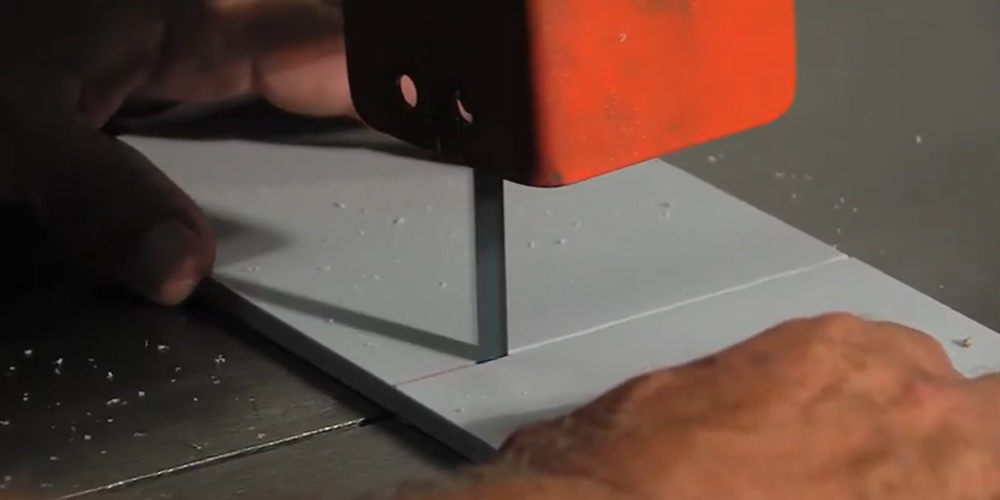
Marine lumber machines just like wood. Straight cuts use a carbide-tipped 50 to 70-tooth wood cutting blade on a table saw or worm drive circular saw. Curved cuts are easy with a jigsaw or bandsaw using a wood cutting blade. Clean up edges after cutting with a router using a flush-trimming bit.
You can use a router for rounding over edges, cutting rabbets and dadoes, or making tongue-and-groove joints. Carbide-tipped bits give the cleanest results. To make a clean 90° waterproof corner: cut a V-groove halfway through the thickness at the inside of the bend using a 3/4” 90° “V” bit. Apply heat evenly to the seam with a heat gun on low setting while applying pressure to bend the panel. Allow the joint to cool for a perfect 90° waterproof corner. Practice on scrap before attempting a finished piece. Sanding for cleanup works well with an orbital sander loaded with 120 or 150 grit paper.
Marine lumber softens at temperatures above 180°F, so it should not be used in engine compartments or other locations subjected to extreme heat.
Fastening Marine Lumber
Use stainless mechanical fasteners to secure marine lumber. Poly-Dura is one of the few adhesives with any ability to bond this material, but screws or through-bolts are recommended because marine lumber does not glue reliably. Epoxy, polyester resins, polyurethane, and most other adhesives do not stick securely and will eventually pull loose. Marine lumber can be caulked with BoatLIFE Life-Calk for above-water use. 3M 5200 adheres well enough for caulking but not tenaciously enough to serve as an adhesive.
Fastener holes almost always must be drilled oversized because marine lumber expands and contracts with temperature changes. It moves 1/32” per linear foot per 40°F of temperature change, so fastener holes are usually drilled 1/8” larger than the fastener’s diameter. When attaching marine lumber to wood, fiberglass, or other more dimensionally stable surfaces, drill a correctly sized pilot hole into the substrate and an oversized hole in the marine lumber.
If you forget to oversize the fastener holes and assembled your project in cold conditions, the marine lumber could sag in summer heat. Assembly in hot weather could lead to cracking across fastener locations when the marine lumber contracts in colder temperatures. Solid wood also expands and contracts, but in less predictable ways depending on species, grain direction, and moisture content — marine lumber has the advantage of predictability.
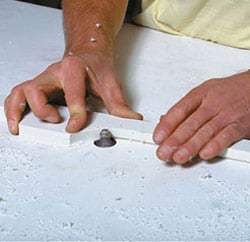
If you choose to counterbore your fastener holes, you can hide the fasteners with plugs made from marine lumber, just as you would with wood. Use a plug-cutting bit the same diameter as the hole you are plugging. Measure the depth of the hole using the depth gauge on a dial caliper. Cut plug stock to the right thickness with matte finish side against the fence. Clamp the plug stock to the drill press (matte finish side down, scrap lumber underneath) and drill out the plugs needed plus a few extras. Deburr and clean the plugs, start them with your fingers, and tap into place with a hammer using a block of wood or plastic as a buffer. The result is a finished installation with virtually invisible plugs.
Project Ideas
Projects using marine lumber range from replacing damaged wood, laminates, and plastics to adding custom accessories. To replace worn or damaged wood, remove the old part and use it as a template by clamping it to the marine lumber sheet. To add new accessories, determine where they will be located on the boat and create a pattern including attachment hole locations.
- Electronics boxes: Marine lumber’s dimensional stability and resistance to moisture make it ideal for housing VHF radios, chartplotters, and accessory switches. It won’t swell or warp around the mounting hardware, keeps a clean appearance, and is easy to rout for cable pass-throughs and ventilation slots. Because it machines like wood, custom electronics enclosures can be built to exact dimensions far more easily than with fiberglass.
- Ski locker lids: Ski locker lids live in one of the harshest spots on a boat — wet, UV-exposed, walked on, and slammed repeatedly. Wood rots, delaminate, and requires refinishing. Marine lumber shrugs off all of it. The non-slip matte finish provides grip when wet, it won’t splinter underfoot, and a replacement lid can be cut to match the original in minutes using the old part as a template.
- Cup holders: A hole saw and a router are all you need to cut and finish a flush-mount cup holder in marine lumber. The smooth interior surface is easy to clean, won’t absorb spilled drinks, and won’t stain from soft drink syrup or coffee. Available in colors that can match or complement your boat’s existing trim.
- Shelves: Marine lumber shelves require no painting, never swell in high-humidity areas like heads and cabins, and won’t develop the soft spots that wood shelves develop when exposed to dripping wet gear. The 1/4” and 1/2” thicknesses are appropriate for most shelf applications; remember to support shelves every 15–18 inches to prevent sagging under load.
- Chart holders: A simple pocket or tray cut from 1/4” marine lumber mounts at the helm to hold charts, tablets, or printed routes without absorbing spray or rain. The material is easy to clean of salt residue, and the matte surface won’t create glare that interferes with reading in direct sun.
- Table tops: Cockpit and salon table tops are high-abuse surfaces that see constant wet glasses, cutting boards, and UV exposure. Marine lumber table tops are FDA-approved for food contact, easy to clean, and far more durable than painted or varnished wood surfaces that need seasonal maintenance. The 3/4” thickness provides a solid feel appropriate for a table surface.
- Bait boards: This may be the single most popular marine lumber project. A bait board endures fish slime, bait oils, knife cuts, salt water, and constant UV — conditions that destroy wood or corrode metal. Marine lumber’s FDA-approved, non-porous, non-stick surface is easy to hose down completely clean. Routed drip edges channel liquids away from the boat, and a flush-cut trim router bit creates clean edges that won’t harbor bacteria. Available in white and other colors that show clearly for cleaning.
- Ladder treads: Boarding ladder treads need to be non-slip when wet, resistant to UV and salt, and durable enough to take the full weight of a boarding adult every trip. Marine lumber’s matte finish provides natural grip when wet. It won’t rot where the ladder arms pass through, won’t splinter, and won’t need refinishing. Existing treads are easy to use as templates for direct replacement.
- Sink covers: A custom-cut sink cover in 1/2” marine lumber transforms a galley or cockpit sink into a flat work surface when not in use. The material is waterproof, won’t warp from repeated wetting and drying, and won’t develop mildew in the damp environment around a sink. It can be routed to fit precisely over the sink rim for a tight fit.
- Transom doors: Transom doors take constant abuse from swimmers, divers, and anglers stepping on and off the boat. Marine lumber is heavy enough to feel substantial, resists the warping and swelling that plague wood doors exposed to alternating wet and dry cycles, and takes stainless hardware cleanly. A replacement transom door can be routed to match the original profile exactly.
- Trim pieces: Replacing weathered or damaged interior and exterior trim is one of the quickest wins with marine lumber. Router profiles — roundovers, chamfers, coves — can replicate the look of traditional wood trim with none of the maintenance. Available in teak-look and other colors for boats where aesthetics matter alongside durability.
- Sliding door tracks: Marine lumber’s self-lubricating surface makes it an excellent track material for sliding companionway boards and cabin doors. It will not swell with moisture and jam the door, will not corrode, and can be routed to any profile the design requires. The dimensional stability (predictable thermal expansion in one direction only) makes fitting sliding components straightforward.
- Arm rests: Helm seat and leaning post arm rests take constant UV exposure and repeated contact. Marine lumber arm rests are comfortable to the touch (not heat-retaining like dark gelcoat), won’t crack or blister from sun exposure, and can be shaped with a router to a comfortable radius. The matte finish doesn’t show wear the way a painted surface does.
- Backsplash panels: Galley backsplash panels behind the stove and sink are exposed to heat, grease, food, and cleaning chemicals. Marine lumber is impervious to all of these. The smooth, non-porous surface wipes completely clean without harboring bacteria or mold, and the 180°F softening threshold is well above normal cooking splash temperatures while keeping it appropriate for use near (but not immediately adjacent to) stove burners.
- Rod holder racks: A rod holder rack cut from 3/4” marine lumber mounts to the gunwale or T-top frame and holds fishing rods securely without damaging them. Routed slots or holes can be sized precisely for the rod butts and blanks you fish with. The material won’t corrode the rod blanks or guides the way metal racks sometimes do in salt air, and it cleans completely after a bloody day of fishing.
- Cabinets: Marine lumber cabin and cockpit storage cabinets are built the same way as wood cabinets — dadoes, rabbets, tongue-and-groove joints, and mechanical fasteners — but require no paint, varnish, or periodic refinishing. Moisture in the head or bilge area will not cause delamination or swelling. Cabinet doors can be cut to fit precisely without allowance for seasonal wood movement.
- Hatches and doors: Deck hatches and interior doors built from marine lumber will outlast painted plywood or solid wood equivalents in a marine environment. The material doesn’t absorb water at the edges or face, won’t develop soft spots from trapped moisture, and can be routed for hinges and hardware exactly as you would route wood. 3/4” thickness provides appropriate rigidity for most hatch and door applications.
- Instrument panels: A custom instrument panel cut from marine lumber lets you position gauges, switches, and controls exactly where you want them, routed to fit each instrument precisely. The material is dimensionally stable enough that instruments won’t loosen over time from panel movement, and it doesn’t conduct electricity, which matters when mounting electrical components. The matte finish reduces glare at the helm.
- Tool holders: Organizing tools, pliers, knives, and small accessories in a routed marine lumber holder keeps gear accessible and visible in fishing, dive, or mechanics areas. The material won’t rust or corrode adjacent to stainless tools in salt air, cleans easily of grease and bait residue, and can be customized to the exact tool inventory you carry.
- Console components: Helm console face panels, switch panels, and trim surrounds made from marine lumber integrate cleanly with fiberglass consoles, don’t require painting, and can be replaced or modified without affecting the structural console. Routing cable runs and switch cutouts is fast and clean. The material is available in colors that can be matched to existing console gelcoat for a factory-look integration.
- Leaning posts: Leaning post platforms, face panels, and armrest pads built from marine lumber provide the same durability benefits as other exterior applications: no rot, no refinishing, non-slip matte surface, and long-term UV resistance. The 3/4” thickness is appropriate for structural panel faces; add backing support every 15–18 inches for any load-bearing component.
- Bait wells and covers: Marine lumber is FDA-approved and non-toxic in contact with live bait and water, making it appropriate for bait well construction. It won’t leach chemicals that would harm live shrimp or baitfish. Covers can be routed with drainage holes and cut to fit precisely. The non-porous surface is easy to clean of decomposing bait material completely — a significant advantage over wood, which retains odors permanently.
- Shower floors: Shower soles in heads and cockpit showers need to drain cleanly, resist mold and mildew, be comfortable and non-slip underfoot, and tolerate constant wet exposure. Marine lumber checks all of these. A routed grid pattern in the floor surface channels water to a drain while providing a textured non-slip surface. The material doesn’t harbor mold the way wood grain does, and it can be removed and hosed down completely clean.
Tools and Supplies
- Marine lumber sheets in the required thickness and size
- Drill and drill bits (high-speed steel)
- Stainless steel screws, nuts, and bolts
- Tape measure
- Carbide-tipped table saw or circular saw with 50–70 tooth blade
- Clamps
- Wax pencil (not lead pencil, ink pen, or marker — these permanently stain marine lumber)
- Posterboard or other pattern material
- Jigsaw for curved cuts
- Hole saw bits
- Countersink bit
- Screwdriver or screw gun
- Router with 1/2” carbide bit (at least 2 flutes)
- Silicone sealant or 3M 5200
- Orbital sander with 120 grit sandpaper
- Rubber mallet
- Safety goggles
Plan Your Project
- Calculate the size of the marine lumber sheet you will need by laying out your patterns on paper first to minimize waste.
- Choose the tools and hardware for each step: screws, nuts, and bolts for attachment; appropriate saw blades; drill bits; countersink or counterbore tools; hole saw blades.
- Purchase the appropriate marine lumber sheet at your local West Marine store or order online.
Create Your Accessory
- Clamp your old part to the marine lumber, or tape your template to it with scotch tape, and make an outline using a wax pencil only. Never use a lead pencil, ink pen, magic marker, or permanent marker — these will permanently stain marine lumber.
- Cut along the wax pencil lines: use a table saw or circular saw for straight cuts, a jigsaw for curved cuts, and a drill with hole saw blades for large holes. Cut holes and notches in components first before cutting them out of the sheet. All cutting tools should be carbide-tipped where possible. Circular blades should have 50–70 teeth and run at approximately 1,200 RPM. Marine lumber gets hot during drilling — stop frequently to let it cool.
- Finish all edges using a router with a 1/2” carbide bit with at least two flutes, or an orbital sander with 120 grit sandpaper.
- If bending to create a corner, place the marine lumber on top of a piece of plywood so the bend line is just past the edge. Heat with a heat gun across the bend line, allowing the extended portion to bend downward. If bending in place, secure with clamps, apply heat, start at the clamped end, gradually apply pressure, and work in one direction. For sharp corners, cut a V-shaped notch on the inside of the bend line with a router before heating and bending.
- Drill attachment holes using a drill bit slightly larger than the mounting screws or bolts to allow for thermal expansion and contraction. Use sharp, high-speed drill bits. Countersink holes to allow screw heads to sit flush. If counterboring, go no deeper than 1/3 of the thickness of the marine lumber.
Installation
- Hold the accessory in position and drill through the mounting holes into the mounting surface. Use a drill bit smaller than the mounting screws so the threads will grip, unless you are through-bolting.
- Install fasteners with threads coated in silicone sealant or 3M 5200 to create a watertight seal.
Note on adhesives and sealants: Most sealants and adhesives will not adhere to marine lumber. 3M Scotch-Weld DP-8005 is one that will work. When bolting marine lumber to another surface and needing a water-tight seal, both 3M 5200 and TACO weather seals will act as effective sealants, though not as structural adhesives.
Care and Maintenance
- Clean marine lumber with a mild solution of liquid soap or boat wash and water, and a synthetic or nylon scrub brush
- Remove stains with citrus cleaner, mineral spirits, or alcohol
- Avoid contact with chemicals such as teak oil, which can cause permanent stains
- Never use lead pencil, ink pen, or permanent markers on marine lumber surfaces — they stain permanently
- Furniture polish or products such as Armor-All can add an attractive luster to the matte finish
Frequently Asked Questions
What is the difference between marine lumber and regular HDPE plastic?
Marine lumber is a specific formulation of high-density polyethylene (HDPE) designed for marine environments. It incorporates UV stabilizers that prevent degradation from sunlight, a colorfast matte finish that resists fading, and consistent cell structure that machines cleanly like wood. Generic HDPE sheet from a plastics supplier may work for some applications, but may not have the UV resistance, colorfast formulation, or machining characteristics of marine-grade material. StarBoard® (the most recognized marine lumber brand) is a proprietary King Plastics formulation — other manufacturers produce similar materials under different brand names.
Why can’t I glue marine lumber?
HDPE (the base material of marine lumber) has a very low surface energy, which means most adhesives cannot form a mechanical or chemical bond with it. Epoxy, polyester, polyurethane, and most contact cements fail to stick reliably and eventually release under load or temperature cycling. The same property that makes marine lumber resistant to water absorption also makes it resistant to adhesives. Mechanical fasteners (screws and through-bolts) are the correct fastening method. Poly-Dura and 3M Scotch-Weld DP-8005 are among the few adhesive systems with meaningful (though limited) adhesion to HDPE, and they should be considered sealants rather than structural adhesives.
Can marine lumber be used outside, exposed to sun and weather?
Yes — resistance to UV, moisture, and weather is one of its primary advantages over wood. Marine lumber does not rot, swell, check, or require painting or finishing. It will not delaminate or absorb water. UV-stabilized formulations maintain color and surface quality through years of sun exposure that would destroy painted wood or unprotected plywood. The 180°F softening temperature is the main outdoor limitation: direct sun in hot climates can raise surface temperatures significantly, so avoid applications where the material will be in continuous direct sun without airflow underneath (such as a solid panel mounted flat on a dark deck surface in the tropics).
What thicknesses are available and which should I use?
Marine lumber is available at West Marine in 1/4”, 1/2”, and 3/4” thicknesses. Use 1/4” for covers, backing panels, decorative trim, and applications where weight and stiffness are not major concerns. Use 1/2” for moderate-duty applications like sink covers, shelf panels, small bait boards, and hatch covers. Use 3/4” for structural panels (within marine lumber’s non-structural limitations), table tops, leaning posts, bait boards that will be used heavily, and any application requiring maximum rigidity. Remember that marine lumber requires support every 15–18 inches in every direction regardless of thickness — it is not a substitute for structural plywood.
How do I account for thermal expansion when fastening?
Marine lumber expands and contracts 1/32” per linear foot per 40°F of temperature change. For fastener holes, drill 1/8” oversize relative to the fastener diameter. When attaching to a dimensionally stable substrate (fiberglass, metal, or wood), drill a correctly sized pilot hole in the substrate and the oversize hole only in the marine lumber. Install hardware loosely if possible, or use oval-head or pan-head screws that allow slight movement in slotted holes rather than round holes for long runs.