It’s easy to keep your outboard in top shape, even if you’re not a mechanic. A little preventive maintenance can keep your motor running reliably for years. Follow the manufacturer’s recommendations where they differ from our advice, and consider these tips.
- Before Every Trip
- After Every Trip
- Routine Maintenance
- Fuel System Tips
- Boat Engine and Repair Manuals
- FAQs
Before Every Trip
- Check that you have adequate, fresh fuel and that the fuel tank vent is open.
- Make sure the oil tank (if the engine has one) is topped up.
- If the engine is not thru-bolted to the transom, ensure the engine mount screw clamps are secure and tight.
- Check that the water intake pickup is clean and free from debris.
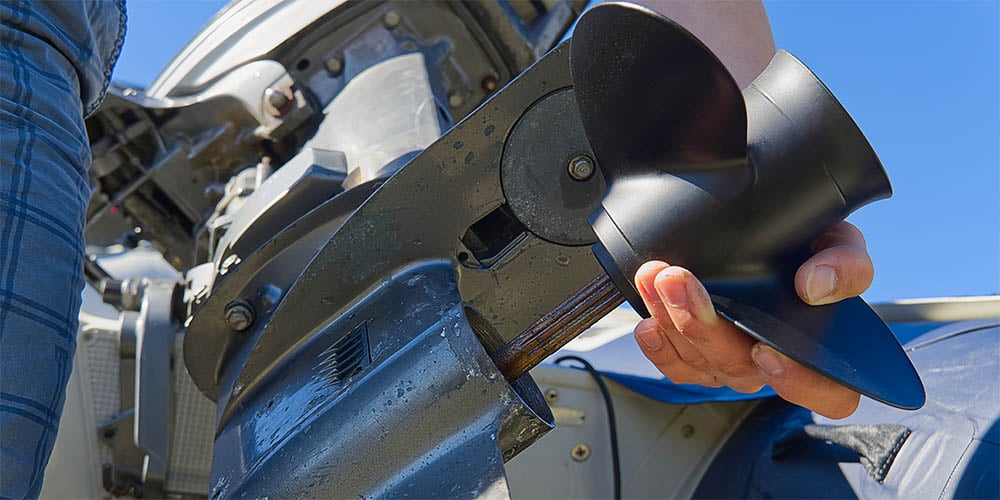
- Check the prop for fishing line wrapped around the hub area. Check for excess oil buildup near the prop — a small amount is normal, so watch for changes in quantity, which can indicate deterioration of the lower unit seal.

Modern 4-stroke outboards are significantly cleaner and quieter than 2-strokes and consume about 40% less fuel.
After Every Trip
- Flush the engine after every outing — not just saltwater trips but freshwater outings as well if there has been sand, gravel, pollution, or other debris in the water.
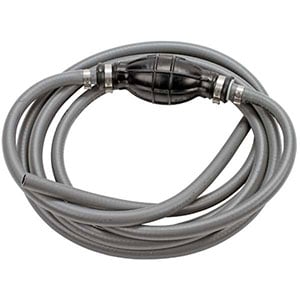
- Use an engine flusher (“ear muffs”) — two flexible rubber seals connected with a metal clamp. Slip the flusher onto the lower unit over the water intake ports and attach a garden hose. Open the tap to no more than about one-quarter of maximum water pressure. Full city water pressure can damage the internal seals of your outboard.
- Start the engine and run it at approximately 2,000 rpm (or your manufacturer’s recommended rpm setting). Allow the motor to reach operating temperature so the thermostat opens and water circulates through the full cooling system. Stay clear of the prop and make sure no one shifts the motor into gear. Many experts recommend removing the prop whenever running the engine out of the water.
- While flushing, check the water pump output. Carefully put your finger through the stream of water — it may be warm but should not be hot. Weak output may indicate debris in the outflow tube. Shut down immediately to prevent overheating. Insert a small piece of wire into the tube and work it back and forth, then restart and recheck. If the problem persists, the water pump impeller may need replacement.
- After flushing, disconnect the fuel line and allow the engine to run until it burns all the fuel in the carburetor. This prevents stale fuel from gumming carburetor passages during storage between outings.
- Once the engine has run out of fuel, turn off the key and battery switch. The complete flushing procedure should take five to ten minutes.
- Wipe everything down and spray with a corrosion inhibitor.
- Lubricate all moving parts including the shift and throttle cables and carburetor linkages.
- Replace the cowling, wipe it down, and keep a canvas or plastic cover on the engine between trips.
Routine Maintenance
Replacing cracked fuel lines with new EPA-compliant low-permeation lines is better for the environment, safer, and prevents fuel loss.
- Periodically inspect the fuel line for cracks and worn spots.
- Check that the primer bulb is not cracked and remains pliable. A hardened or cracked bulb should be replaced.
- Confirm fuel line fittings seat properly and do not leak.
- Inspect clamps on the fuel line for rust or corrosion.
- Inspect fuel tank(s) for damage and corrosion.
- Check the tank vent to confirm it is free of obstructions.
- Check regularly for water in the fuel — especially with ethanol-blended gasoline (E10 or E15), which can absorb water from the air and cause phase separation, where water and alcohol drop to the bottom of the tank separate from the gasoline. If the engine has a clear fuel strainer, water appears as a relatively clear layer at the bottom of the bowl. Drain it before starting the engine.
- Lubricate the engine tilt and steering grease points every 100 hours or annually, whichever comes first.
- Check for engine corrosion and replace sacrificial anodes when they are more than 50% consumed.
- Clean the exterior with boat soap and apply a wax coat to protect painted surfaces.
- Inspect the propeller for dents, dings, and fishing line around the hub at least seasonally.
- Change the engine oil and replace the oil filter per the manufacturer’s recommended interval (typically every 100 hours for 4-stroke outboards).
- Change the lower unit gear oil at least annually or per manufacturer’s recommendation. Milky or discolored gear oil indicates water intrusion — have the lower unit inspected by a dealer if water contamination is found.
- Replace the water pump impeller every 300 hours of use or every three years, whichever comes first. Replace more frequently if you operate in sandy conditions where abrasive material is drawn through the cooling system.
- Take the engine to a dealer for an annual service. Depending on the engine type, this typically includes new spark plugs, oil and oil filter change, fuel filter replacement, valve adjustment (4-stroke), and water pump impeller inspection or replacement.
Fuel System Tips
Modern gasoline containing ethanol (E10, and increasingly E15) requires some extra attention in outboard applications:
- Use fresh fuel. Gasoline degrades over 30–60 days in an outboard fuel system. Stale fuel causes hard starting, rough running, and gummed carburetor passages. For engines that sit between seasons, use a fuel stabilizer or drain the fuel system completely.
- Ethanol and water. Ethanol-blended fuel is hygroscopic — it absorbs moisture from the air. When enough water is absorbed, phase separation occurs: the water and ethanol drop to the bottom of the tank as a separate layer, leaving low-octane gasoline above. An engine running on the water-alcohol layer will stall or run poorly. Keep the tank as full as practical when the boat is not in use to reduce airspace and moisture ingress.
- Ethanol and older fuel system components. Ethanol can degrade older rubber fuel lines, primer bulbs, and carburetors not designed for alcohol-blended fuel. If your boat was built before approximately 2009, inspect fuel system components regularly and replace any that show swelling, cracking, or softening.
- Fuel stabilizer. Add a marine-grade fuel stabilizer to the tank at end of season and run the engine briefly to circulate it through the fuel system before storage.
Boat Engine and Repair Manuals
- SELOC boat engine owner’s manuals and repair manuals for specific brands, models, and ages of outboards
Outboard Motor Maintenance FAQ
Attach engine flusher ear muffs over the water intake ports on the lower unit, connect a garden hose, and turn the water on to about one-quarter of full pressure — never full pressure, which can damage internal seals. Start the engine and run at approximately 2,000 rpm until it reaches operating temperature (so the thermostat opens). Run for five to ten minutes, then disconnect the fuel line and let the engine run until it burns the fuel from the carburetor. Shut off the key and battery switch, wipe everything down, and spray with a corrosion inhibitor.
Every 300 hours of use or every three years, whichever comes first. In sandy conditions where abrasive material is drawn through the cooling system, replace more frequently. The impeller is inexpensive and easy to replace compared to the cost of an overheated engine. Carry a spare impeller kit aboard and know how to change it on the water.
Milky or cream-colored gear oil indicates water has entered the lower unit through a failed seal. Drain and refill with fresh gear oil, but also have a dealer inspect the seals before returning the motor to heavy service. Running a lower unit with water-contaminated oil causes rapid bearing and gear wear. Change lower unit gear oil at least annually to catch this problem early.
Keep the tank full when the boat is not in use to minimize airspace and humidity condensation. Add a marine-grade fuel stabilizer at the end of each season and run the engine to circulate it. Check the fuel strainer regularly for water accumulation — a clear layer at the bottom of the bowl indicates phase separation. For older outboards, inspect rubber fuel system components seasonally for deterioration caused by ethanol.
Check fuel level and quality, confirm the tank vent is open, verify the oil tank is full (if applicable), confirm the engine mount clamps are tight, check the water intake for debris, and inspect the propeller for fishing line wrapped around the hub and for excessive oil accumulation near the prop indicating a lower unit seal leak. A two-minute pre-departure check prevents most common on-water breakdowns.