In the dog days of summer when the air is still, everybody appreciates the cooling breeze of a fan. Typical locations for fans include forepeaks, galley, main saloon, hanging lockers and berthing areas.
Why install a fixed-mount fan?
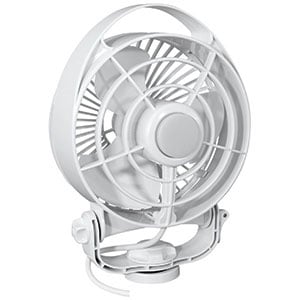
Caframo’s Bora interior fan is ideal for berthing areas, the main salon, cockpit or galley.
Permanently installed fans eliminate the clutter and potential trip hazard of fans with cigarette lighter cords and unlike freestanding fans, they also stay put in a seaway. Also unlike freestanding fans, fixed mount fans can be installed on a horizontal, vertical or overhead surface.
Choose a fan that is right for you!
The fans that we offer are designed for safe operation, with soft “finger safe” blades and protective grilles—which are important if you have children aboard.
Variations of fan designs include a choice of 12V or 24V models, single or multiple speeds and the ability to oscillate. All of our fans feature quiet operation and low power consumption, typically in the range of .3A-.7A.
Follow “Best practice” for Electrical Installations
Whether you opt to wire a single fan into an existing circuit or plan on something more involved, such as creating a dedicated circuit with multiple fans that originates at your boat’s breaker or fuse panel, we recommend that you adhere to “best practice” for marine electrical installations. We also suggest that you only use electrical wire, terminals and connectors that are appropriate for marine installations. For an overview that covers acceptable wire for marine use, electrical tools, terminals, connectors and “best practice” for marine wiring, check our Advisor Marine DC Wiring Basics. Another outstanding reference is Nigel Calder’s Boat Owner’s Mechanical and Electrical Manual, which covers ABYC electrical standards and a host of other topics on boat systems and repair.
Sample Wiring Scenario
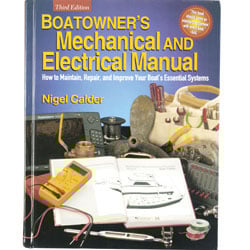
“If you had to choose a single book to help you assess and maintain your boat gear, this would be it.”—Practical Sailor.
The easiest way to install a fan is to take advantage of an existing circuit. Frequently, this will be a circuit that serves a cabin lamp. Let’s say you want to install a fan on the bulkhead in the forepeak of your boat, where (as is typical) a lamp is already installed. In this case you simply need to mount the fan (they usually come with screws) on to the bulkhead or adjacent cabinetry, shorten the leads, and then make the connection. The connections (power and ground) can be made within the lamp’s base if it has screw terminals, or if it doesn’t, you can “cut into” the wires that serve the lamp at a point within or close to its base. In either case, you will probably need to shorten the leads from the fan (most are about five feet long) taking care to leave them long enough to accommodate an orderly run to where they pick up power and ground from the lamp. To clean up the installation and hide the wires where they would otherwise be visible on the bulkhead, you can cover them with a length of channeled teak wire moulding.
Making the Connections
Most wiring problems occur at the connections. NEVER twist wires together or wrap a wire around a terminal screw. A proper crimp connection is essential for safety and current-carrying ability. Use a good quality crimper and marine grade butt connectors and wire terminals. Put the terminal in the correct die in the crimper, insert the wire into the terminal and squeeze until the jaws grip the terminal lightly and hold it in place without distortion. Check the finished crimp to see that the wire is firmly in place by giving it a good solid tug. Finish the job with heat-activated, adhesive-lined heat shrink tubing.
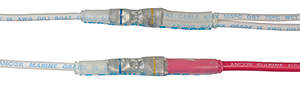
Step-down butt connectors can be used to reduce wire diameter from one gauge to another, or as a multi-wire connector.
When “cutting into” an existing circuit, never make your connections with household-style “wire nuts”. For the installation described above, a simple, uncomplicated choice is to use Step-down Heat Shrink Butt Connectors, which will provide a secure connection with a watertight seal.
Other Electrical Considerations
As previously stated, one of the nice features with the 12V and 24V fans that we offer is their relatively low draw, measured in amps. However, even though these fans draw but a small amount of current (frequently less than .5A) you should make sure that adding a fan to an existing circuit will not cause an unacceptable voltage drop that results in poor performance of the fan. For the sample scenario described above, on a typical 30’ boat whose lighting circuits are wire gauge AWG 16 or larger, there won’t be a problem. But just to be sure, check the 3% voltage drop table located in our Advisor Marine Wire Size and Ampacity or try using Blue Sea Systems’ interactive Circuit Wizard, both of which make this easy to figure out.