Tired of worrying about your trolling motor or sound system running your starting battery down? You need a dual boat battery setup. Luckily, adding a second battery to your boat is a relatively simple task that only requires a few products and tools. We'll run you through everything you need to know.
- Types of Marine Batteries
- Electrical Safety Precautions
- Where to Mount a Second Boat Battery
- Using Quality Battery Cables
- How to Make Your Own Battery Cables
- Battery Switches
- Charge Management
- Best Batteries for Dual Boat Battery Setups
- Glossary of Terms
- FAQs
Types of Marine Batteries
Sealed dual-purpose batteries combine the ability to withstand deep discharges with cranking power to start your engine
Starting batteries are similar to automotive batteries and are available in both flooded and sealed battery types. They are engineered to deliver a large burst of current for a short period — the cranking amps needed to spin an engine starter — and then recover quickly once the engine's alternator begins charging. The tradeoff is that starting batteries are not tolerant of deep discharges: repeatedly drawing them below 50% state of charge damages their plates and shortens service life significantly. They are appropriate as the single battery on wakeboard boats, runabouts, personal watercraft and other boats with minimal DC loads where the engine is always running when electronics are in use.
Deep-cycle batteries are built with thicker, more robust plates that can endure repeated deep discharging and recharging without damage. They are available in flooded and sealed types, and lithium deep cycle batteries are also an excellent option — significantly lighter than lead-acid equivalents and capable of delivering consistent voltage throughout their discharge cycle rather than tapering off as lead-acid batteries do. Any battery used to power onboard DC loads — lighting, trolling motors, inverters, electronics, or any accessory that draws power at anchor — should be a deep-cycle battery. Most dual-battery setups use one starting battery dedicated to engine starting and one deep-cycle battery dedicated to house loads.
Dual-purpose batteries offer a compromise between starting and deep-cycle designs — they can withstand deeper discharges than a pure starting battery while still delivering adequate cranking amps. Their storage capacity is lower than a comparably sized dedicated deep-cycle battery, making them the right choice for boats where both batteries serve interchangeable roles — either one can start the engine, and either one can power house loads — rather than being dedicated to specific functions.
Critical rule: match battery chemistries within the same bank. If you are adding a second battery to an existing system, the new battery must use the same chemistry as the existing one — flooded with flooded, AGM with AGM, gel with gel. Mixing chemistries in a bank that charges together causes one battery to be overcharged while the other is undercharged, shortening both batteries’ service life. Lithium batteries have specific charging voltage requirements that differ from lead-acid; if you are adding lithium to a previously lead-acid system, your alternator and charger must both be compatible with lithium charging profiles before connecting.
Electrical Safety Precautions
- Always disconnect the battery cables before working: Batteries contain a tremendous, and potentially dangerous, amount of stored energy. Whenever you are working on your electrical system, remove the positive battery cables from the battery terminals to eliminate the chance of a short circuit and/or possible electrocution.
- Follow American Boat and Yacht Council (ABYC) safety standards: The ABYC publishes safety standards for circuit protection, wire sizes and other related issues in electrical systems. Make sure your install is compliant with all standards.
- Make sure all connections are clean and the right size: It is imperative that you have low-resistance connections. This means clean metal-to-metal contact, correctly sized terminals that are properly crimped and waterproofed, and secure mechanical fasteners.
- Don’t use wingnuts for battery connections: For outboard engine applications, replace wingnuts on the tops of the battery with nylock nuts or hex nuts and lock washers tightened to at least 10 foot-pounds of torque. For inboard engine applications, use clamp-on battery terminals connected to the correct gauge of battery cable.
- Wear safety glasses: Be sure to wear safety glasses when working on batteries and have water available to flush battery acid from eyes and skin immediately if contact occurs.
- Use the right tools and lights: Avoid unshielded drop lights or any open sources of heat or flame near batteries. Avoid using uninsulated tools that could short across battery terminals.
Where to Mount a Second Boat Battery
Batteries are temperature sensitive — high temperatures dramatically shorten service life. A useful rule of thumb: if the battery location is too hot for you to hold your hand on the surface for several seconds, it is too hot for the battery. Battery temperature during use directly affects how many charge/discharge cycles the battery can deliver over its lifetime; a battery that runs consistently hot may last half as long as one kept at moderate temperatures.
This presents a dilemma for many battery installations: you want short battery cable runs to the engine’s starter or alternator to minimize voltage drop, but a hot engine room will shorten the battery’s life and requires adequate ventilation.
Flooded lead-acid batteries give off hydrogen gas — a lighter-than-air explosive gas — when charging. This gas must be vented directly to the outside of the boat from the top of the battery compartment. If there is insufficient natural ventilation, add a sparkproof exhaust fan to eliminate gas buildup and reduce temperature. Sealed AGM and gel batteries produce significantly less off-gassing than flooded batteries and can be installed in enclosed spaces, but still benefit from ventilation for temperature management. Lithium batteries produce no off-gassing under normal conditions.
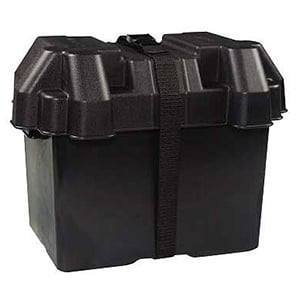
Polypropylene Battery Box for Group 27 or Group 31 battery.
Batteries must be secured so there is no more than one inch of movement in any direction. A Group 31 battery weighs approximately 65 to 75 pounds for lead-acid or 25 to 35 pounds for lithium — either becomes a serious physical and fire hazard if it breaks loose. Pre-manufactured, acid-proof polypropylene battery boxes are available in standard group sizes and are the correct way to secure batteries. Home-built battery boxes must be constructed from marine-grade plywood, covered inside and out with fiberglass cloth saturated with epoxy, and remain secure even in a capsize. Do not mount batteries directly above or below a fuel tank, fuel line, or filter, or directly below battery chargers or inverters.
Use Quality Battery Cables
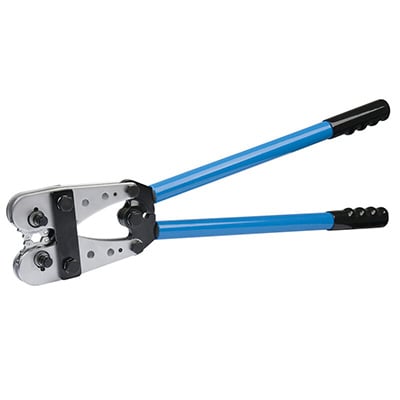
This heavy-duty lug crimper will crimp #8 to 4/0 AWG wire and applies force consistently from all directions to prevent damage to the conductors.
Use tinned, finely stranded marine-grade copper wire for all battery cable runs. Marine-rated wire — such as Ancor Marine grade — uses tinned conductors that resist oxidation in a salt-air environment and fine stranding that flexes without fatigue cracking under vibration. Automotive wire and household wire are not acceptable substitutes in a marine environment, even if the gauge is nominally the same.
Wire gauge for battery cables is determined by current load and cable run length. For most single-engine recreational boat dual-battery installations using a standard battery switch and ACR, 4 AWG cable handles runs up to about 10 feet adequately. Longer runs, higher-current loads (trolling motors over 50 lbs of thrust, large inverters, electric windlasses), or parallel battery banks with combined high capacity all benefit from 2 AWG or 1/0 AWG. When in doubt, size up — undersized battery cable creates voltage drop that reduces the performance of every device it feeds, generates heat under load, and is a fire risk. Use the ABYC voltage drop tables or Blue Sea Systems’ Circuit Wizard to confirm the correct gauge for your specific installation.
Use tin-plated copper ring terminals sized to match the wire gauge and the battery post diameter. Pre-manufactured battery cables are available in standard lengths with properly constructed connectors and adhesive-lined heat shrink. When standard lengths do not fit your installation, make your own — do not splice existing cables to extend them, which creates additional resistance at every joint.
How to Make Your Own Battery Cables
Step 1. Get a proper battery cable crimper.
There is no acceptable shortcut here. Terminals crushed with a pair of pliers, vise grips, or a hammer will fail — often at the worst possible moment. A proper ratcheting hydraulic or mechanical lug crimper applies consistent force from all directions, compressing the terminal barrel uniformly around the conductor without cracking it. The crimper shown above handles #8 to 4/0 AWG, which covers the full range of typical marine battery cable applications.
Step 2. Use closed-barrel terminals with the correct bolt hole diameter.
Closed-barrel ring terminals fully encapsulate the wire end, preventing moisture from wicking into the conductor from the terminal end. Match the terminal’s stud hole to the battery post bolt diameter — positive and negative posts often differ in size on automotive-style batteries. Select terminals rated for the wire gauge you are using; an undersized terminal barrel will not crimp properly around a larger conductor.
Step 3. Apply a corrosion inhibitor before crimping.
Spray or apply a corrosion inhibitor — Fluid Film, Lanocote, or Boeshield are commonly used products — into the terminal barrel before inserting the wire. This displaces moisture from the joint and protects the copper-to-copper contact surface from oxidation throughout the cable’s service life.
Step 4. Seal the joint with adhesive-lined heat shrink tubing.
After crimping, slide a three-inch section of adhesive-lined heat shrink tubing over the joint between the cable insulation and the terminal barrel before applying heat. Adhesive-lined heat shrink bonds to the cable jacket as it shrinks, creating a watertight seal that standard heat shrink does not. Use a heat gun for consistent, controlled application. If using a propane torch with a flame spreader, keep a fire extinguisher immediately at hand and work carefully to avoid overheating the terminal. Cover all positive terminals with a terminal boot or the battery box cover to prevent accidental shorting.
Battery Switches
Traditional OFF-1-2-BOTH Battery Switch
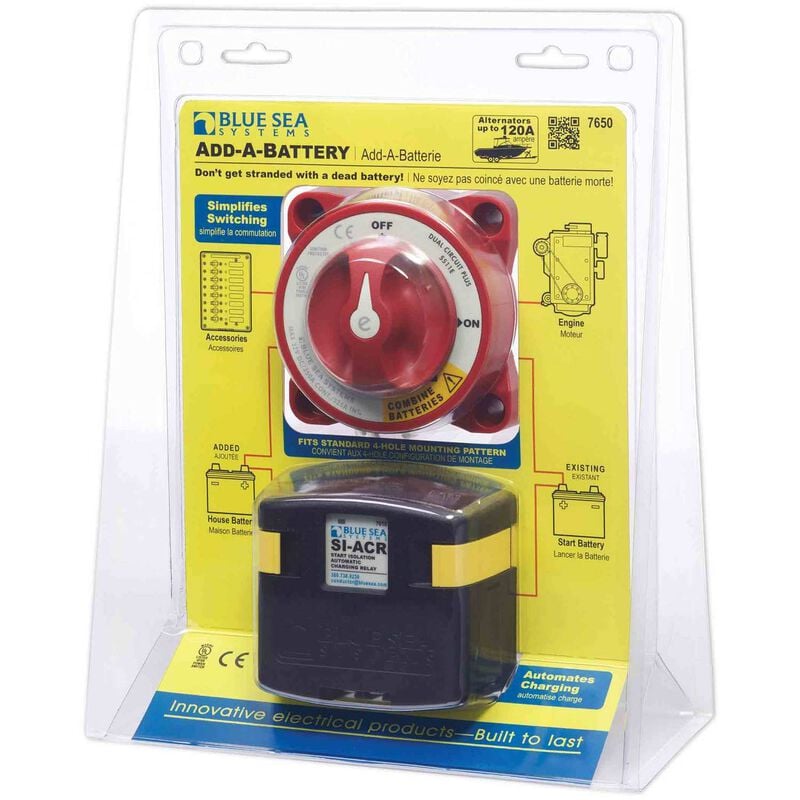
The Add-a-Battery Battery Switch from Blue Sea Systems comes with a traditional battery switch and an automatic charging relay.
The traditional OFF-1-2-BOTH rotary battery switch is the most widely installed dual-battery control in recreational boats. Its operation depends on the operator making deliberate choices at specific points in the trip, which is also its weakness.
Before starting the engine, the operator sets the switch to BOTH to draw full cranking power from both batteries. With the engine running and the alternator charging, the switch stays in BOTH to charge both batteries simultaneously while underway. Once anchored or at the dock with the engine off, the switch should be moved to position 1 or 2 to isolate one battery as a reserve for starting — leaving the other available for house loads. When it is time to start the engine again, the switch returns to BOTH or to the reserve battery.
The critical failure point of this system is operator error: forgetting to move the switch from BOTH to 1 or 2 when anchored can drain both batteries simultaneously, leaving no reserve to start the engine. This is the most common reason boaters become stranded with a dual-battery setup. The traditional battery switch is the lowest-cost option and works well for experienced users who reliably follow the switching protocol, but for boaters who want a more automatic and fault-tolerant system, the ACR-based setup described below is preferable.
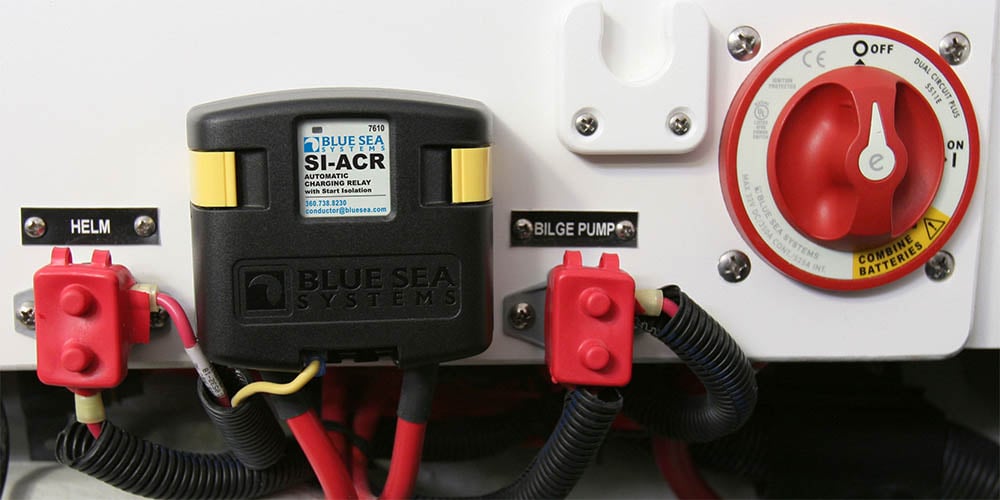
Dual Circuit Plus Switch and Relay Combo
The Dual Circuit Plus switch is a simpler and more fault-tolerant alternative to the traditional selector switch. In normal ON operation, it keeps the start and house battery banks electrically isolated from each other — house loads cannot drain the starting battery regardless of how long the engine is off. In the COMBINE position, it parallels the batteries to boost cranking power when the starting battery is low. Used with a Blue Sea Systems SI7610 Automatic Charging Relay (ACR), the system automatically combines the banks when the alternator is charging and separates them when charging stops — no operator action required. The most cost-effective way to purchase this combination is the Add-a-Battery kit that includes both components.
Battery Switch Wiring Diagram
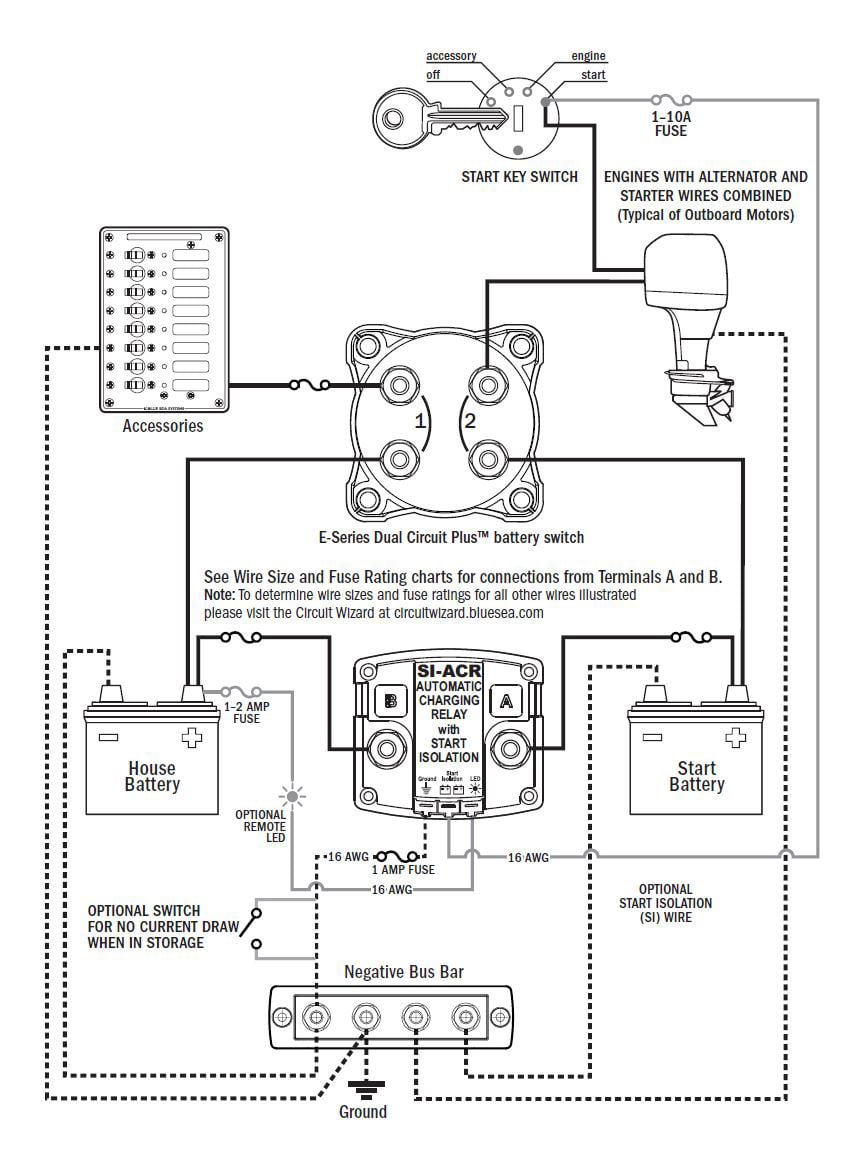
This wiring diagram is for the “Add-A-Battery” Dual Circuit System from Blue Sea Systems. The ACR combines the two batteries while the alternator is charging and automatically isolates them when charging stops, protecting the starting battery from house load drain. The switch’s COMBINE position provides a manual parallel connection for extra cranking power when needed. This arrangement also protects sensitive electronics — fishfinders, chartplotters, VHF radios — from the voltage spike that occurs when a large engine starter engages, since the ACR temporarily isolates the house bank during engine cranking.
Charge Management
Battery isolators were previously the standard method for distributing alternator charging current to multiple battery banks while keeping them electrically isolated during discharge. Isolators use diodes as one-way electrical valves — current can flow from the alternator to the battery through the diode, but not back from the battery through the diode to the other bank. Their practical disadvantage is that diodes create a voltage drop of approximately 0.6 to 0.7 volts, which means batteries connected through an isolator are chronically undercharged relative to the alternator’s output voltage. Undercharging shortens battery life and reduces available capacity. Some alternators with external voltage sensing can compensate for this drop, but the heat generated by the diodes remains a problem.
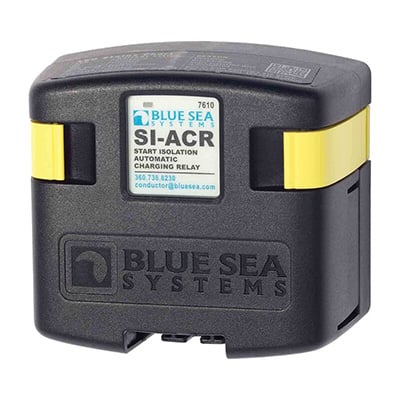
This Starting Isolation (SI) Dual Sensing Automatic Charging Relay from Blue Sea Systems protects your sensitive electronics by temporarily isolating the house loads from the engine circuit during engine cranking.
Automatic Charging Relays (ACRs, also called Voltage Sensitive Relays) are the current standard for most recreational boat dual-battery systems. Rather than using diodes to block reverse current, an ACR uses a mechanical relay controlled by a voltage-sensing circuit. When the circuit senses that a charging source — the alternator, or a shore power charger — has raised the voltage on either battery to the charge threshold (typically around 13.0V for a 12V system), the relay closes and connects the two banks in parallel so both charge simultaneously. When charging stops and voltage drops back to a resting level, the relay opens after a short time delay (to prevent nuisance openings from momentary voltage dips caused by large load startups like a refrigerator compressor) and isolates the banks again.
The result is fully automatic charge management with no operator involvement and no diode voltage drop — both banks receive full alternator voltage when charging. ACRs are also used for load shedding, navigation battery isolation in a pilothouse, and limiting charge current to a smaller remote battery bank.
Lithium battery note: Standard ACRs designed for lead-acid systems can be used with lithium batteries in the house bank when the starting battery remains lead-acid, but confirm the ACR’s voltage thresholds are compatible with the lithium battery’s charge profile. Some lithium battery manufacturers specify dedicated lithium-compatible ACRs or DC-DC chargers to isolate their batteries from a lead-acid starting battery, particularly to prevent the starting battery from being pulled down by a deeply discharged lithium bank. If your house bank is lithium, consult the lithium battery manufacturer’s installation requirements before selecting an ACR.
Best Batteries for Dual Boat Battery Setups
Odyssey Extreme Group 31 Dual Purpose Marine AGM Battery
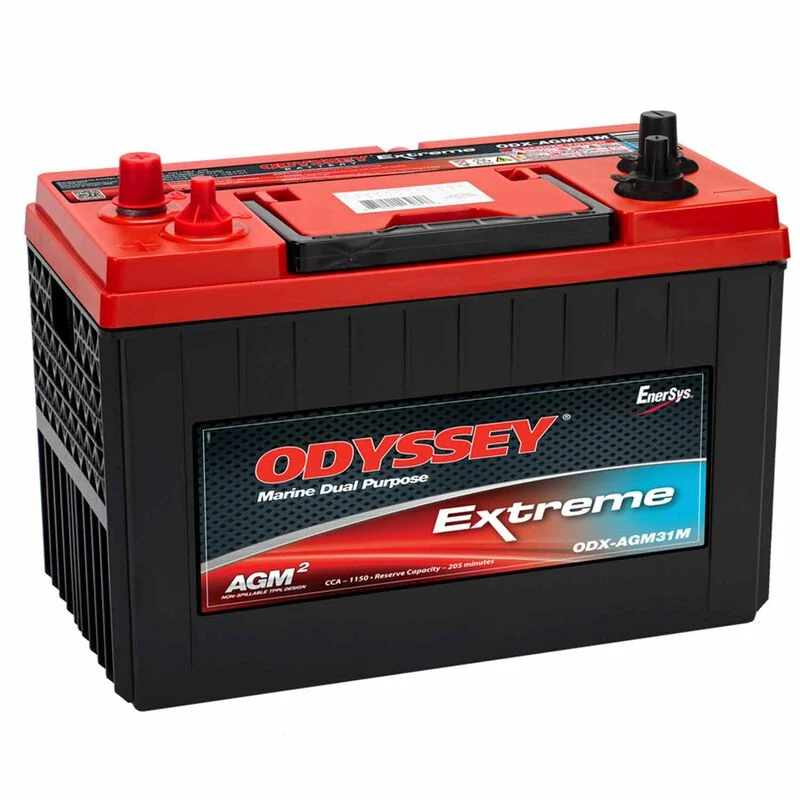
Top features: The Odyssey Extreme Group 31 Dual Purpose Marine AGM Battery is well suited for boaters who want two interchangeable batteries that can each handle both starting and house loads. Combined with a traditional battery switch, you can use both to start the engine, run the alternator to recharge while underway, and keep one in reserve once anchored.
What makes it stand out: Odyssey’s Thin Plate Pure Lead (TPPL) construction delivers higher cranking power for its size than conventional AGM, longer cycle life, and faster recharge acceptance — it can reach 80% charge in as little as four to six hours with a compatible charger.
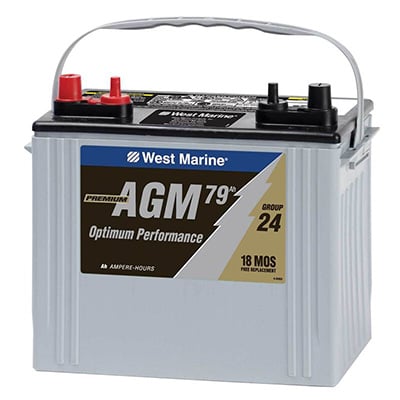
West Marine Group 31 Dual Purpose Marine AGM Battery
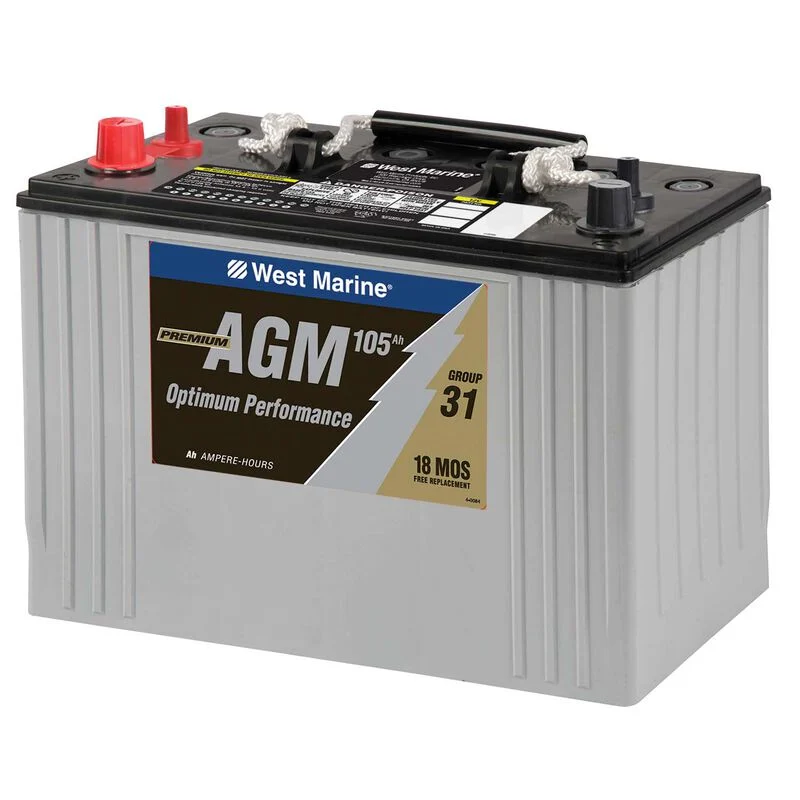
Top features: Our West Marine Group 31 Dual Purpose Marine AGM Battery delivers a strong balance of price and performance. Absorbed Glass Mat (AGM) construction means no spillable electrolyte, no off-gassing under normal charge conditions, and higher resistance to vibration damage than flooded batteries. It also features high freeze resistance for boaters in cold climates.
What makes it stand out: Best value in the dual-purpose AGM category for boaters who want sealed, maintenance-free construction without paying a premium price.
Relion Group 31 RB100 Lithium Iron Phosphate Deep Cycle Battery
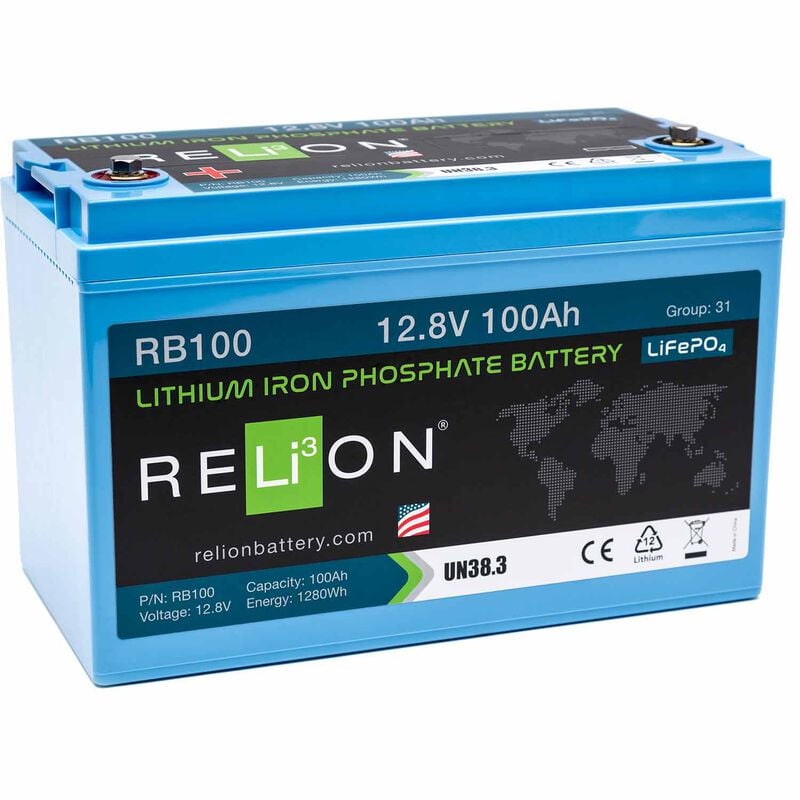
Top features: The Relion Group 31 RB100 Lithium Iron Phosphate Deep Cycle Battery is a dedicated house bank battery — not a starting battery. Lithium iron phosphate (LiFePO4) chemistry delivers full rated voltage throughout the discharge cycle, so electronics and other loads perform consistently whether the battery is at 100% or 20% capacity. A 100Ah lithium battery also provides the effective capacity of a 150–180Ah lead-acid battery, since lead-acid batteries should not be regularly discharged below 50% without accelerating plate damage.
What makes it stand out: 50–60% lighter than a lead-acid equivalent at the same nominal capacity, and 2,000+ charge cycles versus 300–500 for most AGM batteries — a significant long-term value for high-use applications.
Glossary of Terms
ACR (Automatic Charging Relay): A voltage-sensing relay that automatically connects two battery banks in parallel when a charging source is detected and separates them when charging stops, providing automatic charge distribution without diode voltage drop or operator intervention.
AGM (Absorbed Glass Mat): A sealed lead-acid battery construction in which the electrolyte is absorbed into glass mat separators rather than held in free liquid form, eliminating spillage risk, reducing off-gassing, and improving resistance to vibration damage compared to flooded batteries.
Battery Isolator: A device using diodes to distribute alternator charging current to multiple battery banks while preventing reverse current flow between banks; largely replaced by ACRs in modern installations due to the diode's inherent 0.6–0.7V voltage drop that causes chronic undercharging.
BMS (Battery Management System): An electronic system built into lithium batteries that monitors and protects the cells from overcharge, over-discharge, overcurrent, and short circuit conditions; required for safe lithium battery operation.
Cranking Amps (CA) / Cold Cranking Amps (CCA): The rated current a starting battery can deliver for 30 seconds at a specified temperature without dropping below a minimum voltage threshold, used to match a battery to an engine's starting requirements.
Deep Cycle: A battery design using thicker, denser plates engineered to withstand repeated deep discharge and recharge cycles without damage, in contrast to starting batteries whose thin plates are optimized for high current bursts.
Dual-Purpose Battery: A battery design that balances starting and deep-cycle characteristics, able to deliver adequate cranking amps while also tolerating deeper discharge than a pure starting battery.
LiFePO4 (Lithium Iron Phosphate): A lithium battery chemistry used in most marine lithium deep-cycle batteries, characterized by thermal and chemical stability, 2,000+ charge cycle life, and consistent voltage output throughout the discharge cycle.
Voltage Drop: The reduction in voltage across a cable or connection caused by its resistance, reducing the voltage available to loads and causing heat buildup under high current conditions; minimized by using correctly gauged wire and clean, low-resistance connections.
Installing a Second Battery FAQs
A dual-battery system separates engine starting from house loads, so using your electronics, trolling motor, stereo, or lights at anchor cannot strand you with a dead starting battery. The engine starting battery stays reserved for its one critical job — cranking the engine — while the house battery handles everything else. Even a modest house load like a fishfinder and LED cabin lights can drain a starting battery in three to four hours of sitting at anchor with the engine off.
A deep-cycle battery — AGM, gel, or lithium iron phosphate — is the correct choice for the house bank. Deep-cycle batteries are engineered for repeated discharge and recharge cycles without plate damage. A starting battery used for house loads will fail prematurely because its thinner plates cannot withstand the deep discharge cycles that house use requires. For most recreational boats, AGM is the best balance of price, performance, and installation flexibility. Lithium is the best choice for weight-sensitive applications or high-cycle use.
The two primary options are a traditional OFF-1-2-BOTH battery selector switch or a Dual Circuit Plus switch combined with an Automatic Charging Relay (ACR). The traditional switch is less expensive but requires the operator to actively manage switch position to protect the starting battery. The ACR-based system is fully automatic — it connects the banks for charging when the alternator runs and separates them when it stops, with no operator input required. For most boats, the ACR-based system is more reliable in practice because it removes the operator error that strands boats with both batteries discharged.
For lead-acid dual-battery setups, an ACR is the functional equivalent of basic charge management and is the minimum recommended component. For lithium house banks, a Battery Management System (BMS) is built into most lithium batteries and protects against overcharge, over-discharge, and short circuit — verify your lithium battery includes an integrated BMS before purchasing. Additionally, your shore power charger should be a multi-bank charger capable of charging both banks independently at the correct voltage profile for each chemistry.
For most single-engine recreational boat dual-battery installations with cable runs of 10 feet or less, 4 AWG tinned marine-grade cable is the practical minimum. For cable runs of 10 to 20 feet, or for high-draw applications like large trolling motors, windlasses, or inverters, use 2 AWG or 1/0 AWG. All battery cables must use marine-grade tinned copper wire — not automotive wire. Use the ABYC voltage drop tables or Blue Sea Systems’ Circuit Wizard to confirm the correct gauge for your specific run length and load.
In a ventilated, cool, and secure location, inside a correctly sized polypropylene battery box that limits movement to one inch in any direction. Avoid locations directly above or below fuel tanks, fuel lines, or filters. Flooded batteries must vent hydrogen gas directly to outside air from the top of the compartment. AGM and gel batteries produce minimal off-gassing and can be mounted in enclosed spaces, though ventilation for temperature management is still recommended. Lithium batteries produce no off-gassing under normal conditions and have the most installation flexibility, but must still be secured against movement.
While underway, the engine’s alternator charges both banks through the ACR or battery switch. At the dock, use a multi-bank shore power charger with separate outputs for each battery bank — this charges each bank at the correct voltage for its chemistry and state of charge independently, rather than bulk-charging both through a single connection. A charger rated for the chemistry of each bank (AGM profile for AGM batteries, lithium profile for LiFePO4 batteries) is essential for full charge and maximum battery life.
Disconnect the main battery positive cable before beginning any work. Use insulated tools to prevent accidental terminal shorts. Install a fuse or circuit breaker on every positive cable within 18 inches of the battery terminal — this is an ABYC requirement and protects against cable fires if a short develops anywhere in the run. Wear safety glasses when working near batteries. Keep a dry chemical or CO2 fire extinguisher accessible in the work area.
Yes, in parallel — the BOTH position on a traditional battery switch or the COMBINE position on a Dual Circuit Plus switch connects both banks in parallel, doubling available capacity and cranking amps. Use the parallel position for engine starting when the primary starting battery is low, or while underway so the alternator charges both banks simultaneously. Do not leave a traditional switch in BOTH while anchored with the engine off — house loads will drain both batteries, leaving no reserve for starting.
Conclusion
A properly installed dual-battery system is one of the most practical upgrades on any boat that spends time at anchor with electronics running. The core components are straightforward: a correctly sized deep-cycle house battery, marine-grade battery cables in the right gauge, a battery switch or ACR for charge management, and properly secured battery boxes in ventilated locations. Match battery chemistries within each bank, use tinned copper wire and properly crimped connections throughout, and size your cables for the actual current loads and run lengths in your installation.
The result is a boat that always has a charged starting battery ready when you need it, and a house bank that can power your electronics, trolling motor, or lighting for a full day without compromise.
Need More Help?
West Marine has you covered. From the latest high-capacity batteries to marine-grade connectors and wire, we have what you need. Our in-store associates can help make sure you get everything right the first time. Find your store here.
Related:


