
This beautiful carbon fiber T-Grip is molded to fit inside the elliptical shaft of the EL-500 Fixed Elliptical Shaft Carbon Paddle .
If the thought of cutting your favorite fixed carbon fiber SUP paddle has you nervous, we’ve got some tips to make the process a breeze.
For this Advisor, we’ll use Surfstow’s Fixed Elliptical Shaft Carbon SUP Paddle with a bamboo blade. This paddle is designed to be tailored to the individual paddler, so it’s just the right size for you and only you.
What you’ll need
To properly size a paddle, you need the following items:
- Hacksaw
- Mitre box (saw guide)
- Measuring tape
- Sandpaper
- Latex or nitrile gloves
- Safety goggles
- Marking pen
- Masking tape
- Epoxy glue
If your paddle has heat shrink tubing, you’ll need a heat gun. Make sure the tubing is on the shaft before you begin.
How long should your paddle be?
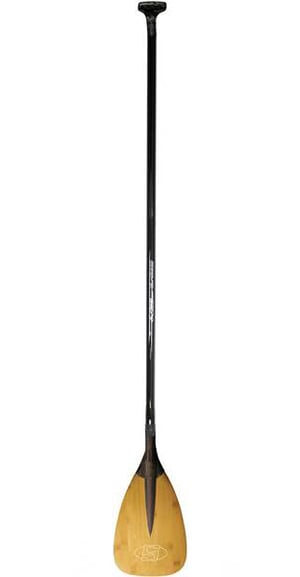
Surfstow’s ultralight cut-to-length EL-500 Fixed Elliptical Shaft Carbon Paddle .
Next, you need to determine how long your paddle needs to be. Paddle length is dependent on how tall you are and your preferred type of paddling. If you like wave riding, add about eight inches to your height. For layed-back paddling on flat water, add about to 12 inches to your height. For example, a flat water paddler that is 6'10" tall would mark the shaft for an overall paddle length of 7'10". Rather than marking the shaft itself, we suggest you wrap the shaft with masking tape mark the tape. Now double check the length by reaching up to the tape to determine how the length feels to you.
Adjust the Measurement to Compensate for the
T-Grip
The T-Grip in our example adds four inches to the overall length after it is glued in place. So you will need to subtract 4" from the preliminary measurement that you determined above. Now retape the shaft and mark the corrected length on the tape. Note: The tape also keeps the carbon fiber shaft from splitting while it’s being cut.
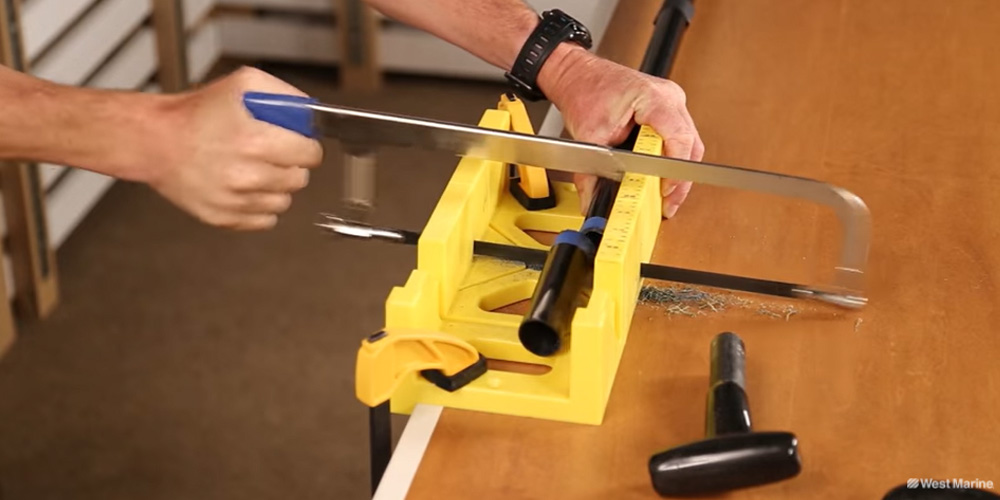
Cutting to length
Put on your safety goggles, secure the shaft in a miter box (saw guide) and carefully make a right-angle cut with a sharp hacksaw. Sand the edges of the cut to remove any frays. Since the T-grip will be glued inside the shaft, you also need to sand the inside of the shaft and the outside of the T-grip gluing surface to prep the surfaces for gluing. Wipe off any dust.
Gluing the T-Handle
Put on the gloves, apply the adhesive to the T-grip and inside the shaft. Make sure to glue the T-grip to the shaft facing the correct side of the paddle. The fingers should face the angled blade with the logo. Check that it’s on straight and square. Note: If you plan on finishing the T-handle/shaft seam with heat shrink tubing, make sure you slip the heat shrink on to the shaft before you glue the T-handle on to it!
Wipe off any excess epoxy and tape the shaft to the handle. Don’t be surprised if the T-grip keeps popping out. That lets you know you have an airtight fit. Allow the adhesive to dry five minutes (using WEST System G5 Five-Minute Adhesive) or the recommended drying time for the type of epoxy you’re using. Remove the tape carefully. Pull the shrink tubing over the seam and heat it with the gun making sure to rotate the paddle so you shrink the tubing all around the shaft.
Allow your paddle to cure for 24 hours before using it on the water. At that point, you’ll be ready for many enjoyable and injury-free paddling sessions.