Winter has given way to spring and guess what? It’s time to get your outboard motor ready for the season ahead!
Your outboard spring commissioning tasks will vary according to the maintenance you completed in the fall as part of winterization. This article assumes that in the fall, you treated the fuel system with a stabilizer, flushed your outboard with antifreeze, changed the lower unit gear oil, treated the cylinders with fogging oil and for four-stroke motors, changed the crankcase oil.
Note: The following instructions are general in nature. Since different outboard motors may have different commissioning requirements, we suggest you check your owner’s manual before you begin.
- Visually Inspect the Motor
- Check the Timing and Alternator Belts
- Check the Steering
- Test the Trim/Tilt
- Ensure Your Outboard is Securely Attached
- Inspect the Anodes
- Examine the Propeller
- Change the Water Pump Impeller
- Connect the Fuel Tank
- Test Run the Motor
- Wash and Wax the Motor
- FAQs
- We're Here to Help!
- Related Articles
Step 1: Visually Inspect the Motor
Remove the cowl and give the motor a visual inspection. Look for any evidence of rodent infestation in the form of bits of paper or chew marks on hoses and wiring. Pay particular attention to electrical wiring harnesses, fuel hoses and connections. Double check the spark plug connections and make sure the connectors are firmly pressed into place. If you did not change the spark plugs in the fall, now is the time.
Step 2: Check the Timing and Alternator Belts

West Marine crew member Miguel Maldonado de-tensions an idler pulley while he removes an alternator belt.
For four-stroke motors:
While you have the cover off the motor, check the timing belt for wear. The timing belt is located at the top of the motor. On some motors, you may need to remove a plastic cover to see it. If the timing belt is visibly worn or frayed, now is the time to replace it. If the design of your motor is of the “interference” type (See “Timing Belts and Interference Engines” at the end of this article) it is very important that you not postpone this task. Many owners opt to have a service professional handle this job.
For outboard motors equipped with an alternator:
Check the condition and tension of the alternator belt. Adjust and/or replace as necessary. This is a DIY task for many owners, but some may prefer to seek the help of a service professional.
Step 3: Check the Steering
After replacing the cowl, check the steering. Start by rotating the steering wheel (or pushing the tiller) hard over to port and then to starboard. The motor should turn easily in both directions. If you encounter resistance that prevents full movement, do not force the helm. At this point you can either call a service professional or trouble shoot the problem yourself. Following is a discussion of the three types of outboard steering and what can lead to resistance felt at the helm.
Steering Check Continued: Tiller-Steered Outboards
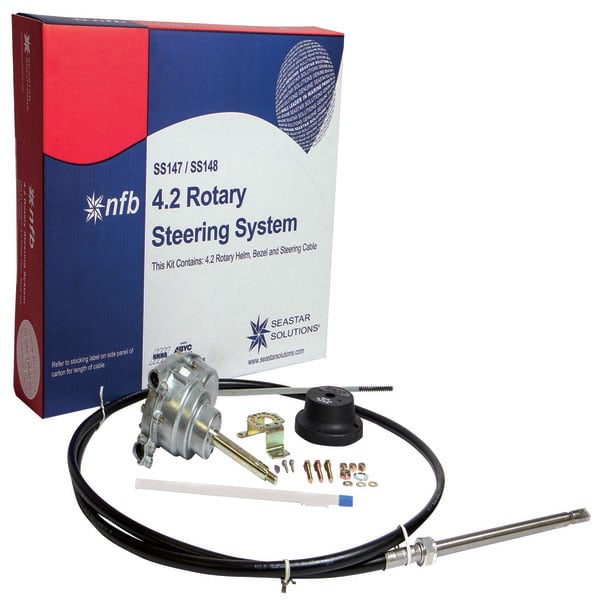
Mechanical steering cables and helms are offered together in steering kits.
Any resistance you feel when pushing the outboard to port or starboard most likely will indicate a problem at the pivot tube. As a possible remedy, try injecting some grease into the pivot tube via the zerk fittings. You will need a grease gun loaded with a cylinder of grease to do this. The grease should flow easily through the zerk fittings into the pivot tube bearings. If you encounter resistance, the bearings are most likely plugged up with old grease, rust or a combination of both. In this case, we suggest you contact a service professional.
Steering Check Continued: Boats with Mechanical Steering
Problems with mechanical steering can often be traced to rust and/or old grease in the pivot tube (see discussion above) or to a buildup of excess grease or rust in the tilt tube that impedes the travel of the cable. If the problem is at the tilt tube, disassembly and cleaning of the cable end and interior of the tube will normally correct this. Another problem is steering cables that have rusted within their sleeves. When this happens, replacing the steering cables or, for a modest additional cost, the cables and the helm (offered together in mechanical steering kits) is the best solution. For more about mechanical steering, see our West Advisor article Mechanical Steering.
Try the interactive SONAR parts finder for the engine parts you need.
Steering Check Continued: Boats with Hydraulic Steering
Problems with hydraulic steering can be due to a variety of problems such as fluid leaks, air in the system and corrosion. Bleeding the system is much like bleeding the brakes on a car. The procedure consists of turning the wheel hard over in one direction then releasing the air from the lines through a bleeder on the hydraulic cylinder. Two people are needed: One person to hold the wheel while the other opens the bleeder and catches the expelled oil. The procedure is repeated with the wheel turned over the other way. For more about hydraulic steering, see our West Advisor article Hydraulic Steering.
Step 4: Test the Trim/Tilt
First, follow your owner’s manual instructions on how to check the trim/tilt hydraulic fluid level and then check the system for leaks. If everything looks ok, attempt to raise the motor. If it bounces or is jerky as it travels up or if it fails to raise up all the way, you most likely have air in the system. In this case, follow the instructions in your owner’s manual on how to bleed the system.
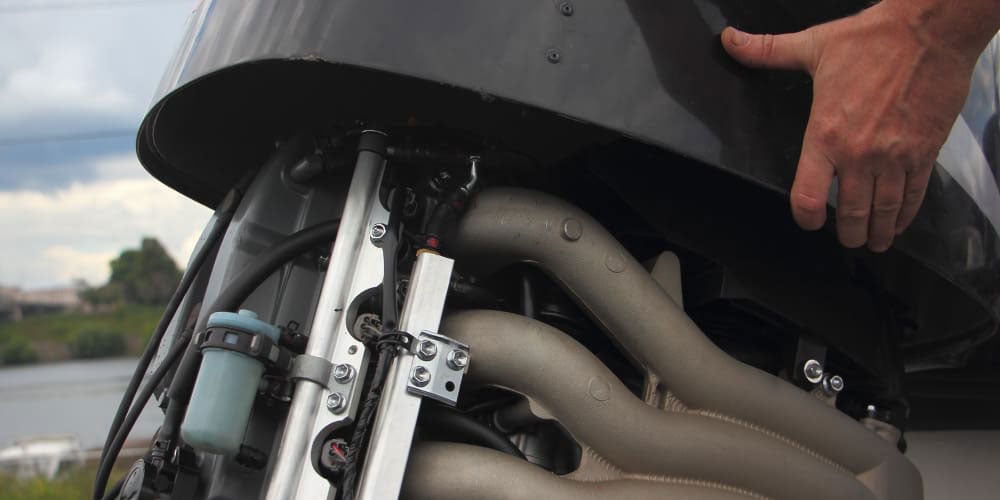
Step 5: Ensure Your Outboard is Securely Attached to the Boat
Make sure the motor is securely clamped to the transom; or if the motor is secured with bolts, that the bolts are tight. While you are at it, look for stress cracks in the transom that might be an indication of a structural problem that needs to be fixed.
Step 6: Inspect the Anodes
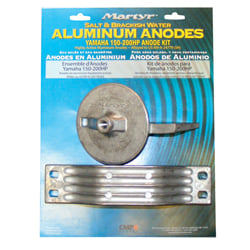
Outboard anodes are available in complete kits.
The lower unit of your outboard motor will have one or more sacrificial anodes. For the location of anodes, check your owner’s manual. The purpose of sacrificial anodes is to protect your outboard motor against damage caused by galvanic corrosion. Often erroneously referred to as “zincs”, anodes are actually available in three different materials: Zinc for saltwater, aluminum for salt- or brackish water and magnesium for freshwater. During the off season, anodes made of zinc can develop a buildup of white material which should be knocked off before using the boat. For more information on sacrificial anodes, read our West Advisor article Preventing Galvanic Corrosion.
Step 7: Examine the Propeller
The propeller should rotate smoothly and not be bent or chipped. Next, remove the propeller and look for any fishing line that may be wrapped up against the gear box seal—which can lead to the failure of the seal and an expensive gear box repair. After completing this task and replacing the prop, are you satisfied with its performance? Propeller performance can be evaluated in terms of hole shot versus top speed. In general, the lower the pitch of a prop the better the hole shot. Conversely, the higher the pitch of a prop, the higher the top speed. In most cases the best prop for your boat is a compromise between the two.
Tip: If the outboard motor you are commissioning has a tachometer, after you launch your boat, check your owner’s manual for the optimum rpms that your engine should turn at WOT or Wide Open Throttle. This should be done under normal load conditions, meaning when the boat is loaded with a full complement of crew and gear. If it’s revving too high or too low, you may need a propeller with a lower or higher pitch. For more information, see our West Advisor article Selecting a Propeller.
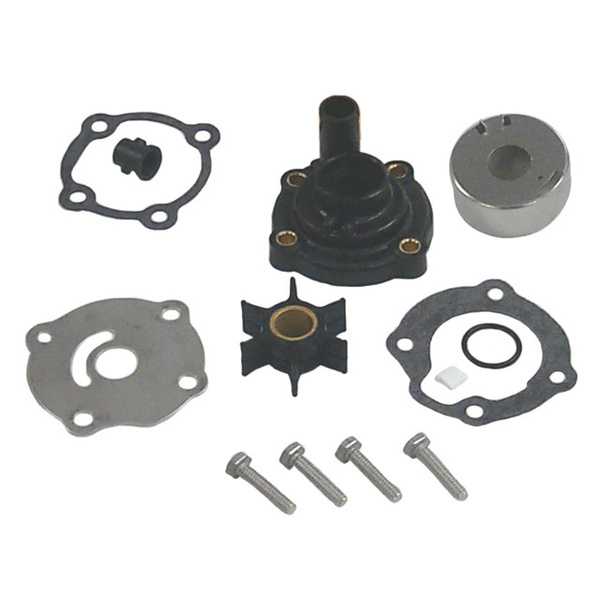
Typical outboard water pump repair kit.
Step 8: Change the Water Pump Impeller
Check your owner’s manual for how often the water pump impeller needs to be changed. If the time to change the impeller is approaching, or if you recently bought your motor used and don’t know when it was last changed, we suggest you change it now. Your owner’s manual should cover the procedure, which is not very complicated. In most cases, access to the water pump requires that you disconnect the shift rod, loosen four bolts and drop the lower unit of the motor. While owners of small outboards often perform this job themselves, many owners of large outboards (with correspondingly heavier lower units) delegate this task to a service professional. To locate the correct impeller for your outboard, use our Engine Parts Finder.
Step 9: Connect the Fuel Tank to the Motor
Give the primer bulb a couple of pumps and make sure the fuel hose connections are leak free. While you’re at it, inspect the primer bulb and the fuel lines, which should be pliable, free of cracking and not hard to the touch.
Step 10: Test Run the Motor
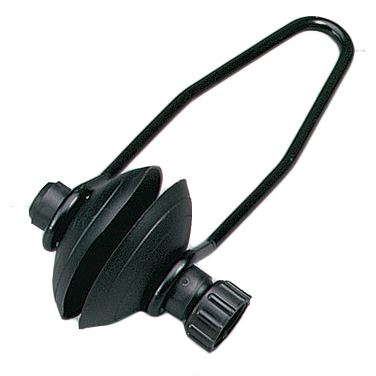
Engine flusher muffs like these enable you to connect a water hose to your outboard motor.
Before starting the motor, you will need to attach a set of flushing muffs to the water intakes at the bottom of the lower unit forward of the prop. Turn on the water and then follow the procedure in your owner’s manual for starting the motor. Once the motor starts, you will notice a lot of white smoke, which is the fogging oil from winterization burning off. While the engine is running, look for a steady stream of water exiting from under the cowling. This is called the “tell tale” and it indicates that cooling water is circulating through the motor. Caution: When running the motor with the flushing muffs attached, make sure they do not slip off, as running the motor dry can result in serious damage.
Step 11: Wash the Motor and Apply a Coat of Wax
Applying a coat of wax will help to protect the cowling and make it easier to keep it clean during the boating season ahead.
Timing Belts and Interference Engines
An interference engine is a type of four-stroke internal combustion piston engine in which one or more valves in the fully open position extends into any area through which the piston may travel. By contrast, in a non-interference engine, the piston does not travel into any area into which the valves open. The purpose of the timing belt is to coordinate the opening and closing of the valves in relation to the intake and power strokes of the engine. While timing belts do not break very often, the consequences of a broken timing belt will vary with whether you have an interference or non-interference engine. In the case of a non-interference engine, the engine will simply stop and not suffer any damage beyond the broken belt. However, if you own an interference engine, a broken belt will result in the pistons coming into contact with the valves—which results in severe damage and a very expensive repair bill.
Guide to Waking Up an Outboard Motor FAQs
What should I check during the visual inspection of my outboard motor?
Remove the cowl and inspect for rodent damage, such as chew marks on hoses or wiring. Check spark plug connections for security and replace spark plugs if not changed during fall winterization.
How do I inspect and maintain the timing and alternator belts?
For four-stroke motors, remove any plastic cover to inspect the timing belt at the top of the motor for wear or fraying; replace if damaged, especially for interference engines. For motors with an alternator, check thealternator belt’s condition and tension, adjusting or replacing as needed.
What should I do if I feel resistance when checking the steering?
For tiller-steered outboards, grease the pivot tube via zerk fittings. For mechanical steering, clean or replace rusted cables or tilt tube. For hydraulic steering, bleed the system to address air or leaks.
How can I help ensure the trim/tilt system is functions properly?
Check the trim/tilt hydraulic fluid level per the owner’s manual, inspect for leaks, and test the motor’s raise/lower function. Bleed the system if movement is jerky or incomplete.
Why is it important to verify that the outboard is securely attached?
Confirm the motor is tightly clamped or bolted to the transom and inspect for transom stress cracks, which may indicate structural issues requiring repair.
When should I replace the sacrificial anodes on my outboard?
Check anodes on the lower unit and replace if over 50% eroded. Use zinc anodes in salt water, aluminum anodes in fresh or brackish water, and magnesium anodes in freshwater.
How do I evaluate and maintain the propeller?
Ensure the propeller is free of chips or bends, remove it to check for fishing line around the gear box seal, and compare RPM at wide-open throttle to the owner’s manual to assess pitch suitability.
What is the process for test-running the outboard motor?
Attach flushing muffs to water intakes, turn on the water, start the motor per the owner’s manual, and verify the “tell tale” stream shows proper cooling. White smoke from burning fogging oil is normal.
We're Here to Help!
At West Marine, we’re passionate about fueling your boating adventures. Beyond water pump impellers, anodes, and flushing muffs for your outboard, explore boating’s best selection of gear online or in over 220 stores, where our expert crew offers trusted guidance for unforgettable days on the water. Use our store locator to find the West Marine store near you.


