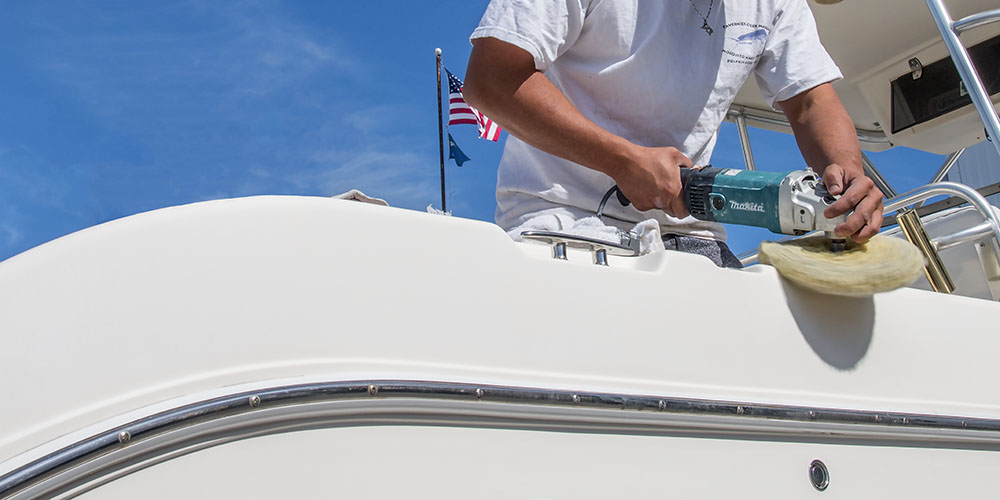
Preventative maintenance is essential to the dependable operation of your boat and for a safe and enjoyable time on the water. Regular maintenance is also one of the best ways to avoid costly repairs down the line. A boat that is serviced on a consistent schedule performs better, holds its value longer, and is far less likely to cause you problems when out on the water.
This guide covers common maintenance tasks that most owners can perform themselves, organized by system, with a seasonal framework and troubleshooting guidance for common problems. New boaters will also find a glossary of maintenance terms and boat-type-specific notes throughout.
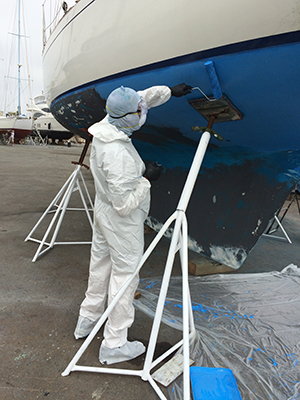
Many boaters apply antifouling paint in the fall, while others wait until spring.
- Seasonal Maintenance Framework
- Maintenance Schedule by Interval
- Bottom Painting and Hull Maintenance
- Routine Engine Maintenance
- Electrical System Maintenance
- Anode Inspection and Replacement
- Checking the Condition of Hoses and Hose Clamps
- Inspection and Maintenance of Plumbing Systems
- Keeping the Bilge Clean
- Adjusting the Stuffing Box
- Keeping Cockpit Scuppers Free of Debris
- Washing, Waxing and Protecting the Finish
- Gelcoat Maintenance
- Safety Equipment Maintenance
- Boat-Type Specific Guidance
- Troubleshooting Common Problems
- Maintenance Glossary
- FAQ
Seasonal Maintenance Framework
Boat maintenance follows the rhythm of the boating season, and organizing tasks into a seasonal framework prevents both missed service intervals and the last-minute scramble at launch time. The framework below applies to temperate climates with a defined boating season. Boaters in year-round climates like South Florida, the Gulf Coast, and Southern California should treat spring commissioning and fall layup tasks as annual service items performed at any convenient interval.
Spring Commissioning
Spring commissioning is the most comprehensive maintenance event of the year — systems that were winterized, disconnected or otherwise taken out of service in the fall need to be inspected, tested and returned to service. Work through systems in this order:
- Engine: Change oil and filter if not done at layup. Replace fuel filters if you did not do this in the fall. Inspect impeller (replace if due). Check belts for cracking and tension. Inspect hoses and clamps. Check coolant level. Reconnect batteries and test starting system.
- Electrical: Inspect all battery connections for corrosion. Test bilge pump, navigation lights, and electronics. Reconnect shore power cord and check shore power connections. Test VHF radio.
- Hull and running gear: Inspect for hull damage, osmotic blisters, and cradle pad marks. Apply bottom paint if not done in fall. Inspect propeller for dings, nicks, and corrosion. Inspect and replace anodes if more than 50% consumed. Inspect through-hulls and seacocks — operate every seacock to confirm it opens and closes freely.
- Plumbing: Flush antifreeze from freshwater system. Test all pumps, faucets, and heads. Inspect hoses for cracks and fittings for leaks.
- Safety gear: Inspect all safety equipment (see Safety Equipment Maintenance section below). Confirm all flares are in date. Test EPIRB registration and battery date. Inspect life jackets for condition.
Summer Season Maintenance
During the active boating season, maintenance shifts to ongoing inspection and prompt response to developing problems. Tasks to perform on a regular basis throughout the season:
- Check engine oil level before each extended trip.
- Check bilge for unusual water accumulation before and after each trip.
- Inspect for new gelcoat damage, loose hardware, or chafed lines after hard use or rough conditions.
- Operate seacocks periodically to prevent them from seizing.
- Wash the hull and topsides regularly to remove salt, bird droppings, and pollution that degrade the finish.
- Change engine oil and filter at the manufacturer’s recommended hour interval (typically every 50–100 hours).
- Inspect the stuffing box regularly for proper drip rate.
Fall Layup
Fall layup prepares the boat to survive winter storage without freeze damage, corrosion, or deterioration. For boats in climates where freezing is possible:
- Engine winterization: Change oil and filter (During winter layup, old oil in the crankcase can form corrosive compounds that can damage internal engine surfaces.). Fog cylinders if specified by the manufacturer. Drain the raw-water cooling system or protect it with antifreeze according to the engine manufacturer's winterization procedure. Stabilize fuel and run the engine long enough to circulate stabilizer through the fuel system. Remove and store the battery in a temperature-controlled location connected to a float charger.
- Freshwater system: Drain tanks and run non-toxic propylene glycol antifreeze through all lines, fixtures, and heads until antifreeze appears at every outlet.
- Hull: Consider applying bottom paint in the fall for wet-stored boats. Inspect hull for damage that should be addressed over winter.
- Electrical: Disconnect shore power before covering the boat. Secure all wiring so it cannot chafe or be damaged by movement in storage.
- Cover or shrink wrap: Install a proper boat cover or have the boat shrink-wrapped with adequate ventilation to prevent mold and mildew.
Bottom Painting and Hull Maintenance
Wet-stored boats generally need antifouling protection to prevent marine growth. Barnacles, algae, and other organisms attach to unprotected hulls rapidly in warm water — in Florida and the Gulf Coast, a hull left unprotected in the water can accumulate enough growth to significantly degrade performance in weeks. Antifouling paint works by releasing biocide compounds at a controlled rate that prevents organism attachment.
Options include painting your boat’s bottom in the fall as part of the winter layup process or applying antifouling paint in the spring. Many copolymer ablative paints do not oxidize in air, making fall application viable — the paint is ready to activate when the boat splashes in spring without needing a new coat. For help and advice on bottom paint selection and application, see our West Advisor articles Do-it-Yourself: Topside Painting, Top Ten Antifouling Paint Buying Questions, and Do-it-Yourself: How to Bottom Paint Your Boat.
For wet-stored fiberglass boats, an area of ongoing concern is osmotic blistering. Osmotic blisters can form when water permeates the gelcoat and laminate and interacts with water-soluble compounds within the laminate, creating pressure that can produce dome-shaped blisters. If you find blisters on the hull at haulout, options include spot repair of individual blisters or application of an epoxy barrier coat across the entire bottom. A barrier coat creates a low-permeability layer between the water and the laminate that dramatically slows moisture intrusion. For more on osmotic blistering and barrier coats, see our West Advisor article Epoxy Barrier Coats.
Routine Engine Maintenance
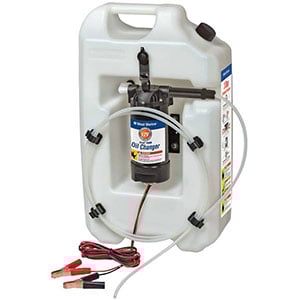
Oil change systems like the West Marine Flat Tank Oil Changer make changing oil easy on inboard and sterndrive engines.
Checking your oil level and changing your engine’s oil at appropriate intervals is one of the most important actions you can take to optimize engine health and longevity. Owner’s manuals typically recommend an oil change every 50 to 100 operating hours, but total run time alone is not always a reliable guide.
The amount of time an engine sits idle between uses is equally important. Dirty oil left in an idle engine can absorb moisture and form acidic compounds that attack bearing surfaces, cylinder walls, and valve components from the inside — damage that develops silently between seasons and becomes evident only when the engine is run hard again.For this reason, changing the engine oil before winter layup is widely recommended, even if the engine has not reached its normal operating-hour interval. When changing the oil before layup, consider cutting open the used oil filter and examining the filter media for metal particles, which can be an early warning of internal wear.
Other engine maintenance tasks:
- Water pump impeller: The raw water pump impeller should be inspected annually and replaced every 1–2 years or every 100 hours, whichever comes first. A failed impeller can cause rapid engine overheating and, if the engine continues to run, potentially severe damage.
- Belts: Inspect the alternator and water pump belts for cracking, glazing, and correct tension. A glazed belt slips rather than drives, causing the alternator to undercharge the batteries. For belt-driven water pumps, a belt that breaks while underway disables the cooling system.
- Fuel filters: Inspect and replace primary and secondary fuel filters according to the engine and filter manufacturer's recommended intervals; annual replacement is common for many marine applications. Marine fuel systems frequently encounter water contamination from condensation and from dock fuel quality issues — a clogged or water-laden filter starves the engine under load.
- Throttle and shift cables: If you feel excessive resistance shifting into forward or reverse, inspect your shift and throttle cables at both the helm connection and the engine connection. Cables with a cracked jacket should be replaced. Rust working into the inner cable is a common cause of resistance — marine grease at each end can slow the process, but a cable that has corroded internally needs replacement. Cable failure while underway can result in a serious collision.
- Coolant: Check engine coolant level on freshwater-cooled and closed-loop cooling systems. Low coolant indicates a leak somewhere in the system that needs to be identified and repaired.
For an informative overview of ways to make engine oil changes easier, read the West Advisor article Do-it-Yourself: Changing Engine Oil. West Marine offers a complete selection of aftermarket engine replacement parts for most makes and models through our engine parts selector.
Electrical System Maintenance
Marine electrical systems are exposed to salt air, vibration, and moisture. Corrosion at connections, degraded insulation, and failing connections are a common cause of both electrical equipment failure and onboard fires on recreational boats. Regular inspection and prompt remediation keeps both problems at bay.
Battery Maintenance
Batteries are the foundation of the DC electrical system. A weak battery that cannot hold a charge causes starting failures, bilge pump failures, and radio failures — frequently at the worst possible moment.
- Inspect battery terminals and cable ends annually for corrosion (white or blue-green buildup). Clean corroded terminals with a wire brush and apply a marine-grade corrosion inhibitor spray.
- Check battery electrolyte level on flooded lead-acid batteries (the most common type) and top off with distilled water if low. Top off with distilled water when necessary. Tap water can contain minerals that contaminate the electrolyte and shorten battery life.
- Load-test batteries annually — a battery that reads 12.6 volts at rest but cannot hold voltage under a starter load is failing and should be replaced before it strands you.
- Store batteries in a location not subject to freezing temperatures and keep them fully charged with a float charger (battery maintainer). If you must store batteries in a location subject to freezing temperatures, keeping them fully charged makes them much less susceptible to freeze damage.
Wiring and Connections
- Inspect the battery bank connections, main fuse or circuit breaker, and distribution panel annually. Tug-test each terminal connection — a connection that moves indicates a loose terminal that will corrode and eventually fail.
- Look for wiring with cracked, brittle, or chafed insulation anywhere it passes through bulkheads, cable clamps, or areas of movement. Bare wire contacting another conductor or a metal surface causes shorts and fires.
- Check that every circuit in the distribution panel is properly labeled. Unlabeled circuits get left energized when they should be off, draining batteries and creating fire risk.
- Inspect shore power connections for corrosion at the inlet, the cord ends, and the shore power connection. Corroded shore power connections are a significant fire risk — if the cord end is discolored or pitted, replace it.
Bilge Pump and Float Switch
A serviceable bilge pump is essential on most boats. Test it frequently at the dock and before every extended trip. With the bilge dry, manually trigger the pump and confirm it runs and moves water. Test the automatic float switch according to the pump manufacturer's instructions. Where appropriate, add enough water to the bilge to activate the switch. A float switch that is corroded, fouled with debris, or stuck will not activate in an emergency. Many bilge pump failures are not the pump motor itself but the float switch or a corroded connection between the switch and the pump.
Navigation Lights
Navigation lights are legally required when operating from sunset to sunrise and in restricted visibility. Test all navigation lights (bow, stern, masthead on sailboats, anchor light) at the beginning of each season and periodically during the season. Replace corroded bulb sockets, cracked lens covers, and failing LED modules before they fail underway. An all-round anchor light that is burned out when the boat is anchored can pose a collision risk.
Inspect Sacrificial Anodes and Replace as Needed
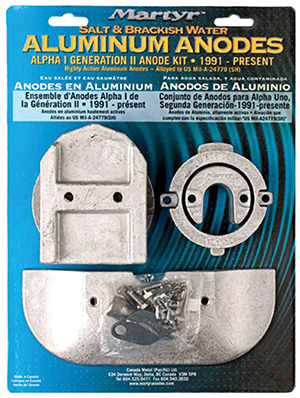
Anode kits include a complete set of sacrificial anodes for most inboard and sterndrive models.
Galvanic corrosion can damage or destroy underwater metal parts — propellers, shafts, trim tabs, outdrives, and through-hull fittings. It occurs when dissimilar metals are electrically connected and immersed in an electrolyte like saltwater. One metal becomes anodic to the other and begins to dissolve. A bronze propeller on a stainless steel shaft is a classic example: left unprotected, the propeller slowly loses material, becomes brittle, and can fracture under load.
Sacrificial anodes are the primary defense. Made of zinc (saltwater), aluminum (salt or brackish water), or magnesium (freshwater only), they are bolted to the prop shaft, propeller, hull, and drive unit. Because they are more reactive than the metals they protect, they corrode preferentially — sacrificing themselves to protect the more expensive metals around them. Anode material selection matters: zinc anodes passivate (stop working) in freshwater, while magnesium anodes in saltwater corrode too rapidly.
The general recommendation is to replace anodes when approximately half of their original material has been consumed. Inspect them at every haulout and at any point the boat has been in an area of high electrical activity (busy marinas with stray current from shore power systems can accelerate anode consumption significantly). If anodes are nearly fully consumed at haulout, before installing new anodes, inspect the protected metals for early corrosion damage. To learn more about galvanic corrosion, see our West Advisor article Preventing Galvanic Corrosion.
Inspect Your Boat’s Hoses
Engine vibration, thermal cycling, and UV exposure cause marine hoses to harden, crack, and pull away from fittings over time. A failed bilge discharge hose dumps water back into the bilge from the discharge side. A failed fuel hose is a fire hazard. A failed raw water cooling hose causes engine overheating within minutes. A failed sanitation hose creates a plumbing emergency and a serious odor and hygiene problem.
Inspect all hoses annually — squeeze each one firmly along its length. A hose that has hardened and lost flexibility is past its reliable service life and should be replaced proactively rather than waiting for a failure. Check for cracks at the ends where hoses connect to fittings, which is where failure most commonly begins due to vibration stress concentration. Where practical, hoses connected to below-waterline fittings should be secured with two corrosion-resistant clamps, provided the fitting is long enough to accommodate both clamps properly. Clamp bands should sit square on the hose, not tilted, and should be tightened until they grip firmly but not so tightly that they cut the hose material. For help selecting the right hose for each application, see our West Advisor article Selecting Marine Hoses.
Below-waterline hoses deserve special attention. Any hose connected to a through-hull fitting below the waterline is a potential source of flooding if it fails. Inspect hoses at regular intervals and replace at the first sign of cracking, deformation or other signs of deterioration.
Keep Plumbing Systems Operating Properly
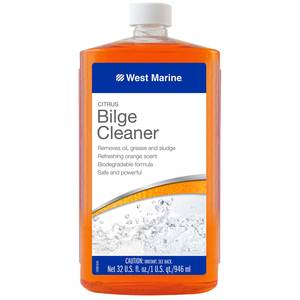
Specialized cleaners like bilge cleaner are available for every cleaning task on a boat.
A boat’s freshwater and sanitation systems require the same attention to maintenance as the systems in a house — with the added complication that they need to be winterized in freeze-prone climates.
Freshwater systems: Test all freshwater pumps, faucets, and hot water at commissioning. A pressure pump that cycles excessively (turns on and off rapidly when a faucet is open) indicates either a waterlogged accumulator tank or a leak somewhere in the pressurized system. Inspect the accumulator tank bladder and the tank’s air charge annually. For upgrades and repairs, West Marine offers a complete selection of freshwater pumps and replacement parts.
Sanitation systems: Marine heads (toilets) are among the most maintenance-intensive systems on a boat because they are used frequently, handle harsh materials, and contain joker valves and seals that harden and crack over time. A head that pumps hard, leaks around the base, or has an odor despite proper operation likely needs a rebuild. Most marine heads can be rebuilt with a kit containing new valves, seals, and joker valve. For rebuilds and upgrades, West Marine offers a complete selection of marine heads and rebuild kits and replacement parts. Sanitation hoses should be inspected for odor permeation. A persistent head odor despite clean operation often indicates that hoses need replacement.
Seacocks and through-hulls: Below-waterline through-hulls generally should have an accessible seacock or other appropriate shutoff valve that can shut off water flow in an emergency. Operate every seacock at least monthly to prevent them from seizing open with marine growth or corrosion. At every haulout, inspect through-hull fittings and seacocks for corrosion and confirm they open and close freely. A tapered wooden bung should be tied to every through-hull below the waterline as a last-resort emergency plug if the seacock or hose fails.
Inspect the Bilge and Keep it Clean
Keeping a close eye on your boat’s bilge is important for several reasons. Oily water in the bilge indicates an engine oil leak that needs to be tracked down and fixed — both for mechanical reasons and because discharging oily bilge water overboard is illegal under federal law. Debris in the bilge can foul the bilge pump float switch or the pump intake strainer, rendering the pump useless at the moment it is most needed.
Depending on the type of boat and systems installed, some boats have virtually dry bilges; while others naturally accumulate some water, usually from a dripping stuffing box. Water in the bilge can also be due to backflow from the bilge pump discharge hose, a stuffing box that needs adjustment, a scupper hose that has come loose, a leaking through-hull, a loose hose clamp on a below-waterline fitting, rainwater from a failing hatch seal or other reasons. The bottom line is that if you have a wet bilge, you should account for where the water is coming from and correct the problem before it becomes a serious threat to your boat.
Keep the bilge clean by periodically washing it with bilge cleaner and remove excess water with a large sponge. If your bilge pump is equipped with a float switch, inspect it as often as possible and ensure that the float is able to travel freely and is not blocked by debris.
Adjust Your Boat’s Stuffing Box
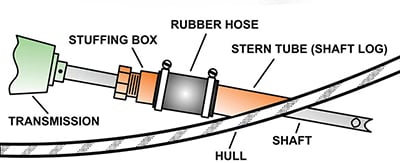
Diagram of a stuffing box.
If you own an inboard-powered boat and wonder where bilge water is coming from, one place to look is the stuffing box. A stuffing box forms the seal between the prop shaft and the shaft log — the hole in the hull through which the shaft passes to reach the propeller. The assembly consists of a threaded sleeve screwed into the shaft log and a hollow nut, through which the prop shaft passes. The nut contains rings of wax-impregnated flax packing compressed around the rotating shaft.
For traditional stuffing boxes (those with flax or synthetic packing) a small amount of water is intentionally allowed to drip through the packing — typically 3 to 8 drops per minute when the shaft is turning — because this water lubricates and cools the packing and prevents it from running dry and burning. A stuffing box that drips when the shaft is stationary may simply need the packing nut tightened slightly. Tighten in small increments (no more than a quarter turn), then run the engine in gear and check the drip rate. A stuffing box that runs dry overheats and destroys the packing rapidly. A stuffing box that drips excessively regardless of adjustment has packing that is worn out and needs to be replaced. For more on this procedure and modern alternatives to traditional stuffing boxes (including dripless shaft seals), see our West Advisor article Stuffing Boxes, Shaft Seals, Bearings and Couplings.
Keep Deck and Cockpit Scuppers Free of Debris
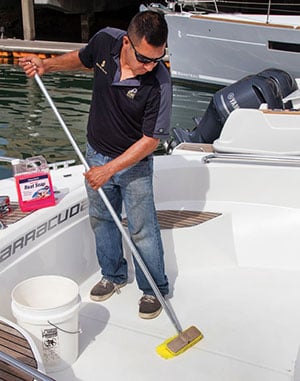
Scrubbing a cockpit clean.
Boats can sink at the dock when rain or snowmelt fills a cockpit whose scuppers are blocked. When a cockpit fills to the point where water reaches the cabin sill, it enters the boat interior and the boat can sink at the dock over the course of a single rainstorm. Maintenance in this case is simple: visit your boat regularly and keep cockpit drains and deck scuppers clear of debris.
If the scupper drains through a hose that passes inside the boat to a through-hull fitting, inspect that hose and the through-hull at the same time. A scupper hose that has come loose from its fitting can dump cockpit drainage inside the boat rather than overboard — exactly the opposite of its intended function. Confirm the hose is double-clamped securely at both ends.
Clean, Polish and Protect Your Boat’s Finish
Washing your boat regularly removes salt, bird droppings, pollution, and fish residue that can degrade the finish and accelerate staining and surface deterioration. Bird droppings are mildly acidic and can cause permanent staining if left on gelcoat for extended periods. Regular washing with a marine-grade boat soap removes these contaminants before they cause permanent damage.
After washing, oxidized or chalky gelcoat should be polished to remove the oxidized layer and restore clarity and gloss. Follow polishing with a protective coat of marine wax to provide a barrier against UV exposure and contaminants. Wax degrades with UV exposure and should be reapplied at least annually — in high-UV environments like Florida and the Gulf Coast, twice a year is more appropriate. For an overview of how to clean and renew oxidized gelcoat, see our West Advisor article Gelcoat Care and Restoration.
Gelcoat Maintenance
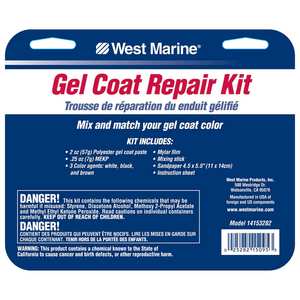
Gelcoat repair kits make repairing minor gelcoat damage straightforward for most do-it-yourselfers.
Cracks and superficial dings in gelcoat are not normally a cause for immediate structural concern, but they should be repaired promptly to prevent water from migrating into the underlying fiberglass laminate. Structural cracks around hardware deserve much more concern than ordinary cosmetic crazing.
If you find a series of cracks, take time to inspect the area more closely. Cracks that radiate from the base of a cleat, stanchion, or other load-bearing hardware indicate that the hardware is overloaded and the local laminate may be damaged. The repair may involve removing the hardware, assessing the underlying structure, and repairing or reinforcing the laminate and deck core material as necessary. Sealing the surface cracks without addressing the structural cause will result in the cracks reopening. For cracks around the base of a stanchion, a larger backing plate combined with appropriate filler and gelcoat is often sufficient. For cracking around a heavily loaded fitting like a cleat used for tying to docks, inspect the interior laminate for signs of core damage or delamination before simply sealing the surface.
Superficial repairs can be mastered by most do-it-yourselfers using gelcoat repair kits that include filler, tint, and catalyst. Color matching is the most challenging aspect of gelcoat repair — UV exposure causes gelcoat color to shift over time, so a perfect color match from a repair kit may not match the weathered surrounding gelcoat exactly. Mixing several colors and testing on a small area before committing to a visible repair produces better results. For a DIY overview, see our West Advisor article Do-it-Yourself: Gelcoat Repairs.
Safety Equipment Maintenance
Safety equipment is the maintenance category most likely to be overlooked because it is used infrequently — and the one where failure has the most severe consequences. The USCG requires specific safety equipment based on boat length and water type, but maintaining it in serviceable condition is your responsibility.
Life Jackets (PFDs)
- Inspect all life jackets annually for rips, tears, waterlogged foam, and broken hardware. A PFD with waterlogged foam no longer provides its rated buoyancy.
- For inflatable PFDs, inspect the oral inflation tube and auto-inflation mechanism. Replace CO₂ cylinders after inflation and when they are damaged, corroded, or below their specified weight. Replace the inflator mechanism, bobbin or other components at the intervals specified by the manufacturer. Inspect the water-activated bobbin for expiration date. Inflate the bladder orally and leave it inflated overnight to check for leaks.
- Dry PFDs completely before storage. PFDs stored wet develop mildew that degrades the foam and webbing.
Flares and Visual Distress Signals
- USCG-approved pyrotechnic flares expire after 42 months from the date of manufacture. Check the expiration date stamped on each flare and replace any that have expired or will expire before the end of the boating season.
- Expired flares may be carried as supplemental backup, but they do not count toward the required complement.
- Electronic visual distress signals do not use pyrotechnic expiration dates, but their batteries and the device itself must be maintained according to the manufacturer's instructions. Test the battery and replace or recharge before each season.
Fire Extinguishers
- Inspect fire extinguisher pressure gauges monthly. An extinguisher with a gauge reading in the red zone has lost pressure and will not operate correctly. Replace or recharge it immediately.
- Shake dry chemical extinguishers monthly to prevent the powder from caking and blocking the discharge nozzle.
- Inspect the pull pin and tamper seal annually. A missing tamper seal means the extinguisher may have been discharged partially.
- Disposable fire extinguishers must be removed from service 12 years after the date of manufacture stamped on the bottle. (There are other factors that govern disposible fire extinguisher replacement, for an expanded discussion, see Selecting fire Extinguishers.) Rechargeable extinguishers are subject to inspection/maintenance rather than automatic 12-year replacement.
EPIRB and PLB
- Ensure your EPIRB or PLB is registered with NOAA at beaconregistration.noaa.gov and that registration information is current. Outdated registration information can complicate identification and may delay an appropriate response.
- Check the battery expiration date on the label. EPIRB batteries are typically rated for 5–6 years and must be replaced by the date marked on the unit.
- If your EPIRB is equipped with a hydrostatic release unit, check its expiration date and replace it according to the manufacturer's specified interval.
- Use only the manufacturer's self-test procedure; do not activate the beacon's emergency transmission function except in a genuine emergency.
Bilge Pump
As noted in the electrical section, test the bilge pump and automatic float switch before every extended trip.
Boat-Type Specific Guidance
Outboard-Powered Boats
Key outboard-specific maintenance items:
- Lower unit gear lube: Drain and refill the lower unit gear case at least annually or every 100 hours. Milky or discolored gear lube indicates and should be investigated before the gearcase is returned to service.
- Water pump impeller: Located in the lower unit housing, the impeller on an outboard is replaced by removing the lower unit. Follow the manufacturer’s recommended interval.
- Tilt/trim system: Check the hydraulic trim fluid level annually and inspect the tilt tube and trim motor for corrosion.
- Fuel system: Use ethanol-treated fuel stabilizer seasonally and consider an inline water-separating fuel filter between the tank and engine.
- Flushing: After saltwater use, flush the engine with fresh water using the procedure specified by the manufacturer, such as a built-in flushing port or flushing muffs where applicable. Salt deposits can contribute to cooling-system restriction and corrosion.
Sterndrive (MerCruiser, Volvo Penta) Boats
- Drive unit bellows: The rubber bellows that seal the sterndrive to the transom (U-joint bellows, shift cable bellows, and exhaust bellows) are the most critical maintenance item on a sterndrive boat. On some boats, a failed bellows can allow water intrusion, potentially leading to flooding; Inspect annually and replace according to the manufacturer's recommended interval or sooner if cracking, hardening or separation is found.
- Drive unit anodes: Sterndrive units use a specific set of anodes on the drive assembly. Inspect and replace per the same 50% rule as other anodes.
- Gimbal bearing and U-joints: Inspect annually for play, corrosion, and smooth operation.
Sailboats
- Standing rigging: Inspect the entire wire standing rigging annually for broken strands (meat hooks), cracked swage fittings, corrosion at turnbuckle threads, and wear at spreader ends. Standing rigging can deteriorate gradually through corrosion, fatigue, cracking, wear and in other ways.
- Running rigging: Sheets and halyards should be inspected for chafe, UV degradation, and core integrity annually. A sheet that looks fine on the outside may have a compromised core that will fail under load.
- Sails: Inspect sails for UV damage on the luff tape and leech, batten pocket wear, and stitching degradation. Sails stored damp mildew rapidly.
- Winches: Service primary and secondary winches annually by disassembling, cleaning and servicing according to the manufacturer's recommeneded procedure. Pawls commonly require light oil rather than heavy grease.
- Keel bolts (fin keel sailboats): Inspect the keel-to-hull joint at every haulout for cracking, weeping, and movement. Keel-bolt or keel-attachment problems can have catastrophic consequences. If the keel joint shows significant cracking or water staining, have a surveyor evaluate the attachment before sailing offshore.
Pontoon Boats
- Pontoon tubes: Inspect the pontoons for dents, scratches, and corrosion at the annual haulout. Address damaged protective coatings according to the pontoon manufacturer's recommended repair procedure. Check the welds where structural members attach to the tubes for cracking.
- Decking: Marine-grade carpet and vinyl decking should be cleaned and inspected annually. Trapped moisture under the decking accelerates aluminum corrosion on the frame beneath. Consider replacing worn decking that retains water with a non-absorbent alternative.
- Hardware: Inspect all stainless deck hardware, bimini frame connections, and pontoon brackets annually for corrosion and structural integrity.
Troubleshooting Common Problems
The following are the most common symptoms that bring boaters to West Marine for advice, with their most likely causes and first diagnostic steps.
Engine Overheating
Lack of Cooling Water: First check: Confirm water is exiting the tell-tale ("pee hole") on an outboard or the exhaust fitting on a sterndrive. No tell-tale flow can indicate a clogged tell-tale, blocked intake, thermostat/cooling-system problem, or failed impeller. Also check for a plastic bag or debris blocking the raw water inlet.If water is flowing but the engine is still overheating, possible causes include a thermostat problem, restricted cooling passages, a heat-exchanger issue, inadequate raw-water flow, or a coolant problem on freshwater-cooled systems.
Battery Not Holding Charge
Most likely cause: Sulfated battery (from repeated deep discharge or long storage without charging), parasitic draw (a circuit drawing current continuously while the boat is off), or a failing alternator. First check: Measure resting voltage (should be 12.6–12.7V for a fully charged flooded battery). Load test the battery with a load tester. Check battery draw by measuring current at the main switch with everything off.
Hard Shifting or Shifter Resistance
Common causes include: Corroded or kinked throttle/shift cable. First check: Disconnect the cable at the engine end and test resistance by moving the helm control. If the resistance disappears with the cable disconnected at the engine, the problem is in the cable. If resistance remains, the problem is in the helm control mechanism.
Bilge Filling Faster Than Normal
Most likely cause (inboard): Stuffing box running too wet, loose hose clamp on a through-hull fitting, or failed seacock. First check: With the engine stopped, inspect the stuffing box for excessive dripping, adjust as necessary and verify the drip rate during normal operation. Then systematically inspect every through-hull hose connection below the waterline for wetness. Open each seacock to confirm it operates and inspect around the base for weeping.
Head Pumps Hard or Smells
Most likely cause: Clogged inlet, worn valves, hardened joker valve, or permeated hoses. First check: Pour a cup of fresh water into the bowl and attempt to pump it out. If the pump is completely rigid (will not move), the outlet line may be obstructed or the joker valve has inverted and sealed. If the pump moves but with extreme resistance, the valves need rebuilding. Persistent odor despite proper operation can indicate permeated sanitation hoses, but the tank, vent system, joker valve and other components should also be checked.
New Cracks Appearing Around Deck Hardware
Most likely cause: Undersized backing plate causing load concentration, or a failing core behind the hardware. First check: Determine if the cracks are star-shaped (radiating from the center) or spider-cracks (a network without a clear center). Star/radial cracks can indicate point loading, impact, stress concentration, movement of hardware, or underlying structural problems. Inspect the underside of the deck at the hardware location for moisture, delamination, or soft core material. If the core feels soft or the deck flexes around the hardware, the core has failed and needs repair before just sealing the gelcoat surface.
Maintenance Glossary
New boaters encounter a specific vocabulary in maintenance discussions. Here are the terms used most frequently in this guide:
- Anode (sacrificial anode): A block of reactive metal (zinc, aluminum, or magnesium) bolted to underwater metal parts. It corrodes preferentially, protecting the more expensive metals around it from galvanic corrosion.
- Antifouling paint: Bottom paint formulated with biocides to prevent marine organisms (barnacles, algae, slime) from attaching to the hull of a wet-stored boat.
- Barrier coat: An epoxy coating applied to the hull below the waterline to reduce moisture permeation through the gelcoat and slow the development of osmotic blisters.
- Bilge: The lowest interior point of the boat hull where water collects. The bilge pump removes accumulated water overboard.
- Float switch: An automatic switch inside the bilge that triggers the bilge pump when water rises to a preset level.
- Flax packing: Wax-impregnated braided rope used inside a traditional stuffing box to form a seal around the prop shaft.
- Galvanic corrosion: Corrosion that occurs when dissimilar metals are electrically connected and immersed in an electrolyte such as saltwater. The less noble metal corrodes to protect the more noble one.
- Gelcoat: The smooth, pigmented outer layer of a fiberglass boat. It is not structural but protects the fiberglass laminate from water and UV and provides the boat’s finished appearance.
- Impeller: A rubber vane component inside the raw water pump. It draws cooling water from outside the boat and pumps it through the engine. It must be replaced on a regular schedule because it degrades with use.
- Osmotic blister: A dome-shaped defect in the gelcoat of a wet-stored fiberglass boat, caused by water penetrating the gelcoat and reacting with soluble materials in the laminate to create an acidic solution that pushes outward.
- Scupper: A drain opening in the deck or cockpit that allows accumulated water to drain overboard.
- Seacock: A valve on a through-hull fitting below the waterline. It can be closed in an emergency to stop water from entering the boat through the associated hose or fitting.
- Shaft log: The fitting through which the propeller shaft passes through the hull. The stuffing box is located at the shaft log.
- Stuffing box: The assembly at the shaft log that creates a seal around the rotating prop shaft, allowing a small controlled drip of water for lubrication and cooling.
- Tell-tale (pee hole): A small water discharge port on an outboard engine’s mid-section that shows cooling water is flowing. If no water exits the tell-tale when the engine is running, causes may include a clogged tell-tale, obstructed water intake, thermostat/cooling-system issue, damaged impeller, or other problems.
- Through-hull: A fitting that passes through the boat hull. Most below-waterline through-hulls should have an accessible seacock or other appropriate shutoff valve.
Boat Maintenance FAQ
Most marine engine manufacturers recommend an oil change every 50 to 100 operating hours or annually, whichever comes first. More importantly, always change engine oil before winter layup regardless of hours. Dirty oil left in an idle engine can accumulate moisture and acidic contaminants that contribute to corrosion. Starting a new season with fresh oil is one of the most effective engine longevity measures available.
Replace anodes when approximately half of their original material has been consumed. You can gauge this visually at haulout by comparing the anode’s current size to what a new one looks like. An anode that is 50% consumed has been doing its job and is due for replacement before the next season. Never wait until an anode is fully depleted — once it is gone, the metals it was protecting begin to corrode immediately. Also use zinc anodes in saltwater, aluminum anodes in general use or brackish water, and magnesium anodes in freshwater only.
Yes, if there is any risk of freezing temperatures in your area. Boats stored on land are surrounded by cold air and can freeze faster than boats stored in water, which retains heat longer than air. Even a brief overnight freeze can crack an engine block, split a pump housing, or fracture plumbing fittings if water has not been removed from the systems. Engines, freshwater systems, heads, washdowns, livewells, and any system that holds water must be winterized or protected by a heating system before the first freeze risk of the season.
Warning signs of electrical problems include: circuit breakers that trip repeatedly without a clear cause, equipment that intermittently loses power or has erratic operation, a burning smell near the distribution panel or wiring runs, battery that discharges overnight with everything switched off (parasitic drain), corrosion visible at battery terminals or panel connections, and wiring with brittle or cracked insulation. Any of these should be investigated promptly — electrical fires on boats are among the most destructive and hardest to extinguish. If you are not confident diagnosing the problem yourself, have a marine electrician inspect the system.