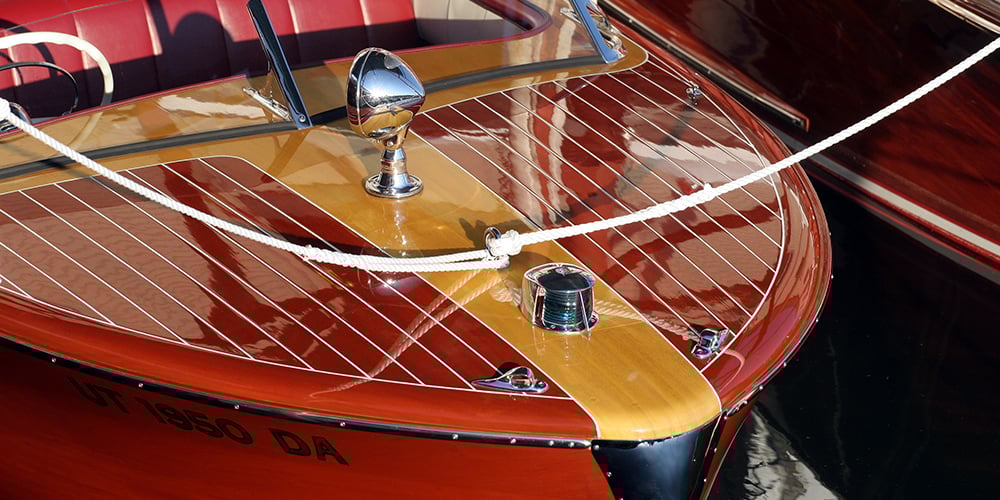
Boats with sparkling brightwork are becoming increasingly rare, so those with impeccably maintained varnish attract attention and compliments from both casual dock walkers and fellow boaters. Either way, a conversation that starts with “What a beautiful boat!” is bound to be a pleasant one. As pretty as a perfect varnish job looks, it requires dedication and discipline to keep it that way. The following advice will take some of the guesswork out of achieving that perfectly even, glass-like finish. Before you start, consider that patience is a virtue and that clean tools and a protected working environment will greatly enhance results.
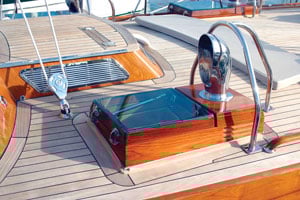
Varnished surfaces contrast beautifully with an "au natural" teak deck.
No Shortcuts for Good Prep Work
Before you begin varnishing, repair soft or discolored wood with epoxy, wood bleach or stain as needed. Be vigilant and fix those little nicks and dings before they get down to bare wood.
- Use quality masking tape for extended use and protect other surfaces with polyethylene sheeting.
- Sand with the grain. Early coats are sanded with 180–220 grit paper, for later coats use 320–400-grit wet-or-dry paper. Bear in mind that wet sanding is more aggressive.
- If you use a random orbit sander (e.g., to remove lots of old and brittle varnish) be very careful. Keep it moving to avoid uneven sanding, gashes and divots.
- Be extremely careful when using chemical paint stripper to remove old layers of varnish. Work only in well-ventilated areas, wear protective gear and avoid direct skin contact.
- Using a heat gun or putty knife for removal of old paint and varnish is less toxic but both techniques require a steady hand and patience to avoid gouges or burns.
When to Varnish
Avoid the “I have to do it today” syndrome: Be patient. Wait for the weather to be right. Sand thoroughly. Do all the prep work. When it comes to a varnish project, haste will inevitably make waste.
Choose the right weather: Varnish indoors if possible. You can varnish anywhere between 50 and 80 degrees, but ideal conditions are 55 to 65 degrees with 45 to 55 percent relative humidity. Don’t varnish in the wind because dust is the enemy of a smooth, flawless finish so you have to minimize its impact whenever possible. Don’t varnish in direct sunlight because uneven drying can cause wrinkles. Avoid varnishing in high humidity or when rain is in the forecast. If you work in open air, time a fresh coat so it can dry before overnight dew sets in.
Wear clean clothing and a dust-free hair cover. Be sure to have ample supplies of tack-cloth at hand.
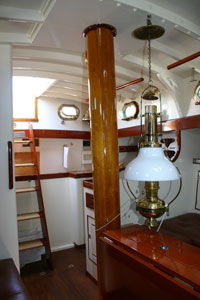
Beautiful high-gloss mast inside the schooner Elizabeth Muir. Matte or semi-gloss finishes are also popular below deck.
Varnishing Techniques
- Don't shake the can; it can cause bubbles in your varnish. Varnish does not need to be stirred or mixed, except when adding thinner. Strain varnish through a disposable sieve.
- Avoid bubbles (produced by jabbing or squeezing the brush) and gently stir in thinner with a clean wooden stick.
- Do not load your brush directly from the can but use a dedicated vessel. Also have a separate container ready to tap off excessive varnish; don’t pour unused varnish back into the can.
- Dip less than half the length of bristles into the varnish and allow them to saturate.
- Maintain a “wet edge” by brushing toward the area previously varnished.
- Brush with the grain and tip off with a light touch and a lightly-loaded brush.
- Use thinner according to the instructions on the can. Finishing coats should be applied at 100 percent strength.
Use the Right Brush
Technique is important, but so is the brush. For best results, use clean brushes that have not been used with paint. Most pros use badger hair brushes like our Flagship Brushes; they must be carefully cleaned after each use. If you can’t properly clean them, your expensive brush will be wasted.
If you don’t want to deal with linseed oil or kerosene solvents, you can get decent results with foam brushes. If you use them, keep them covered and pat with tack cloth prior to varnishing. Badger brushes really matter only on the final two coats.
In Between Coats
- Remove the ridges, but avoid sanding through the previous coat. Remember that a smooth surface is necessary for the mirror finish you desire.
- Clean prepared surface using a shop vac with brush attachment, then wipe down with a soft rag lightly wetted with the solvent recommended on the varnish can. Lightly wipe with a tack rag right before application.
- Allow coats at least 24 hours to dry. Later coats need 48 hours to cure properly before being sanded again. Gummy spots while sanding indicate the varnish has not cured all the way. If that happens let the area dry and sand it out carefully before proceeding.
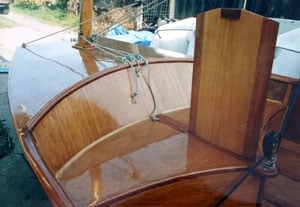
Wood-epoxy custom racing El Toro the author finished with three coats of WEST System 105/207 epoxy, followed by four coats of Epifanes Clear High-Gloss Teak Varnish
How Many Coats to Apply
This depends on how many are already there and what kind of environment your boat is exposed to. If you start with bare wood, six to eight coats provide a solid basis for adding more during regular maintenance. Some varnishers apply as many as ten coats. Varnished wood in the tropics will require more coats (and more frequent maintenance) than in the Pacific Northwest.
Not happy with the last coat? You can always add more. It is hard to overdo it with the number of coats as long as the ones underneath are not brittle, faded or cracked.
Good Advice You Normally Won’t Get Until It Is Too Late
- Clean tools, especially brushes, are the hallmark of masters. Because some jobs require work with the brush pointing up, it will get heavy as the varnish flows back into the bristles where it dries. To avoid this, switch to a clean brush and put the old one into a cup of thinner.
- Shine a light horizontally on the varnished area to check for “holidays” (missed spots).
- If bugs land on a fresh coat of varnish, they won’t go anywhere. Resist the temptation to pick them out right away. Instead, sand them out after the varnish has dried.
- If building a new coat from scratch, sealing the bare wood with three coats of penetrating epoxy adds protection, as well as stabilizing the wood substrate so it won’t expand and contract due to moisture and heat changes. This adds to the longevity of the varnish. We’ve achieved great results using WEST System 207 Special Coating Hardener that’s made for this purpose (used with their 105 Epoxy Resin). After epoxy clear-coating and sanding vigorously to achieve a flat, fair surface, you then build up the coats of varnish as described above. You can apply fewer coats of varnish (four or five instead of up to ten coats).
- Store brushes in a freezer, wrapped in plastic, between days of use to reduce the number of times you have to clean them.
- Save thinner by using narrow, deep vessels for brush cleaning.
Further Reading: How to Apply Teak Oil