Dewinterizing a Boat — Quick Expert Summary
-
Dewinterizing means flushing antifreeze and safely bringing systems back online after storage.
-
Always follow your engine and equipment owner’s manuals first.
-
Start with inspection + batteries, then do engine, then water/plumbing, then sanitation, then A/C, then safety + controls.
-
Use a clean water supply for test-running engines (muffs/flushers) and confirm strong water flow immediately.
-
Replace worn hoses, belts, impellers, and anodes before launching.
-
Dispose of antifreeze and oily waste properly—never into the bilge or overboard.
Dewinterizing a boat involves taking it out of winter storage and preparing it for spring and summer use. This process is the reverse of winterization, where engines, freshwater systems, sanitation systems and marine air conditioning systems are protected with antifreeze to prevent freeze damage during cold weather storage. Proper dewinterizing removes antifreeze safely, verifies that systems function correctly and helps prevent costly breakdowns during the boating season.
Many spring commissioning issues are caused not by major failures, but by overlooked maintenance items such as cracked hoses, weak batteries, worn impellers, contaminated fuel or corroded electrical connections. Taking the time to inspect and test systems carefully before launch helps avoid unexpected problems on the water.
While some boats require only basic startup procedures, larger boats equipped with generators, freshwater plumbing, water heaters, marine heads and air conditioning systems require a more detailed dewinterizing process. The exact tasks depend on the type of engine, the systems onboard and the procedures completed during winterization.
Note: The advice we give is not intended to replace the recommendations found in the owner’s manuals for the systems covered by this guide.
Dewinterizing Tasks Can Vary
The dewinterizing tasks you perform will vary according to the type of boat you have, how it is equipped and the procedures you completed when it was winterized in the fall. Boats stored in freezing climates often require more extensive recommissioning procedures than boats stored in mild climates.
Outboard-powered center consoles, bass boats and bay boats may require only basic engine checks and battery reconnection, while cruisers, sailboats and larger inboard-powered vessels often involve freshwater plumbing, sanitation systems, generators, water heaters and marine HVAC systems.
- How to Dewinterize Inboard and Inboard/Outboard Engines
- How to Dewinterize Outboard Motors
- How to Dewinterize a Freshwater System
- How to Dewinterize a Sanitation System
- How to Dewinterize a Marine Air Conditioning System
- Other Tasks
Before You Start: What You’ll Need
-
Owner’s manuals for engine, A/C, water pump, head and heater
-
Battery charger + distilled water (if using flooded lead-acid batteries)
-
Basic hand tools + flashlight
-
Oil-absorbent pads (bilge protection)
-
Flush muffs or inboard flusher + hose with good water flow
-
Spare hose clamps, zip ties and rags
-
Replacement items as needed: impeller, fuel filter(s), spark plugs, anodes and belts
Safety Notes (Do This Every Time)
-
Ventilate the engine space before starting.
-
Keep absorbent pads in place so no fluids reach the bilge.
-
Never run an engine without proper cooling water supplied.
-
If water flow is weak or missing at the exhaust, shut down immediately.
Spring Commissioning Inspection Checklist
Before reconnecting batteries or starting engines, perform a full visual inspection of the engine compartment, bilge and onboard systems. Look for cracked hoses, corrosion, rodent damage, loose hose clamps, leaking fittings and signs of water intrusion.
Inspect wiring harnesses carefully because rodents frequently chew insulation during winter storage. Verify bilge pumps cycle correctly and ensure no standing oily water or antifreeze residue remains in the bilge before launch.
How to Dewinterize Inboard and Inboard/Outboard Engines
Try the interactive SONAR parts finder for the engine parts you need.
If you have an inboard or an inboard/outboard motor that was winterized in the fall and wish guidance on how to bring it back online for the boating season ahead, below is a comprehensive list of recommended tasks. Some steps may be skipped if they were already completed during winterization.
For more on how to dewinterize an inboard/outboard motor, see our West Advisor article Waking up Your Inboard/Outboard Engine.
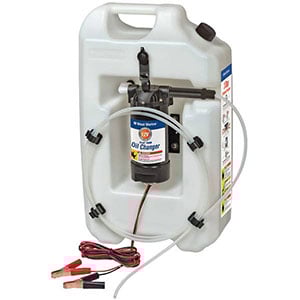
Oil change pumps like West Marine's Flat Tank Oil Changer make oil changes easier and cleaner.
- Inspect the engine belts. Edge fraying, glazing or cracking warrants replacement.
- Inspect the fuel system hoses. Look for cracking, stiffness, fuel odor or visible leakage.
- Inspect the cooling system hoses. Replace hoses that are brittle, swollen or excessively hard.
- Reconnect and charge the batteries. Verify proper voltage and electrolyte level where applicable.
- Inspect the propeller. Look for bent blades, fishing line around the shaft and shaft seal damage.
- Change the outdrive gear lube oil. Milky lubricant may indicate water intrusion.
- Inspect or replace the water pump impeller. Annual replacement is strongly recommended.
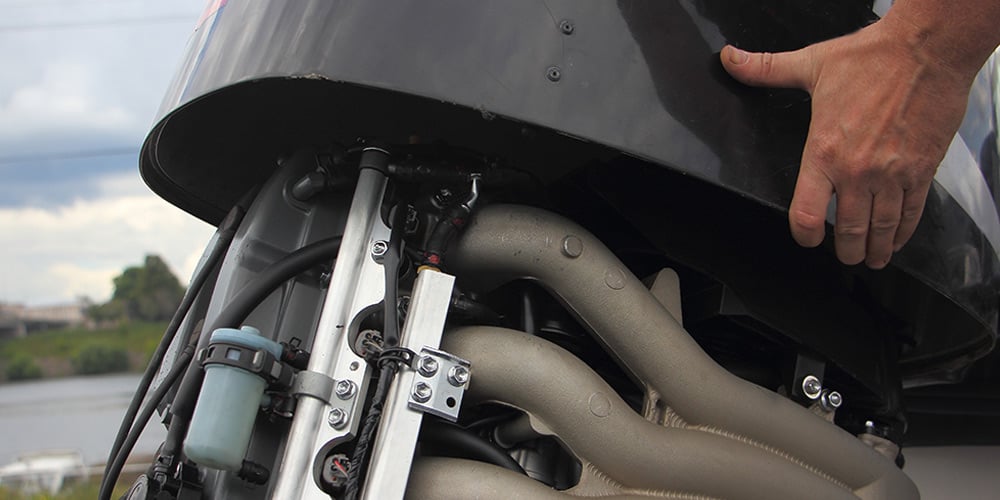
- Connect the engine to a cooling water source. Use flushing muffs or an inboard flusher before startup.
- Start the engine. Verify oil pressure immediately and confirm strong exhaust water flow.
- Change the engine oil and oil filter.
- Inspect and replace the spark plugs if fouled.
- Replace the fuel filter element.
- Optional: Install a 10-micron fuel filter. Multi-stage fuel filtration improves fuel system protection.
- Inspect all sacrificial anodes. Replace when more than 50% depleted.
Common Spring Startup Problems for Inboards
Hard starting, rough idle, overheating and weak charging output are common issues discovered during spring startup. Many of these problems trace back to stale fuel, dirty fuel filters, weak batteries, impeller damage or corroded electrical connections.
If overheating occurs immediately after startup, shut the engine down and inspect raw-water flow before continuing operation.
How to Dewinterize Outboard Motors
If your outboard motor was winterized correctly in the fall, dewinterizing is usually straightforward. However, if the engine was not winterized properly, additional service may be necessary before safe operation.
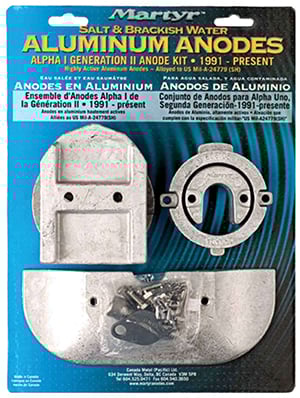
Available anode kits include complete OEM-equivalent anode replacements.
For outboards that were winterized properly:
- Inspect the powerhead thoroughly. Look for leaks, rodent damage and loose components.
- Start the motor. Use flushing muffs and verify strong water flow from the telltale and exhaust.
- Inspect shifting and steering. Verify smooth operation in forward, neutral and reverse.
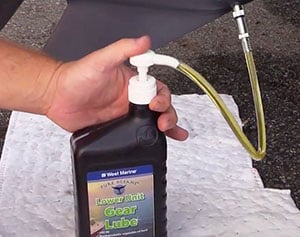
Example of gear lube pump in use.
If the outboard was not winterized properly, additional maintenance may include:
- Inspect and service the fuel filter/water separator.
- For 4-stroke models, replace the engine oil and oil filter.
- Replace lower unit gear oil.
- Inspect and replace spark plugs if needed.
- Inspect carburetors or EFI systems.
- Inspect the propeller and prop shaft.
- Service contaminated VST tanks and VST filters if necessary.
Why Fuel System Inspection Matters
Ethanol-blended fuel can absorb moisture during winter storage and create fuel system issues ranging from poor performance to injector clogging and corrosion. Inspecting filters, separators and fuel lines before launch reduces the chance of engine problems during the season.
How to Dewinterize a Freshwater System
Dewinterizing a freshwater system involves flushing winterizing antifreeze from tanks, pumps, plumbing lines and faucets until the system runs clean and odor-free.
- Add several gallons of water to the water tank.
- Turn on the freshwater pump.
- Open all faucets.
- Flush the system until antifreeze is removed.
- Refill the tank completely with clean water.
- Run all fixtures again until water flows smoothly.
- Top off the tank.
- Add a water treatment if desired.
Freshwater System Sanitizing Tips
Many boat owners sanitize freshwater systems during spring commissioning to eliminate bacteria, odor and biofilm buildup. Sanitizing is especially important if water remained stagnant in tanks or lines during storage.
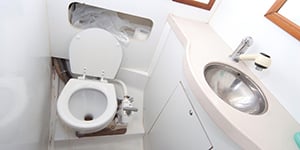
How to Dewinterize a Sanitation System
West Marine offers a complete selection of sanitation system upgrades and repair parts.
- Inspect all sanitation hoses and fittings.
- Flush the toilet and verify the macerator pump functions correctly.
- Rinse and pump out the holding tank.
- Add a holding tank treatment.
Signs a Sanitation Hose Needs Replacement
Persistent odor, visible cracking, stiffness or leaking fittings often indicate sanitation hoses need replacement. Marine sanitation hose degrades over time due to waste exposure and permeation.
How to Dewinterize a Marine Air Conditioning System
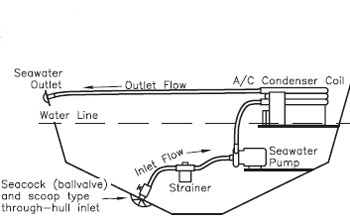
Seawater circulation and air conditioning components.
The following steps assume the seawater cooling circuit was winterized with antifreeze in the fall.
- Disconnect the seawater discharge hose and place it into a bucket.
- Run the air conditioning system.
- Flush until water runs clear.
- Reconnect all hoses securely.
- Dispose of antifreeze properly.
Marine Air Conditioning Spring Inspection
Inspect seawater strainers, hoses and circulation pumps carefully during recommissioning. Restricted seawater flow can reduce cooling performance and damage marine HVAC equipment.
Other Tasks
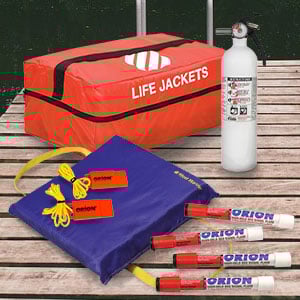
For most boats, Coast Guard required gear includes signaling devices, a horn or whistle, throwable flotation, life jackets and one or more fire extinguishers.
- Inspect the electrical system.
- Inspect the steering system.
- Inspect the shift mechanism.
- Antifoul the boat’s bottom if necessary.
- Clean mold and mildew thoroughly.
- Wash and wax the boat.
- Verify all required safety equipment is onboard.
- REPLACE THE TRANSOM DRAIN PLUG BEFORE LAUNCHING.
Pre-Launch Checklist
Before launching, verify batteries are fully charged, bilge pumps operate correctly, drain plugs are installed, navigation lights function properly and steering shifts smoothly. Double-check fuel levels, trailer wheel bearings and tire pressure if trailering the boat.
Performing a complete pre-launch walkthrough helps prevent avoidable ramp and dockside problems during the first trip of the season.
Dewinterizing a Boat FAQs
How long does it take to dewinterize a boat?
Most boat owners spend 2–6 hours dewinterizing, depending on engine type and onboard systems.
What’s the biggest mistake during dewinterizing?
Starting the engine without verifying cooling water flow is the most common and most damaging mistake.
Do I have to change oil during dewinterizing?
If oil was not changed before storage, replace it before running the engine extensively.
How do I know antifreeze is fully flushed from the freshwater system?
Run water until color, taste and odor from antifreeze are completely gone.
What does milky gear lube mean?
Milky gear lube usually indicates water intrusion from a failing seal.
Should I replace the impeller every year?
Many boaters replace impellers annually as preventative maintenance.
Can I pour antifreeze or oily water into the bilge?
No. Dispose of antifreeze and contaminated fluids properly according to local regulations.


