Custom self-adhering vinyl graphics, striping tape and letter and number decals are one of the easiest ways to personalize a boat, update registration numbers or refresh aging graphics. Over time, however, decals can fade, crack, discolor, peel or simply become outdated. Saltwater exposure, UV radiation, oxidation and years of weathering eventually break down both the vinyl itself and the adhesive underneath.
While removing decals sounds simple, doing it incorrectly can damage gelcoat, strip paint, leave deep scratches or create uneven “ghosting” where the old graphics once sat. Older decals are especially challenging because UV exposure hardens the vinyl and makes the adhesive brittle and stubborn.
The good news is that most vinyl graphics can be removed safely with patience, controlled heat and the proper tools. Whether you’re replacing faded registration numbers, removing dealership branding, updating boat names or preparing a hull for new graphics, careful decal removal helps preserve the finish underneath while minimizing cleanup time.
This guide explains the safest methods for removing vinyl decals from fiberglass boats, painted surfaces and gelcoat while reducing the risk of scratching, discoloration or surface damage. We’ll also cover adhesive removal, oxidation correction and preparation tips for installing new graphics afterward.
- Why Boat Decals Become Difficult to Remove
- Before You Start: Gather the Right Supplies
- Step 1 — Wash the Surface Thoroughly
- Step 2 — Remove the Decal
- Step 3 — Remove Residual Adhesive
- Step 4 — Clean and Polish the Surface
- Can You Remove Decals Without Damaging Gelcoat?
- Can You Install New Decals Immediately After Removal?
- Common Boat Decal Removal Mistakes
- Glossary of Terms
- FAQ
- Conclusion
Why Boat Decals Become Difficult to Remove
Marine decals live in one of the harshest environments possible. Constant exposure to UV radiation, saltwater, heat cycles, oxidation and environmental contaminants slowly changes both the vinyl and adhesive chemistry over time.
As decals age, the vinyl becomes more brittle and the adhesive underneath hardens. Instead of peeling away cleanly, older graphics often tear into small pieces or leave stubborn residue behind.
In many cases, the surrounding gelcoat also oxidizes differently than the area protected beneath the decal. This is why older graphics sometimes leave behind a visible “shadow” or ghost image after removal.
Common Reasons Boat Owners Remove Decals
- Replacing faded registration numbers
- Updating boat names or hailing ports
- Removing dealership logos
- Replacing damaged graphics
- Modernizing older boat appearance
- Preparing for repainting or restoration
- Removing cracked or peeling striping tape
Before You Start: Gather the Right Supplies
Using the proper tools makes decal removal significantly safer and easier. The goal is to soften the adhesive and lift the decal gradually without gouging the surface underneath.
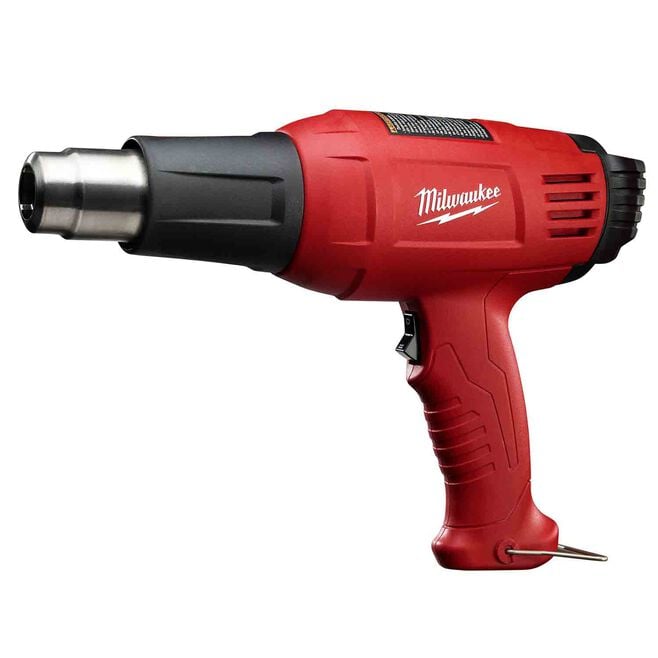
Decal adhesive can quickly be softened with the application of controlled heat.
- Heat gun, hair dryer or eraser wheel
- Plastic razor blade or scraper
- Denatured alcohol or adhesive remover
- Sticker Off!
- Marine Formula Adhesive & Sealant Remover
- Soft cotton or microfiber cloths
- Boat soap
- Rubbing compound
- Marine wax
Why Plastic Scrapers Matter
Metal blades and putty knives can permanently scratch gelcoat, clear coat and painted finishes. Plastic razor blades flex slightly and greatly reduce the risk of gouging the surface while still helping lift stubborn vinyl edges.
Using softer tools becomes especially important on dark-colored hulls where scratches show more easily.
Step 1—Wash the Surface Thoroughly
Remove Dirt Before Heating the Decal
Start by washing the decal and surrounding area thoroughly using boat soap and fresh water.
This removes salt, sand, oxidation residue and surface contaminants that could scratch the finish while removing the decal.
Cleaning first also allows heat to distribute more evenly across the decal surface.
Why Clean Surfaces Matter
Small particles trapped under scrapers or cloths can create swirl marks and scratches during decal removal.
Clean working surfaces significantly reduce accidental cosmetic damage.
Step 2—Remove the Decal

An eraser wheel can speed up decal removal on larger graphics.
There are two primary methods for removing marine decals safely:
- Heat gun or hair dryer method
- Eraser wheel method
Both methods can work extremely well when used properly.
Heat Gun Method
Using a heat gun set to “low” or a hair dryer set to “high,” apply gentle heat to the decal while constantly moving the heat source back and forth several inches from the surface.
The goal is to soften the adhesive — not melt the vinyl or overheat the gelcoat.
Once softened, use a plastic scraper to gently lift one corner of the decal.
Slowly peel the decal back at a sharp angle while continuing to apply heat ahead of the peeling edge.
Work gradually and avoid rushing. Older decals often require repeated heating and slow removal.
Why Too Much Heat Can Cause Problems
Excessive heat can soften gelcoat, damage painted finishes or cause vinyl to shred into tiny pieces instead of peeling away cleanly.
Controlled moderate heat works much better than maximum temperature.
Eraser Wheel Method
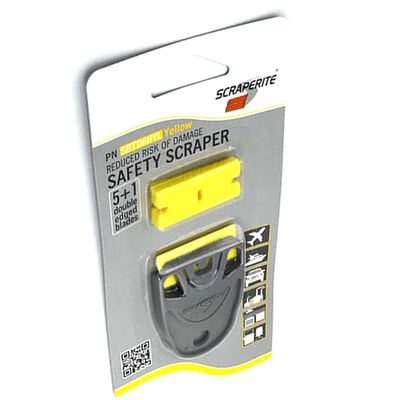
Plastic scrapers help protect gelcoat and painted finishes from scratching.
Eraser wheels attach to drills and mechanically remove decals using friction.
Run the wheel around 2,000 RPM and work small sections at a time.
Eraser wheels are especially useful for older brittle graphics and large striping jobs where peeling by hand becomes time-consuming.
However, they still require careful technique because excessive pressure or heat buildup can damage softer finishes.
When an Eraser Wheel Works Best
- Large registration numbers
- Wide striping tape
- Dealer graphics
- Old brittle decals
- Multi-layer vinyl graphics
Step 3—Remove Residual Adhesive
After removing the vinyl itself, adhesive residue will usually remain on the surface.
This residue should be removed carefully using denatured alcohol or a marine-safe adhesive remover specifically designed for decal cleanup.
Apply the solvent to a microfiber cloth and gently work the adhesive using circular motions.
Repeat as necessary until the surface feels smooth and residue-free.
Best Adhesive Removers for Boats
Marine-safe products such as:
…are formulated specifically to soften adhesive without aggressively attacking gelcoat or marine finishes.
What NOT to Use on Gelcoat
- Metal razor blades
- Aggressive grinding pads
- Lacquer thinner
- Heavy-duty paint stripper
- Wire brushes
Using harsh chemicals can permanently dull or soften fiberglass finishes.
Step 4—Clean and Polish the Surface
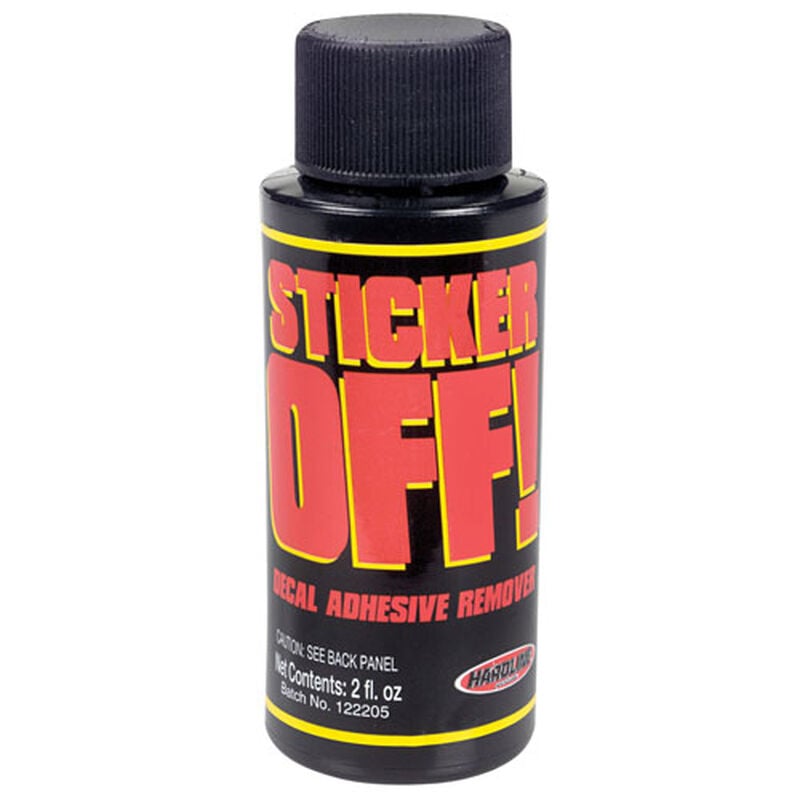
Marine-safe adhesive removers help dissolve leftover decal residue safely.
After adhesive removal is complete, wash the area again thoroughly using boat soap and water.
This removes leftover solvent residue and prepares the surface for polishing or waxing.
At this stage you may notice a visible “ghost” image where the old decal sat.
This usually occurs because the surrounding gelcoat oxidized while the area beneath the decal remained protected from UV exposure.
How to Remove Ghosting and Oxidation
In many cases, moderate oxidation and ghosting can be minimized using:
- Rubbing compound
- Polishing compound
- Marine wax
For deeper oxidation restoration guidance, see our West Advisor article Gelcoat Care and Restoration.
Why Oxidation Makes Old Graphics Visible
The exposed surrounding gelcoat slowly fades and oxidizes over years of UV exposure while the area beneath the decal remains shielded.
Even after decal removal, color differences may temporarily remain until polishing levels the surrounding finish visually.
Can You Remove Decals Without Damaging Gelcoat?
Yes — when done correctly.
The keys are controlled heat, patience and using non-abrasive tools.
Most gelcoat damage happens because boat owners:
- Use excessive heat
- Use metal scrapers
- Rush the removal process
- Use overly aggressive solvents
- Pull decals too aggressively
Slow, careful removal dramatically reduces the chance of surface damage.
Can You Install New Decals Immediately After Removal?
Absolutely — but the surface must be cleaned and fully prepared first.
Before applying new graphics:
- Remove all adhesive residue completely
- Wash and dry the surface thoroughly
- Polish oxidation if necessary
- Wipe the surface with isopropyl alcohol before installation
Proper prep ensures the new decals bond correctly and last longer.
Common Boat Decal Removal Mistakes
- Using too much heat
- Using metal blades
- Removing decals too quickly
- Skipping surface cleaning
- Using harsh solvents
- Applying excessive pressure with eraser wheels
- Ignoring oxidation afterward
Why Patience Matters
Older marine decals often require slow careful removal in small sections.
Rushing usually creates more work by shredding vinyl into tiny fragments and leaving additional adhesive behind.
Glossary of Terms
Adhesive Remover: A marine-safe chemical solvent formulated to dissolve and lift leftover decal adhesive without aggressively attacking gelcoat, paint, or clear coat finishes.
Denatured Alcohol: A solvent commonly used to dissolve light adhesive residue after a decal has been peeled away, applied with a soft cloth rather than directly poured on the surface.
Eraser Wheel: A rubber abrasive attachment that mounts to a power drill and removes vinyl decals through friction, useful for large graphics and old, brittle vinyl that resists peeling by hand.
Gelcoat: The pigmented outer resin layer applied to a fiberglass hull or deck that provides color, gloss, and a protective barrier against UV exposure and water intrusion.
Ghosting: A visible outline or shadow left behind after a decal is removed, caused by the surrounding gelcoat oxidizing and fading from UV exposure while the area beneath the decal remained shielded.
Oxidation: The chalky, faded surface condition that develops on gelcoat and painted finishes over time from prolonged UV exposure, often more pronounced on areas that were not protected by a decal or covering.
Polishing Compound: A fine abrasive product used after rubbing compound to refine a surface further and restore gloss, typically the final step before applying wax.
Rubbing Compound: A moderately abrasive paste used to cut through oxidation and surface imperfections on gelcoat or paint, commonly used to blend ghosting left behind after decal removal.
Striping Tape: A narrow, colored vinyl tape applied to a hull or deck as a decorative accent line, removed using the same heat and adhesive-removal methods as standard decals.
Frequently Asked Questions for Removing Vinyl Decals from a Boat
The safest method usually combines moderate heat, slow peeling and plastic scrapers to avoid damaging gelcoat or painted finishes.
Yes. Excessive heat can soften gelcoat and damage finishes, which is why low heat and constant movement are recommended.
When used correctly at proper RPM and pressure, eraser wheels are generally safe, but excessive heat or aggressive pressure can still damage finishes.
The surrounding gelcoat oxidizes differently than the protected area beneath the decal, leaving a visible contrast after removal.
Yes, once the surface is fully cleaned, residue-free and properly prepared.
Conclusion
Removing vinyl decals from a boat requires patience, careful technique and the proper tools, but when done correctly, the process is very manageable for most boat owners.
Controlled heat, plastic scrapers, marine-safe adhesive removers and proper polishing afterward help preserve the underlying finish while preparing the surface for new graphics or restoration work.
Whether you’re updating registration numbers, changing your boat name or modernizing aging graphics, careful decal removal helps keep your boat looking clean, polished and professionally maintained.
We’re Here to Help!
West Marine carries heat guns, eraser wheels, plastic scrapers, marine-safe adhesive removers and polishing compounds for every step of decal removal and graphic installation. Whether you’re updating registration numbers or prepping a hull for new graphics, our team can help you find the right tools for the job. Click on our handy store locator to find a West Marine store near you.
Related:


