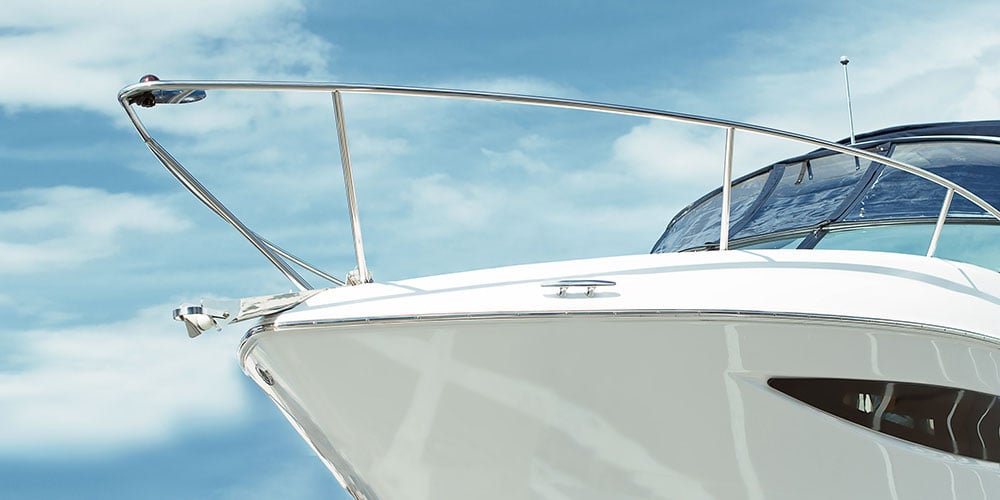
What Rail Fittings Do
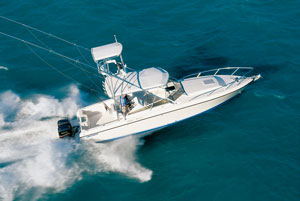
Rail fittings let you build rigid bow, stern and cabintop handrail and lifeline systems, dodgers, and other canvas/tubing assemblies, providing secure handholds and/or rigid barriers around your boat’s perimeter. Made in a variety of shapes and angles, these components can accommodate the many configurations possible on a boat. They are available in two diameters: 7/8"dia., generally used on smaller powerboats, and 1"dia., used on sailboats and larger powerboats.
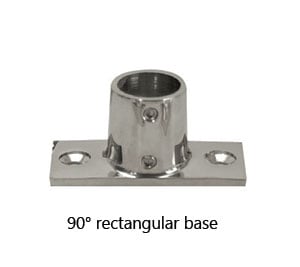
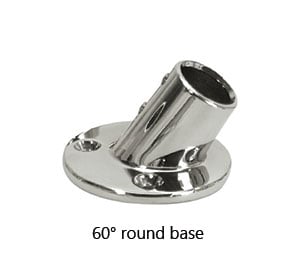
Rail bases connect the tubing to the deck of a boat. They are available in many angles, from 30° to 90°. They are available with round or rectangular bases.
Tees are like plumbing tees, and form a three-way connection between tubes.
Bow forms connect two tubes at about a 110° or 125° angle.
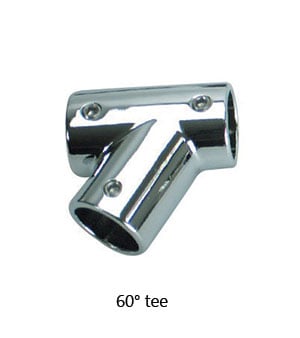
Universal tees are like normal tees except the third leg intersects at a 60° angle.
Elbows are 90° intersections.
Material Choices
Rail fittings are made from two materials: zamak (a zinc-aluminum alloy) and Type 316 stainless steel. Zamak fittings have a highly polished look when new, but only a modest amount of corrosion resistance when subjected to saltwater, so we recommend them for freshwater environments only. Stainless steel fittings are stronger and have outstanding corrosion resistance, at a premium price. Match materials between system components to minimize the effects of galvanic corrosion between dissimilar metals.
Rail tubing comes in 7/8" or 1" diameters, and is made from Type 304 stainless or aluminum. It is sold in stock lengths of 6', 12' or 20'.
Aluminum tubing with chrome zamak fittings are intended for freshwater applications only. They’ll be rapidly corroded by the galvanic action of the saltwater environment.
Stainless steel tubing with stainless steel fittings can be used for both freshwater and saltwater applications.
Stainless steel fittings used with aluminum tubing will cause corrosion. You should never use this combination.
.065" wall thickness is recommended when bending tubing. Special Order S14-7865P20-1 (7/8" diameter x 20' length) or S14-1065P20-1 (1" diameter x 20' length).
Installation Tips for the DIY Boat Owner
Most rail fittings attach to the deck with either number 10 flat head machine screws (for 7/8" diameter rail components) or 1/4-20 flat head machine screws (for 1" diameter rail parts), which should be through-bolted for greatest strength and safety, using substantial backing plates. While it is tempting and convenient to use sheet metal screws, machine screws with locking nuts will be far stronger. Seal the fasteners with polyurethane, or polysulfide caulk to prevent leaks and water damage to the hull or deck material. Apply plenty of sealant around the fastener holes, especially on the shanks of the fasteners. Rail fittings attach to the rail tubing with Allen head setscrews, so they can be owner-installed, and taken apart if needed. A small dab of Loc-Tite on the setscrews will ensure that your railing stays together for many seasons.
Tools and Supplies Needed
Screwdriver or reversible drill
Goggles
Allen wrench
Spray lubricant
Hacksaw (for cutting aluminum tube)
Band Saw with metal-cutting blade or cut-off wheel (for cutting stainless steel)
Wetordry™ Sandpaper, 80-grit (for deburring edge of cut tubing)
Polyurethane or polysulfide caulk
Stainless steel screws
Loc-Tite™
Preparation
Remove the damaged fittings and tube sections using a screwdriver or drill, Allen wrench and spray lubricant.
Measure the fittings and tube you removed and determine which part is best for your replacement.
Prepare the surface of the boat by cleaning the gelcoat thoroughly and filling all holes with thickened epoxy, silicone sealant or 3M 5200.
Measure the length of the tube sections to be replaced and cut the tube to the appropriate lengths. File the edges smooth with a metal file.
If you're replacing a bend in your tube, it is recommended you take your broken tube along with the new tube and fittings to a local marine Bimini top professional, electrician or plumber. They have the bending equipment to ensure the right bend for you. Bends must be made with the fittings in place.
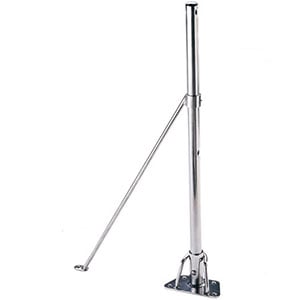
We also stock complete lifeline stanchions.
Installation
Place the bent tube, such as bow rails with fittings attached in position, along with the tubing it attaches to.
Attach all additional slide-on fittings onto the tube and secure with the provided setscrews. You may need to refer back to set screw punctures on the old tube to determine where the new fittings should be located, especially if the tube is new.
Secure any fittings to be attached to the deck using stainless steel screws and a screwdriver or drill.
Care and Maintenance
Wash with soap and water and avoid harsh chemicals, especially bleach.
Apply a polish coating regularly for added protection and beauty.
Never use course abrasives like sandpaper or steel wool.
Remove stain spots as soon as possible with a brass, silver or chrome cleaner.
TIP: Apply polyurethane or polysulfide caulk to the screw threads when you’re securing fittings to the deck of the boat. This will help seal the holes. Once all the tubing and fittings have been installed, back out the setscrews and apply Loc-Tite to all setscrews and re-tighten to prevent them from loosening in rough waters.