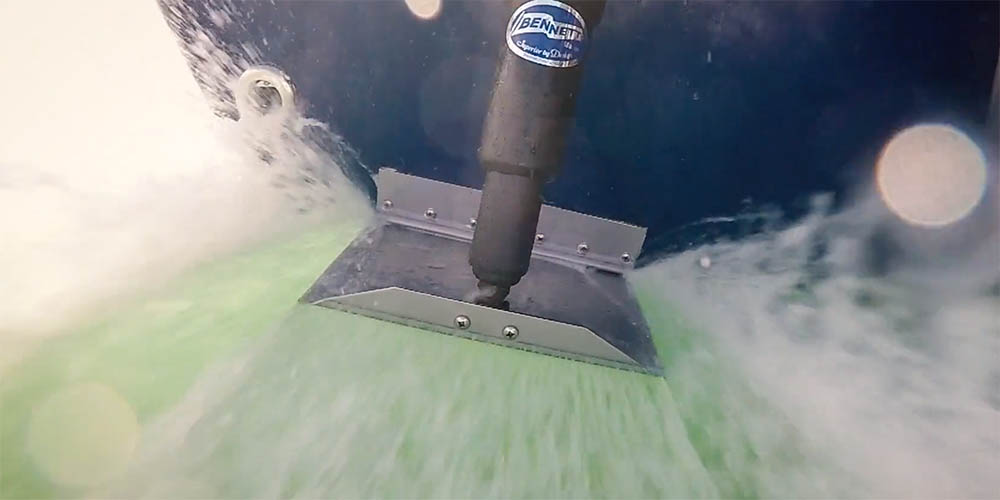
Trim tabs are used to adjust a powerboat’s trim—its fore, aft and athwartships attitude in the water—for optimum performance in changing sea conditions and to improve its ride and handling. You can control bow attitude, just like with power trim, but electric and hydraulic trim tabs enable side-to-side adjustment to compensate for uneven weight distribution, even at low speeds. Regardless of your boat size, speed, or shape, trim tabs will improve performance and comfort.
What Benefits do Trim Tabs Provide?
Increased performance: Most boats are designed to plane at a particular speed and weight distribution. When weight increases, or speed decreases, the stern settles down and fuel economy suffers. Trim tabs counteract this tendency and allow the boat to achieve its most efficient attitude whatever the weight or speed.
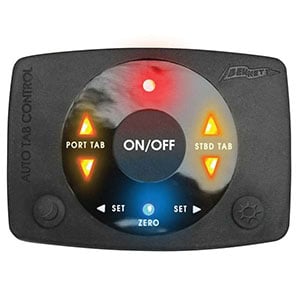
Automatic trim controls like the Bennett AC3000 maintains cruising attitude the way Cruise Control maintains speed for your car.
Increased fuel efficiency: When the stern is down your boat pushes a “hill” of water in front of it, which requires more energy to overcome. The hull drag and prop angle also contribute to this fuel-wasting inefficiency. Trim tabs adjust independently of your power trim and allow each to be trimmed separately for maximum efficiency.
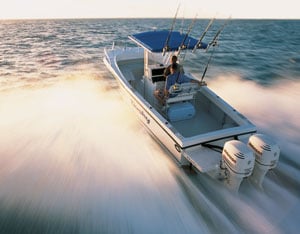
Increased safety: With the bow high your visibility forward is greatly reduced. Using trim tabs to adjust the boat to the proper running attitude preserves forward vision.
Automatic, Electric or Hydraulic Tabs?
Automatic/non–hydraulic trim tabs use nitrogen gas cylinders, work like shock absorbers and require no adjustment while under way. They require no through-transom wires or plumbing and are simplest to install, but cannot be adjusted under way if heavy Uncle Henry decides to change sides.
Automatic tabs may work better on smaller boats such as inflatables, boats with no room for a hydraulic pump or for the budget-conscious boater. Automatic tabs are a good choice for small fast boats, boats that tow tubes or other types of sport boats that change speed and direction frequently. Acting like the suspension system on a car, automatic tabs react faster than a person can, and they react automatically.
Regardless of boat length, for greatest control of trim we recommend adjustable electric or hydraulic trim tabs. Adjustable trim tabs provide immediate control for varying weight distribution and changing sea conditions. These are ideal for fishing boats, performance boats, trawlers, cruisers, and yachts of all sizes.
Smart Tabs are simplest to install because there’s no electric or hydraulic system.
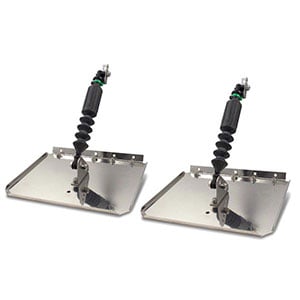
Electric trim tabs are controlled by electric actuators that deflect the trim tab planes up and down. Because the actuators stop and start immediately with the press of the switch, they provide precise control and instant response time. Electric trim tabs do not require the installation of hydraulic hoses and pump and are generally regarded as easier to install.
Hydraulic trim tabs planes are controlled by hydraulic cylinders. A hydraulic pump inside the boat provides the pressure to actuate the cylinders.
What Measurements Do You Need?
Trim tab packages are designed for owner–installation with common tools. When ordering, remember to measure the longest plane span possible between the outside edge of the transom and the centerline. Subtract 3"–4" for clearance on the outer edge and 8"–12" of clearance from centerline (to account for the outboard or sterndrive’s lower unit). A good rule of thumb is at least 1" of width per boat foot of length.
Installing Smart Tabs
With an electric drill, two drill bits (1/8" and 3/16"), a Phillips screwdriver and two wrenches, a boat owner with basic to intermediate ability can install Smart Tabs in less than an hour. Professional installers should be able to install Smart Tabs in 30 minutes or less.
Installing Smart Tabs involves assembling a pair of Trim Plates by bolting them together with their hinges, brackets and zinc anodes (if you are going to use them in saltwater). Next, mount the Trim Plates in the correct location on the bottom of the transom with the included sheet metal screws. Then mount the upper hardware (the Gas Actuators and Transom Brackets) using the included templates, making sure each actuator is perpendicular to its hinge/plate.
Finally, adjust the angle of the tabs using a 25° template. The amount of lift pressure the tabs provide (and how much they lift your boat’s transom) is adjustable on the trailer through a range of five different settings.
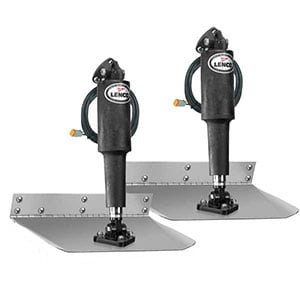
Installing Lenco trim tabs involves connecting a control box, switch kit and power leads
Installing Lenco or Bennett Trim Tabs
While some boaters may have a dealer or boatyard install their trim tabs, you can do the work yourself if you are handy with a drill and screwdriver. The average do-it-yourself boater can handle the installation in an afternoon. Depending upon the size and construction of the boat, it should take about four or five hours for installation.
Mechanical work on the transom is similar to installing Smart Tabs, except that a hole needs to be drilled through the transom under each upper actuator mount to allow the pass-through of the electric wire (Lenco) or hydraulic hose (Bennett). Find the best position for the tabs, making sure that the upper mounts don’t center on an obstruction inside the boat. Attach the hinge along the bottom of the transom. Use a straightedge laid along the bottom of the hull to find the correct negative angle, which allows you to then locate and align the upper mounts.
Install the switch on the dashboard near the helm. You’ll need to drill a 2"–2 1/2" hole depending on the switch to be installed. Connect the switch to power, then run the supplied wiring harness from the switch to the back of the boat. The Lenco harness simply plugs into the power leads from the electric actuators. The Bennett harness will connect to the Bennett Hydraulic Power Unit.
For Bennett only: Install the Hydraulic Power Unit (HPU) inside the boat in a dry location using the supplied bracket. Run hydraulic tubing between the 90° nipples inside the transom and the HPU. Fill the reservoir in the HPU with any type of automatic transmission fluid. No bleeding of the system is required.