
Your boat trailer works as hard as your boat does — and it tends to get far less attention. A trailer that fails at the ramp or on the highway doesn’t just ruin a day; it can damage your boat, your vehicle, and other drivers on the road. These five upgrades address the most common failure points and frustration points on boat trailers, and every one of them can be installed in an afternoon with basic tools. Whether you trailer a bass boat, center console, or cabin cruiser, all five apply to virtually any setup.
- 1. Replace Your Trailer Jack
- 2. Install Retractable Tiedowns
- 3. Switch to LED Trailer Lights
- 4. Add Guide-On Posts
- 5. Install Bearing Protectors
- Boat Trailer Upgrade FAQs
Upgrade 1: Replace Your Trailer Jack
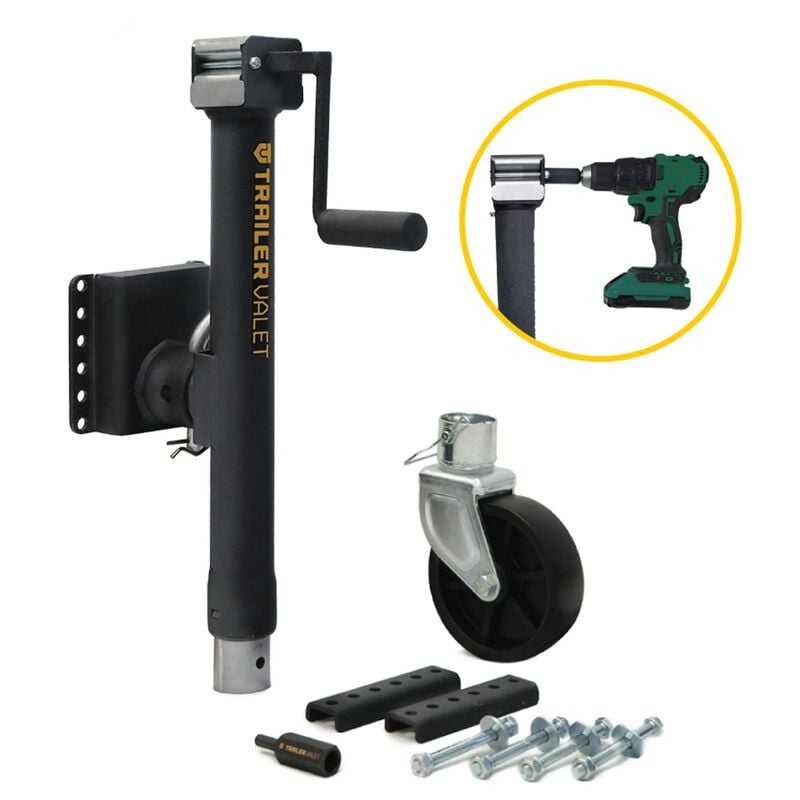
Trailer Valet JX 5K Side Mount Jack — 5,000 lb static capacity, operates manually or with a standard cordless drill.
Why Upgrade Your Trailer Jack?
The standard side-wind jack that ships on most trailers is adequate when the trailer is unloaded and on level ground. In the real world — on a sloped driveway, with a loaded boat, after a long day on the water — it becomes a chore. A quality jack makes hitching and unhitching faster, safer, and far less physically taxing.
The Trailer Valet JX 5K Side Mount Trailer Jack handles up to 5,000 lbs of tongue weight and operates with a standard manual crank or a compact cordless drill. Drill operation is the difference-maker: what previously took two or three minutes of cranking takes about 20 seconds. The weather-resistant shield protects the internal gear system from grit and moisture, and all required mounting hardware is included.
Installation: Replace the existing jack with the same bolt pattern or adapt as needed. Most installations are a direct bolt-on replacement using a socket set and a wrench. A helper to support the trailer frame while you remove and swap the jack makes the job faster.
What to look for when buying a replacement jack: Match the mounting style (side mount vs. top wind vs. A-frame), verify the weight capacity is appropriate for your loaded trailer, and confirm the drop leg length is adequate to raise and lower from your hitch height. If your driveway has a significant slope, a jack with more drop range is worth specifying.
“This drill-operated trailer jack is a game changer. It saves so much time and effort when unhitching. Highly recommend it.” — Marco Perugini, West Marine crew member
Upgrade 2: Install Retractable Tiedowns
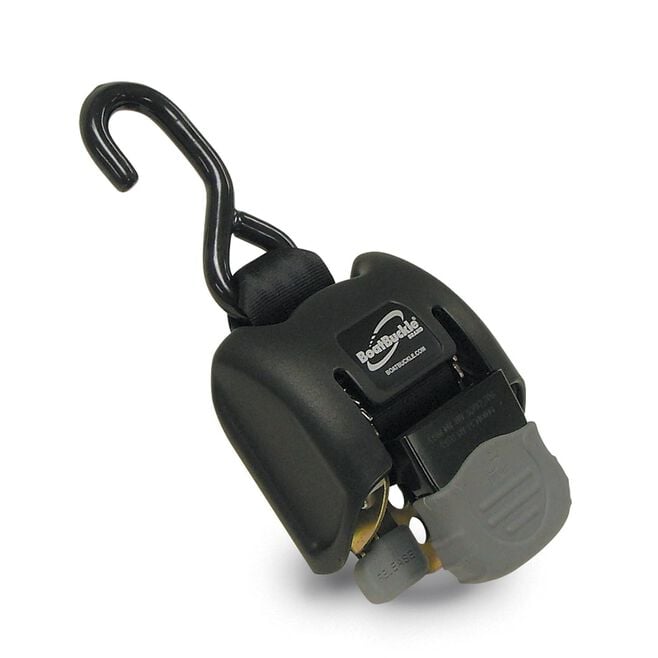
BoatBuckle retractable tiedowns — pull, hook, tension. Release lever retracts the strap automatically. No loose straps, no tangles.
Why Upgrade Your Tiedowns?
Standard ratchet straps do the job, but they create problems: loose ends flapping against the hull at highway speed, tangles when you try to release them at the ramp, and straps that have to be manually re-coiled and stored after every launch. At a busy ramp with other boats waiting, fumbling with ratchet straps wastes time and patience.
BoatBuckle retractable tiedowns solve this cleanly. Pull the strap out, hook it to your bow eye or transom eye, apply tension, and you’re done. When you’re ready to launch, press the release lever and the strap recoils automatically back into the housing. The straps are all-stainless hardware with polyester webbing — both bow and transom versions are available, and they mount with a single bolt through the trailer frame.
Installation: Single bolt through the trailer crossmember or upright. Most installations take under 15 minutes per strap. Verify the mounting location puts the strap at the correct angle to your tie-down point — a direct, straight pull holds better than an angled one.
Bow vs. transom: Install a bow strap to replace your winch strap or supplement it for highway transport. Install transom straps at the stern — these are frequently skipped by new trailer boaters, which allows the stern to bounce on the bunks at highway speed, stressing the hull. Both bow and transom straps should be installed on any boat trailered regularly at highway speeds.
“These tiedowns keep my bass boat secure on the road and they’ve never let me down. Worth every penny.” — John, Raleigh, NC, West Marine customer
Shop all retractable tiedowns ›
Upgrade 3: Switch to LED Trailer Lights
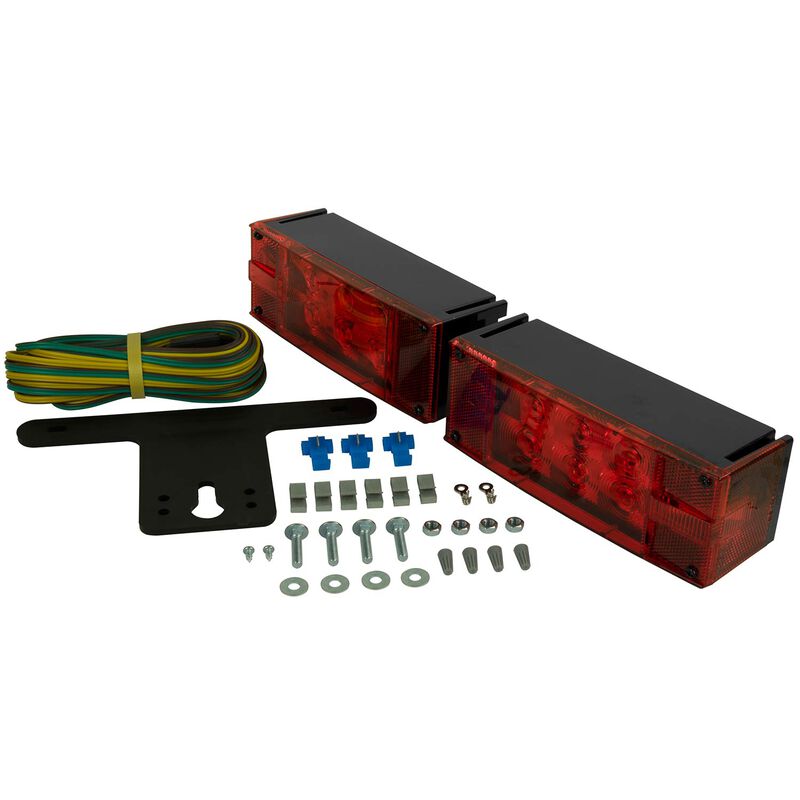
Hopkins Manufacturing LED submersible trailer light kit — stop, turn, and tail functions in each head. Fully submersible. Available for trailers under and over 80” wide.
Why Upgrade to LED Trailer Lights?
Incandescent trailer lights fail at the ramp for a specific physical reason: the bulb runs hot during the tow, then gets plunged into cold water when the trailer is backed down. The rapid temperature change causes the glass to crack — thermal shock — and the bulb fails. Even without breakage, filament bulbs are rated for approximately 3,000 hours and are vulnerable to vibration and road grime. The average trailer boater goes through multiple sets of incandescent bulbs per season.
LED lights have no filament, no glass to crack, and no thermal shock vulnerability. Quality submersible LED units are rated for up to 100,000 hours and sealed against water intrusion. They are also significantly brighter than incandescent equivalents at the same power draw, which improves visibility for other drivers — particularly important at dusk and dawn when most boaters are returning from the water.
The Hopkins Manufacturing LED submersible trailer light kit packs stop, turn, and tail functions into each light head. Available in configurations for trailers under and over 80” wide, with all-in-one multi-function heads that simplify wiring compared to separate stop/turn/tail units.
Installation: Match the connector type to your tow vehicle (4-flat, 5-flat, 7-way round, or 7-blade are most common). Run the wiring harness along the trailer frame using cable clamps or zip ties, keeping it away from moving parts. Use heat shrink connectors rather than twist-and-tape at any splice point — salt water and road spray will corrode an unprotected splice within a season. If you are trailering in saltwater environments, use tinned marine-grade wire throughout rather than standard automotive wire.
Tip: Unplug the trailer lights before backing into the water. Even submersible LEDs last longer when not energized while submerged — it eliminates electrolytic corrosion at the connector pins.
“These lights are a smart investment for any trailer boater. Easy installation and they work great.” — BrianV, West Marine crew member
Upgrade 4: Add Guide-On Posts
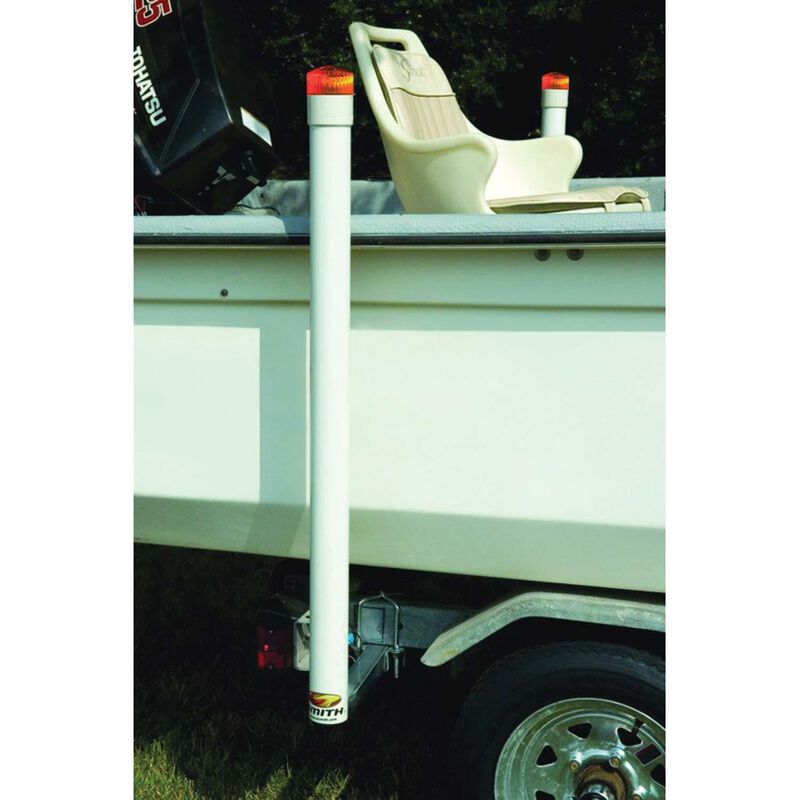
CE Smith lighted post guide-ons — available in multiple lengths with or without LEDs. Waterproof, shockproof LED tips remain visible when the trailer is fully submerged.
Why Add Guide-On Posts?
Loading a boat onto a submerged trailer is one of the harder skills in trailering. You’re driving forward from the driver’s seat while watching a bow that’s behind you, often in current, crosswind, or low light, while onlookers at the ramp offer commentary. Guide-on posts give your hull a physical reference point — you aim for the posts rather than trying to thread an invisible target underwater.
Beyond the convenience, guide posts protect the boat. Without them, a hull that drifts slightly off-center during retrieval contacts the trailer frame edge rather than the bunk carpet — which means gelcoat damage or worse. Posts intercept the hull gently and guide it to the correct centerline position before it reaches the bunks.
The CE Smith lighted version adds waterproof, shockproof LED lights that stay visible even when the trailer is fully submerged at the ramp — making night launching and retrieval dramatically easier. The 60” height keeps the LED tips above water at most ramp depths, giving you a visible aiming reference from the helm.
Installation: Posts mount to the trailer uprights using the included bracket and hardware. Position them at the widest point of the hull where they’ll make first contact during loading — typically just forward of the transom on most V-hull boats. Posts should be tall enough that the tips are visible above the waterline when the trailer is backed to its normal launch depth. Run the LED wiring to the trailer harness at a splice point near the stern lights.
Sizing: 48” posts work for most recreational trailers in moderate ramp conditions. 60” posts are the better choice for deeper ramps, longer hulls, or any situation where you regularly back further than average. Measure from the trailer frame to the waterline at your normal launch depth to confirm tip clearance.
“These guides made centering my jet boat on the trailer a one-person job, even on windy days.” — Condoc, Sacramento, CA, West Marine customer
Upgrade 5: Install Bearing Protectors
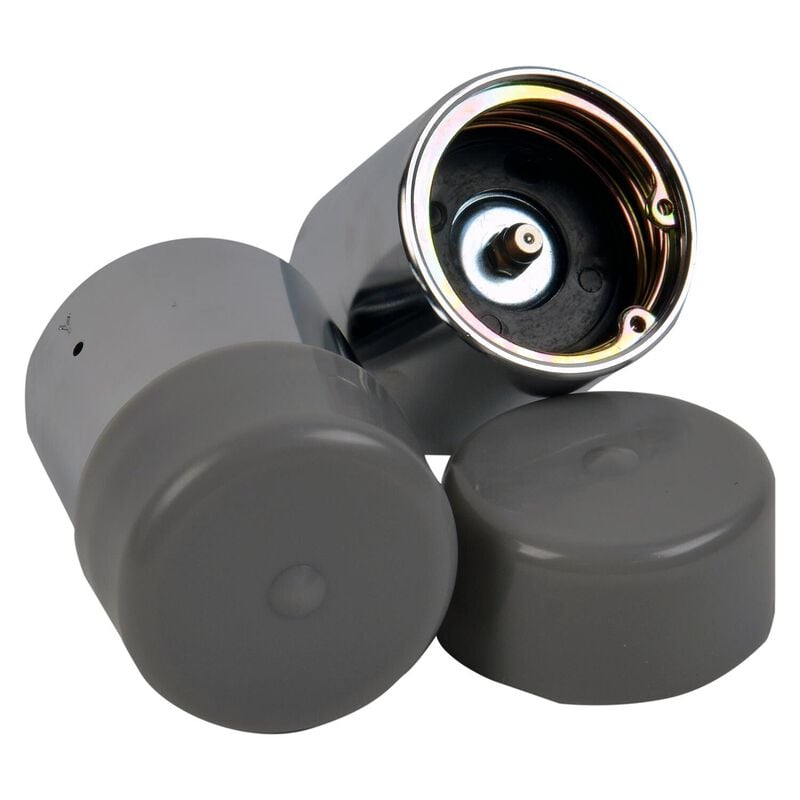
CE Smith bearing protectors — tap directly onto the hub, maintain positive internal pressure to keep grease in and water out. Available in a range of diameters.
Why Install Bearing Protectors?
Wheel bearing failure is the most common cause of trailer breakdowns — and the mechanism is well understood. Hot wheel hubs from highway driving get plunged into cold water at the ramp. The air and grease inside the hub contract as they cool, creating negative pressure. If the hub seal isn’t perfect, that negative pressure draws water in past the seal. Water contaminates the grease, corrodes the bearing races, and eventually the bearing seizes — usually on the highway, miles from home, on a Sunday afternoon.
Bearing protectors interrupt this cycle by maintaining slight positive internal pressure inside the hub at all times. The spring-loaded cap keeps the hub pressurized, so when the hot hub hits cold water, there’s no vacuum effect that can pull water past the seal. They also provide an easy visual check: the protector cap has a clear window or piston that shows whether the hub is fully greased — if the piston is flush or recessed, add grease before your next trip.
CE Smith bearing protectors tap directly onto the hub with a rubber mallet — no special tools required. Available in multiple diameters to fit most standard trailer axles (1.98”, 1.78”, and 1.72” are the most common). Match the diameter to your existing dust cap size.
Installation: Remove the existing dust cap (usually tapped off with a flathead screwdriver and rubber mallet). Clean the hub end. Tap the bearing protector on with a rubber mallet until fully seated. Add grease through the zerk fitting until the piston extends slightly, indicating positive pressure. Check and re-grease at the start of every season and whenever the piston appears fully recessed after a trip.
Saltwater note: Trailers used in saltwater should have bearings inspected and re-greased more frequently than freshwater trailers — ideally after every launch. Salt water is more corrosive and compromises grease faster than fresh water. Consider bearing protectors with a stainless piston for saltwater applications.
“Keeping your bearings greased and protected from water couldn’t be simpler.” — Nick Macrino, West Marine crew member
Ready to Upgrade Your Boat Trailer?
These five upgrades — a quality trailer jack, retractable tiedowns, LED trailer lights, guide-on posts, and bearing protectors — are among the highest-value improvements any trailer boater can make. Each is quick to install, works on virtually any trailer, and pays for itself in convenience, safety, and avoided repair costs.
Find your nearest West Marine store for hands-on help selecting the right sizes and specifications for your exact trailer and boat combination.
Related Articles
Boat Trailer Upgrade FAQs
A modern trailer jack like the Trailer Valet JX 5K makes hitching and unhitching faster and less physically demanding with its 5,000 lb capacity and drill-operated option. It eliminates the manual cranking effort that makes standard jacks frustrating after a full day on the water.
Retractable tiedowns eliminate loose, tangled straps at the ramp. They secure your boat with a pull-hook-and-tension motion and retract automatically when released. Both bow and transom straps should be used on any boat trailered at highway speeds — bow alone is not sufficient to prevent stern bounce on the bunks.
Hot incandescent bulbs crack when submerged in cold water — thermal shock. LED trailer lights have no filament or glass to crack, are sealed against water intrusion, and last up to 100,000 hours versus 3,000 for incandescent. Always unplug the trailer connector before backing into the water, even with LEDs, to minimize electrolytic corrosion at the connector pins.
48” posts work for most recreational trailers at moderate ramp depths. 60” posts are better for deeper ramps, longer hulls, or whenever you back further than average. Measure from the trailer frame to the waterline at your normal launch depth — the LED tips should clear the surface by at least 6” to remain visible. Shop guide-on posts.
Hot hubs from highway driving create negative pressure when submerged in cold water, which draws water past the seal and into the bearing grease. Bearing protectors maintain slight positive internal pressure to prevent this vacuum effect. The clear window or piston also gives you a visual grease level check — if the piston is flush or recessed, add grease before trailering.
Yes. All five upgrades require only basic hand tools — a socket set, a rubber mallet, and a drill for the jack. Each product includes the required hardware. The most involved installation is the LED light kit if you are replacing the full wiring harness; allow two to three hours for that job. The others can each be completed in under 30 minutes.
Saltwater is significantly more corrosive than freshwater. For saltwater trailering: use galvanized or stainless hardware throughout; specify bearing protectors with a stainless piston; use tinned marine-grade wire for any LED light wiring rather than standard automotive wire; rinse the entire trailer with fresh water after every launch; and re-grease bearings more frequently — ideally after every saltwater use rather than seasonally.
All five contribute to safety in different ways. LED lights improve visibility for other drivers on the road. Retractable tiedowns prevent the boat from shifting during transport. Guide-on posts make loading safer in wind, current, and low-light conditions. Bearing protectors reduce the risk of bearing failure and a roadside breakdown. A quality jack with adequate capacity prevents the jack from slipping or failing during hitching on uneven ground.
Inspect and re-grease at the start of every season as a minimum. Check the bearing protector piston before every trip — if it is flush or recessed, add grease before launching. After any trip where the trailer was submerged in saltwater, re-grease the bearings before storing. Every two to three seasons (or sooner if you trailer frequently), remove the hubs and inspect the bearings and races for corrosion, pitting, or wear, and replace as needed. Bearing replacement is inexpensive; a seized bearing on the highway is not.