
Most sterndrive and outboard manufacturers advise you to change the gearcase oil in your lower unit every 100 hours or once a year (whichever comes first). Clean oil is critical for protecting the heavily loaded gears in your lower unit and preventing expensive damage. Servicing the lower unit is a simple job that you can easily do yourself.
- What You'll Need to Change your Lower Unit Oil
- Choosing the Right Lower Unit Oil
- Steps to Changing the Lower Unit Oil
- A Few More Quick Tasks
- Glossary of Terms
- FAQ
What You'll Need to Change Your Lower Unit Oil
- A large, straight-blade screwdriver for the lower unit drain and vent plug screws
- Replacement O-rings/sealing washers for lower unit drain and vent plug screws
- Lower Unit Lube of the appropriate type
- Lower Unit Quart Pump & Lube Tube with an adapter fitting that fits your engine
- Catch pan for the used lower unit oil
- Container to carry used lower unit oil to a haz-mat recycling center
- Clean rags
- Disposable gloves, Mechanix Wear is a good bet
Choose the Correct Lower Unit Oil
Your Owner’s Manual will recommend the manufacturer’s proprietary lower unit lube and that is always a safe choice. We can recommend our West Marine and Pure Oceans brand Lower Unit lubes, which meet all engine manufacturer’s specifications and warranty requirements. For older Johnson/Evinrude outboards (1962-72) with electric shift, you’ll need Premium Type C Lube. We also carry oils from other major marine brands like Sierra, Quicksilver and Chevron.
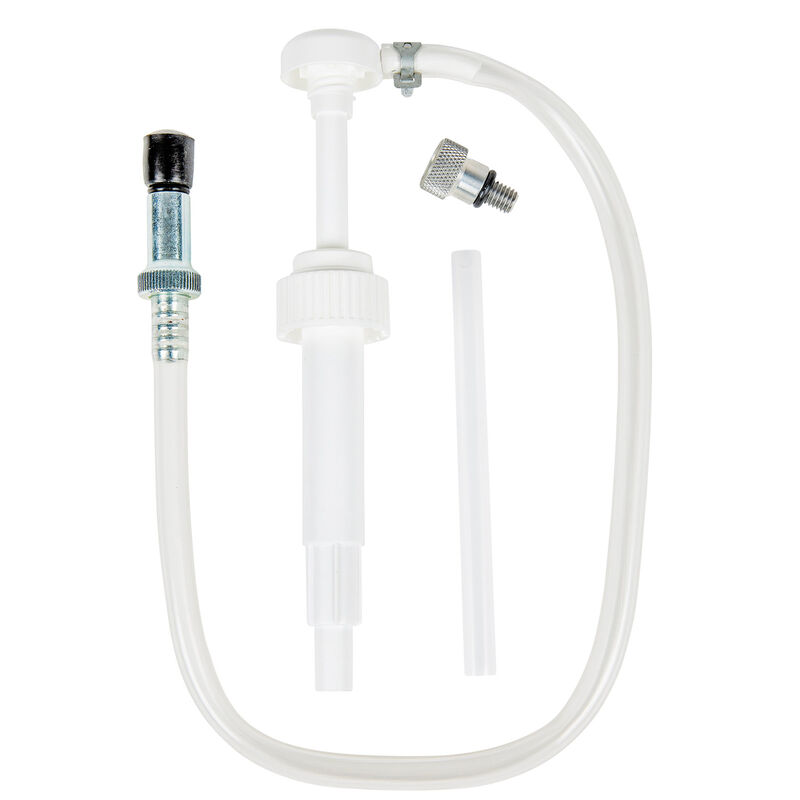 Our gear lube pump fits standard quart size bottles, includes a tube for all 8- and 10- ounce squeeze tubes and eliminates the mess of refilling lower unit oil.
Steps to Changing the Lower Unit Oil
Step 1: The lower drain/fill plug screw is usually located on the starboard side of the lower unit, beneath the “bullet-shaped” portion of the lower unit housing. Locate your drain/fill plug screw and adjust the trim/tilt of your outboard motor or sterndrive so that this plug is in the lowest position possible in order to drain the used oil thoroughly.
Step 2: Use your large screwdriver to remove the lower drain plug screw. This is often easier said than done, because the steel screw in an aluminum housing can become stuck due to galvanic corrosion. If yours is stuck, try soaking the plug with penetrating oil, like WD-40, and letting it work overnight. You can also pick up a manual impact screwdriver (less than $10 at Harbor Freight) which turns the plug slightly when hit with a hammer. Finally, you can try using heat from a heat gun. Be patient and persistent, but try not to strip the slot in the plug head because drilling out the plug will be a major headache.
Step 3: With the drain plug screw loosened and your catch pan in place, keep pressure on the screw so it won’t fall into the pan and be covered with oil. Snatch it away as the oil begins to slowly drip out. Then remove the upper vent plug screw, usually located above the cavitation plate on the starboard side of the lower unit, and the oil will gush rapidly out of the drain hole. Give the oil plenty of time to drain completely, ideally for an hour or more.
Step 4: The lower drain plug screw often has a magnetic tip. Fine metal filings stuck there are normal, but you don’t want to see ‘chunks’ of metal. Inspect the oil in the pan. Again, you may see some sparkle of metal filings in the oil, which is normal. However, milky white or creamy colored oil indicates that water has contaminated the gearcase, and gray oil indicates some kind of failure in the gears or a bearing. Consult your mechanic if your lower unit shows any of the above danger signs. These need to be fixed before the boat goes back in the water.
Step 5: After the oil is completely drained, screw the oil pump adapter fitting to the lower drain hole, connect the Quart Pump which you’ve placed onto your quart of gear oil, and fill the lower unit. Keep pumping until the oil runs out the upper vent plug hole indicating the oil level is high enough.
Step 6: We recommend installing new O-rings/sealing washers on your drain and vent plug screws and coating them with a little non-metallic, marine-grade anti-seize compound to make them easier to remove in the future. Clean all the metal flakes from the tip of both plug screws, and replace the upper vent plug screw in the lower unit. Next, you’ll remove the oil pump adapter fitting from the lower drain hole, with the lower drain screw in your hand and ready. Quickly replace the screw so only a little oil runs out.
Step 7: Now you can thoroughly wipe the exterior of your lower unit to keep the oil out of the environment. Then bottle up the used oil and take it to the local recycling center.
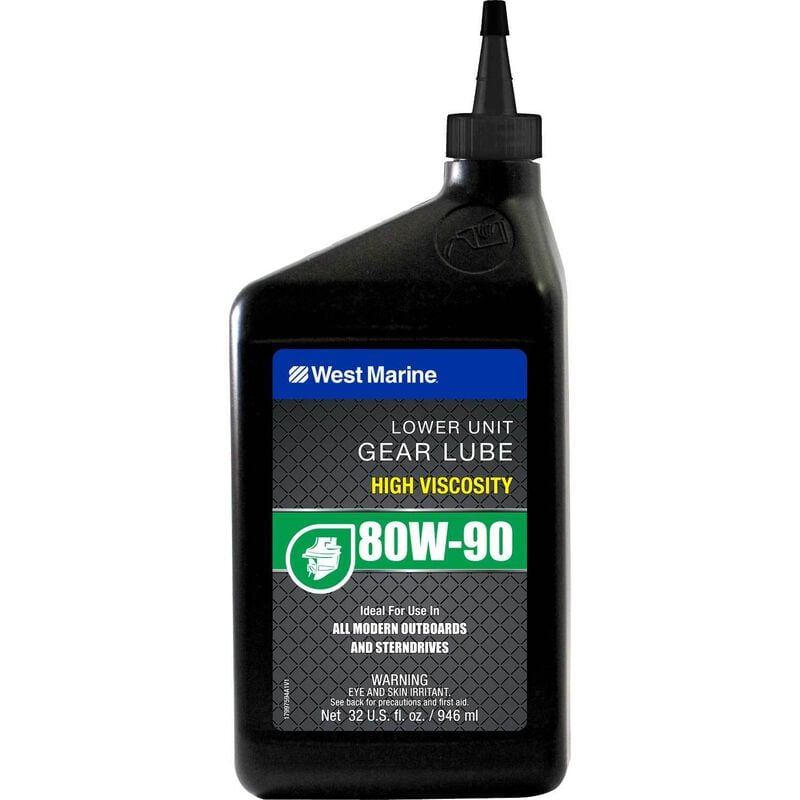 West Marine Synthetic Blend Lower Unit Gear Lube
A Few More Quick Tasks
- Apply some grease to the zerk fittings on the pivot points of the motor mount
- Check the anodes on the lower unit and replace them if they’re more than half dissolved.
- Pull the prop and check for fishing line wrapped around the shaft. Wipe the shaft clean and apply plenty of fresh grease before reinstalling the prop. This is also a great time to have the prop serviced, if needed. If you’re storing the engine on the boat, take the prop home to prevent theft.
- Touch up any nicks or areas where the paint is worn with engine enamel or aluminum-compatible antifouling paint.
Choosing the Right Anode Matters — Getting It Wrong Accelerates Corrosion
Anode material must match your water type. Zinc anodes are correct for saltwater. Aluminum anodes work in both saltwater and brackish water. Magnesium anodes are for freshwater use ONLY — using magnesium in saltwater causes it to dissolve far too quickly to protect anything, and using zinc or aluminum in freshwater can leave anodes underperforming or, in some cases, contribute to corrosion elsewhere on the boat. Check your current anode material before replacing it, and confirm it matches where the boat actually operates, not just where it’s stored.
Glossary of Terms
Anode (Sacrificial Anode): A piece of reactive metal — zinc, aluminum, or magnesium depending on water type — attached to the lower unit or hull that corrodes preferentially in place of more critical metal components, protecting the engine and hardware from galvanic corrosion.
Anti-Seize Compound: A lubricating paste applied to threaded fasteners before installation to prevent corrosion-induced sticking and make future removal easier.
Cavitation Plate: The flat, horizontal plate on a lower unit positioned above the propeller that helps direct water flow to the prop and reduces the ventilation and cavitation discussed in propeller performance.
Galvanic Corrosion: A corrosion process that occurs when two dissimilar metals are in electrical contact in the presence of an electrolyte, such as water, causing the more reactive metal to deteriorate faster — the reason steel drain plugs can seize in aluminum lower unit housings.
Gearcase: The sealed housing inside the lower unit that contains the gears transmitting power from the driveshaft to the propeller shaft, lubricated by gear oil to reduce friction and wear.
Lower Unit: The underwater housing on an outboard motor or sterndrive that contains the gearcase, propeller shaft, and associated gears, connecting the engine's power to the propeller.
Zerk Fitting: A small grease fitting installed at a pivot point or bearing surface that accepts a grease gun nozzle, allowing fresh grease to be injected to lubricate the joint.
Frequently Asked Questions
Most sterndrive and outboard manufacturers recommend changing lower unit gear oil every 100 hours of operation or once a year, whichever comes first. Check your owner's manual for the exact interval and oil type specified for your engine.
Milky white or creamy colored oil indicates water has contaminated the gearcase, most commonly through a worn or damaged seal. This needs to be diagnosed and repaired by a mechanic before the boat goes back in the water, since continued operation with water-contaminated oil can lead to gear and bearing damage.
A light sparkle of fine metal filings, especially stuck to the magnetic tip of the drain plug, is normal wear and not a cause for concern. Visible chunks of metal, or oil that has turned gray, indicate a gear or bearing failure and should be inspected by a mechanic before further use.
A stuck plug is usually caused by galvanic corrosion between the steel screw and aluminum housing. Soak it with penetrating oil overnight, try a manual impact screwdriver, or apply heat from a heat gun. Work patiently and avoid stripping the screw head, since drilling out a stripped plug is a much bigger job.
Zinc anodes are for saltwater. Aluminum anodes work in both saltwater and brackish water. Magnesium anodes are for freshwater use only. Using the wrong material for your water type means the anode won't protect your lower unit correctly, so confirm your anode material matches where the boat actually operates.
We’re Here to Help!
West Marine carries lower unit lube, quart pumps, anodes, and all the tools you need for routine engine maintenance. Click on our handy store locator to find a West Marine store near you.
Related: