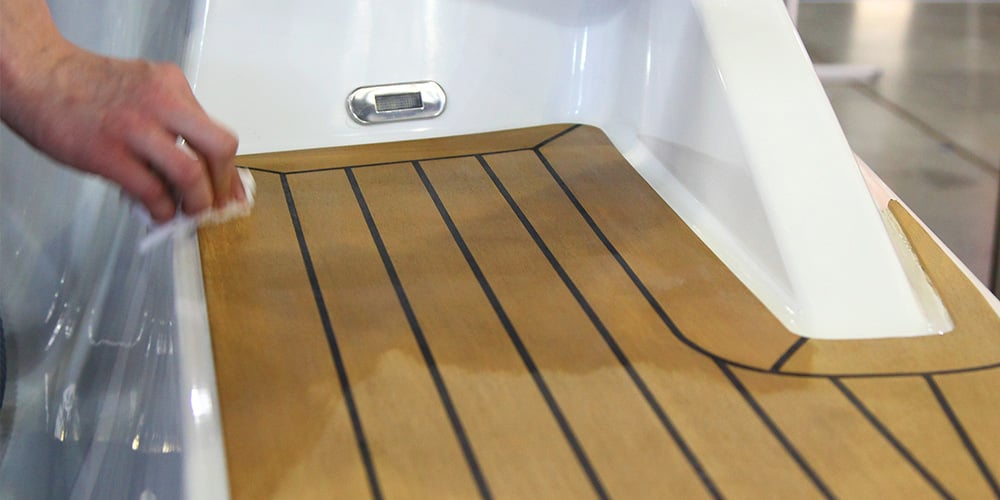
While it is hard to argue with the head-turning good looks of beautifully varnished teak, many boaters choose to protect their teak with oil instead. Teak oil gives exterior teak a warmer, more natural appearance without the high-gloss finish, intensive sanding schedule and multi-coat build process required by varnish. For boaters who want teak that looks cared for but still feels natural underfoot and in hand, oil is often the faster and more practical choice.
The biggest advantage of teak oil is ease of application. A properly varnished finish may require six or more coats, careful sanding between coats and several days of controlled drying time, which can keep the boat tied up at the dock. Teak oil can often be applied, absorbed and wiped down in a much shorter window, making it a better fit for boaters who want to refresh swim platforms, handrails, cockpit trim, companionway boards, steps or other exposed teak without turning the project into a weeklong refinishing job.
Teak oil is not the same as varnish, sealant or synthetic wood coating. It will not create a thick protective film over the wood, and it will require more frequent maintenance in sun, salt and rain. However, when applied correctly, it helps restore color, reduce dryness and improve the appearance of weathered teak while preserving the natural grain and texture that many boat owners prefer.
What is teak oil?
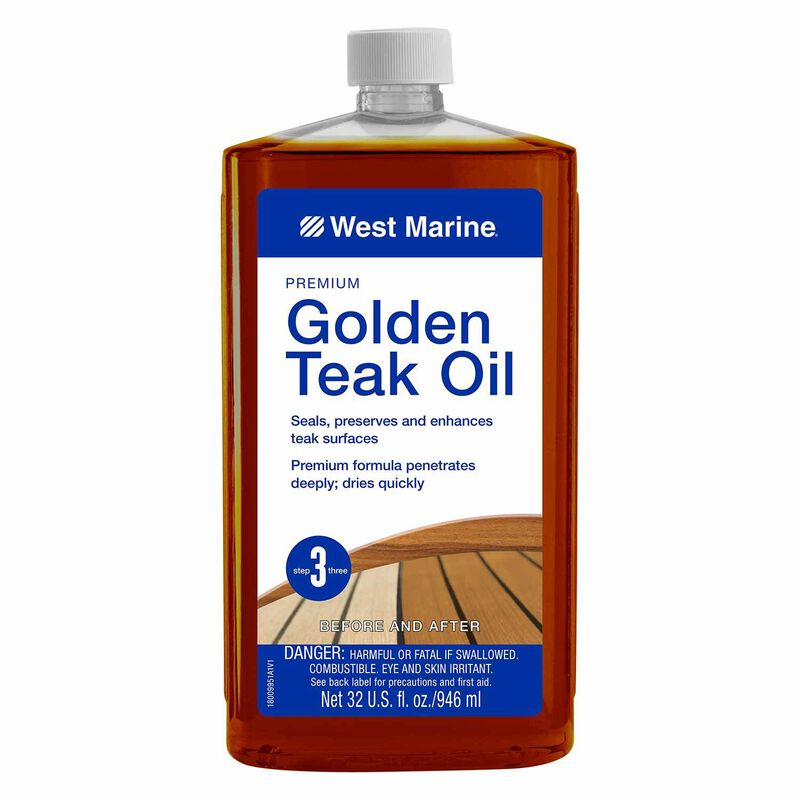
West Marine Premium Golden Teak Oil enjoys excellent customer reviews, with a rating of 4.9 out of five stars.
Teak oil is typically a blend of natural oils, such as linseed oil or tung oil, formulated to penetrate teak wood, enrich the grain and help protect the surface from moisture and weathering. Many teak oil formulas also include solvents to improve penetration, drying agents to speed curing and UV inhibitors to help slow sun-related fading.
Teak is naturally rich in oils, which is one reason it has long been used for marine trim, decking and exterior boat details. Over time, sun, saltwater, freshwater rinse cycles and cleaning products can dry the surface and turn teak gray or uneven. Teak oil helps restore a golden tone by replenishing the surface and enhancing the wood’s natural grain pattern.
What Teak Oil Does Well
Teak oil is ideal for boaters who want a natural, low-build finish that is easy to renew. It penetrates into the surface instead of forming a hard film, so touch-ups are usually simpler than with varnish. Lightly worn areas can often be cleaned and re-oiled without stripping the entire surface.
Teak oil also improves appearance quickly. On weathered but structurally sound teak, the first application often brings back warmth and contrast almost immediately. This makes it useful for seasonal refreshes before launch, boat shows, resale photos or routine maintenance projects.
What Teak Oil Does Not Do
Teak oil does not provide the same long-term UV protection, gloss or sealed surface that a properly maintained varnish system can provide. Because it remains a penetrating finish rather than a hard coating, it wears away faster in high-traffic areas and exposed locations.
For swim platforms, steps and cockpit areas that see frequent use, expect more frequent touch-ups. For brightwork where maximum gloss and long-term film protection are the priority, varnish may still be the better choice.
Teak Oils Available at West Marine
West Marine sells teak oil from trusted marine care brands, including West Marine-branded teak oil and other popular marine wood care products. Most teak oils are similar in general application method: clean the wood, allow it to dry, apply oil evenly, let the oil penetrate and wipe away the excess.
The best teak oil for your boat depends on how much exposure the wood receives, how often you are willing to maintain it and the final appearance you prefer. Some boaters prefer a rich golden finish, while others want a more subdued natural tone. For heavily weathered teak, the cleaning and preparation process usually matters more than the specific oil selected.
Choosing Teak Oil vs. Teak Sealer
Teak oil and teak sealer are often confused, but they are not exactly the same. Teak oil penetrates and enriches the wood, while teak sealer generally adds more surface protection and may slow weathering longer. Oil is easier to renew, while sealer can last longer between applications depending on exposure.
If you like a natural feel and do not mind regular maintenance, teak oil is a strong choice. If you want longer protection with less frequent recoating, a teak sealer may be worth considering.
When Teak Oil Makes the Most Sense
Teak oil is a good choice for handrails, trim, companionway boards, cockpit details, interior teak accents and lightly exposed exterior wood. It is especially useful for boat owners who want a clean, cared-for appearance without committing to varnish work.
It may be less ideal for areas where standing water, heavy foot traffic or intense sun exposure are constant. In those locations, plan on more frequent maintenance or consider a more durable finish system.
How to Clean, Oil and Maintain
Your Teak
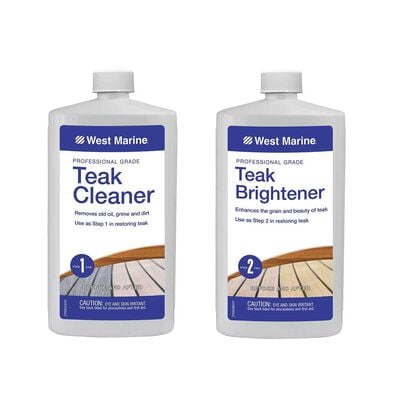
For heavily soiled teak, choose a two-part teak cleaner like what you see here.
If you have made the decision to finish your teak with oil, preparation is the most important part of the job. Oil applied over dirt, salt, mildew, old coatings or uneven oxidation will not penetrate evenly and may leave a blotchy finish. Taking time to clean, rinse, dry and sand properly will produce a more consistent result and help the oil absorb into the wood.
Here is a list of materials you will need to complete a typical teak oil refinishing project:
- Teak oil
- One- or two-part teak cleaner
- Garden hose with nozzle
- Masking tape
- Sandpaper (required grit varies)
- Clean white cloth rags
- Foam or conventional paint brush
- Nitrile gloves
- Mineral spirits (for cleaning tools and wiping up runs or spills)
- Protective eyewear and a paper face mask (recommended for safety)
The following steps cover what is required to complete a typical teak oil refinishing project.
Step 1: Clean the teak
For lightly soiled teak, start with a one-step teak cleaner, such as one by Star brite or West Marine. For moderately or heavily soiled teak, a more aggressive two-part teak cleaner may save time and produce more even results. Always wet the teak thoroughly before applying cleaner and follow the manufacturer’s directions carefully.
Use a soft-bristled scrub brush and scrub as gently as possible, working across the grain rather than aggressively with the grain. Teak grain is hard, but the softer material between the grain can be damaged by stiff brushes, pressure washers or heavy scrubbing pads. Rinse thoroughly and immediately wash away cleaner runoff from metal fittings, gelcoat, paint and hardware.
When to Use One-Part vs. Two-Part Teak Cleaner
One-part teak cleaners are best for routine maintenance, light dirt, mild oxidation and teak that has been regularly cared for. They are usually easier to use and less aggressive, making them a good choice for teak that only needs a seasonal refresh.
Two-part teak cleaners are better for heavily grayed, stained or neglected teak. They are more aggressive and can restore color quickly, but they require careful rinsing and should be used with attention around metal hardware and surrounding finishes.

For masking off around teak to be oiled or varnished, 3M Blue Painter's Tape is a popular choice.
Step 2: Sand the teak
After cleaning, thoroughly rinse the teak and allow it to dry completely before sanding. Sanding levels the surface, removes raised grain and helps prepare the wood to accept oil evenly. Before sanding, mask off nearby gelcoat, painted surfaces, metal trim and nonskid areas to reduce the risk of accidental scuffing.
For teak handrails, cockpit coamings, companionway boards and trim, starting with 60 or 80 grit and working up to 120 grit is often sufficient. For smoother decorative pieces, you may continue to a finer grit, but avoid polishing the surface so much that oil penetration is reduced. A palm sander or dual-action sander can save time on large flat areas, while hand sanding is usually better for edges, corners and curved trim.
How Much Sanding is Enough?
The goal is to create a clean, even surface without removing unnecessary wood. Stop sanding once the surface looks uniform, feels smooth and no longer shows heavy oxidation, rough grain or leftover coating residue.
Over-sanding teak can round edges, thin trim pieces and reduce the life of exterior woodwork. Use the least aggressive grit that produces the desired result.
Step 3: To mask or not to mask?
At this point you are almost ready to apply the oil, but first decide whether to re-mask around the teak. Masking is common and often helpful, especially near gelcoat or painted surfaces. However, it is not always completely effective around molded nonskid or textured surfaces where oil can creep under tape.
Whether you mask or not, keep a clean rag and mineral spirits nearby to quickly wipe up drips, runs or accidental smears. Removing oil while it is still wet is much easier than cleaning it after it becomes tacky.

When used to apply teak oil, foam paint brushes tend to drip less than conventional paint brushes.
Step 4: Apply the oil
Before applying teak oil, lightly wipe the wood with a clean tack cloth or dry lint-free rag to remove sanding dust. Pour a small amount of oil into a clean, dry container instead of working directly from the bottle. This helps prevent contamination and gives better control during application.
Use a foam brush, conventional brush or clean rag to apply the oil in the direction of the grain. Apply a thin, even coat and allow the wood to absorb it. Watch for dry areas that soak up oil quickly and reapply as needed while avoiding heavy puddles or thick surface buildup.
Step 5: Follow up with additional coats
Let the first coat soak into the wood before applying additional coats. Weathered teak may absorb multiple coats quickly, while newer or denser teak may accept less oil. Continue applying thin coats until the wood appears evenly saturated and no longer absorbs oil readily.
For many projects, this happens around the third coat, but actual absorption depends on wood condition, temperature, humidity and how dry the teak was before application.
Step 6: Wipe off the excess
After the final coat has had time to penetrate, wipe off all excess oil with a clean, dry cloth. Leaving excess oil on the surface can result in tackiness, streaking, uneven sheen and dirt attraction. Wipe in the direction of the grain for the cleanest appearance.
Do not leave oil-soaked rags piled together after use. Many oil-based finishing products can generate heat as they dry, creating a fire risk. Follow the product label for safe rag disposal, drying and storage.
Step 7: Let it dry
Allow the teak oil to dry completely before walking on the surface, reinstalling cushions or using the boat normally. Dry time varies depending on temperature, humidity, airflow and how much oil was applied. If the surface feels tacky, it likely needs more drying time or additional wiping to remove excess oil.
Step 8: Step back
Once the oil has cured, the teak should have a warm, natural appearance that highlights the grain without creating a heavy gloss film. The result should look clean and refreshed while still preserving the natural character of the wood.
Periodic Maintenance
Regularly maintain your teak wood finish by applying teak oil every 3 to 9 months, depending on exposure to sun, salt, rain and foot traffic. Boats stored under cover may need oiling less often, while exposed exterior teak in tropical sun or saltwater environments may need more frequent attention.
Between full applications, rinse teak regularly with fresh water and avoid harsh scrubbing whenever possible. Gentle cleaning helps preserve the wood surface and prevents unnecessary grain erosion.
Signs Your Teak Needs More Oil
Teak may need another coat of oil when it begins to look dry, faded, gray or uneven. Water may stop beading on the surface, and high-touch areas like handrails or steps may lose color faster than protected trim.
Common Teak Oil Mistakes to Avoid
Avoid applying teak oil over dirty, wet or heavily oxidized wood. Do not apply thick coats and assume more oil equals better protection. Excess oil left on the surface can become sticky and attract dirt.
Also avoid aggressive pressure washing or scrubbing with stiff brushes, which can erode the softer grain between teak’s harder growth lines.