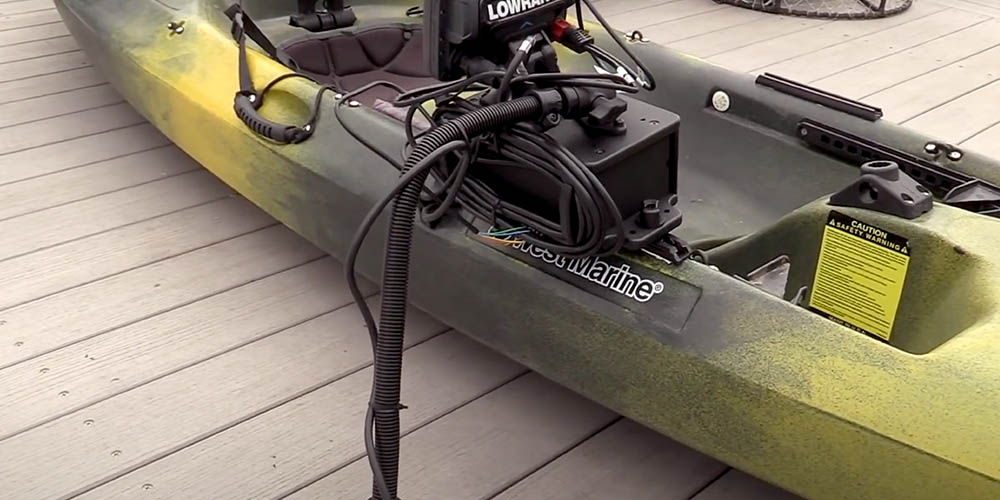
West Marine product specialist Mike Montgomery demonstrates a complete fishfinder installation on a West Marine Pompano sit-on-top kayak. The video covers every stage of the process in close-up detail: installing and sealing the track, building and installing the cell block, positioning and installing the transducer arm, installing the battery, and wiring the unit to power. The full installation took about four hours. Before you start your own, read the notes below — the decisions you make before drilling anything determine how well the finished installation works and holds up over time.
- What Makes a Kayak Installation Different
- Common Mistakes to Avoid
- Tools and Shopping List
- Installation FAQ
Before You Start: What Makes a Kayak Installation Different
Installing a fishfinder on a kayak differs from installing one on a powerboat, particularly in how the equipment is mounted, powered and exposed to water. Planning the installation before drilling can help avoid problems later.
Power and wiring. A kayak typically requires a separate battery and wiring for the fishfinder rather than relying on an existing boat electrical system. The battery should be secured in the hull or another protected location where it cannot shift during normal use. Keep the wiring short and route it where it will not be pinched or snagged. Use marine-grade tinned wire and sealed crimp connections appropriate for the equipment and battery.
Track mounting. Before drilling, sit in the kayak in your normal fishing position and confirm that the display will be easy to see and that the transducer arm will not interfere with your paddle stroke. Mark the track location and verify its position before drilling. If you later move the track, the original holes will need to be sealed.
Sealing penetrations. Any holes drilled through the hull should be properly sealed to help prevent water intrusion. Use a sealant appropriate for the kayak's hull material and the type of installation. On polyethylene kayaks, make sure the sealant is compatible with the plastic, as some marine sealants do not adhere well to polyethylene. Follow the sealant manufacturer's instructions for application and cure time before loading the track.
Transducer placement. The transducer should be positioned where it remains fully submerged and has a clear path through the water. On a sit-on-top kayak using a transducer arm, a position forward of the seat may help reduce interference from paddle turbulence. Keep the transducer face properly oriented according to the manufacturer's instructions. Check its position with the kayak loaded as it will be used, including the paddler and typical gear.
Battery selection and wiring. A compact sealed lead-acid or lithium battery can provide power for a kayak fishfinder. Choose a battery with sufficient capacity for the fishfinder's current draw and intended operating time. Secure the battery to prevent movement and protect the wiring from pinching or abrasion. Use properly sized marine-grade tinned wire and appropriate crimp terminals. Adhesive-lined heat-shrink tubing can provide additional protection for exposed connections.
Common Mistakes to Avoid
Failing to seal screw holes. Seal holes drilled through the kayak hull to help prevent water intrusion. On composite kayaks, avoid damaging or exposing the core. On polyethylene kayaks, use a sealant compatible with the hull material, since some marine sealants do not adhere well to polyethylene. Apply the sealant according to the manufacturer's instructions and allow it to cure before loading the track.
Positioning the transducer too far aft. Paddle turbulence can interfere with sonar performance, particularly when the transducer is close to or behind the paddler. When practical, position the transducer forward of the seat where it has a cleaner flow of water. Follow the transducer manufacturer's recommendations for placement and orientation.
Using unprotected wire connections. Kayak wiring can be exposed to water, so protect electrical connections against moisture and corrosion. Use properly sized marine-grade tinned wire and crimp terminals, with adhesive-lined heat-shrink tubing where appropriate. Use suitable battery terminals or disconnects rather than attaching bare wire directly to a battery terminal.
Skipping a fully loaded test. Before your first fishing trip, test the system with the kayak loaded as it will be used. Check that the transducer remains properly submerged and oriented, the fishfinder operates correctly, and the track and mounts are secure. The kayak's waterline and trim can change significantly with the paddler and gear aboard, so checking the installation under normal operating conditions is worthwhile.
Tools and Shopping List
| Skill Level Description | |
|---|---|
| Installing the track and caulking: 2 out of 10 | |
| Assembling the Portable Kayak Transducer Kit: 5 out of 10 | |
| Electrical wiring and connections: 4 out of 10 | |
| Tools Required | Shopping List |
|
|
Kayak Fishfinder Installation FAQ
A first-time installation involving track mounting, transducer arm assembly, battery wiring, and fishfinder setup can take several hours. The installation shown in the video took about four hours. Allow additional time for planning and for sealant to cure before using the installation.
Many fishfinders can be installed on a kayak, provided the display, transducer, mounting system, battery, and wiring are compatible. Kayak-specific kits can simplify installation by providing a transducer mount and other necessary hardware. Without a kit, you may need to source these components separately.
Position the transducer where it will remain properly submerged and oriented according to the manufacturer's recommendations. On a sit-on-top kayak with an external transducer arm, positioning it forward of the seat can help reduce interference from paddle turbulence. Check the transducer's position with the kayak loaded as it will be used, including the paddler and typical gear.
Use a marine-grade waterproof sealant compatible with the kayak's hull material and suitable for the type of installation. Products such as 3M 4200 or 3M 4000 UV may be appropriate for some applications, but follow the sealant manufacturer's recommendations. On polyethylene kayaks, verify that the product is compatible with the plastic, since some sealants have limited adhesion to polyethylene. Allow the sealant to cure according to the manufacturer's instructions before loading the track.
Choose a battery with sufficient capacity for the fishfinder's current draw and the amount of operating time you need. Compact sealed lead-acid and lithium batteries are commonly used for kayak fishfinders. Check the fishfinder manufacturer's specifications when determining the required battery capacity. Secure the battery to prevent movement and protect the electrical connections from moisture.
Many sit-on-top kayaks can accommodate a fishfinder, provided there is a suitable location for the display, transducer and battery. Some fishing kayaks include accessory tracks, transducer mounting areas or other features that simplify installation. If the kayak already has a compatible accessory track, a fishfinder mount may be installed without drilling. Always consider the kayak's construction, available mounting locations and the fishfinder manufacturer's installation requirements before beginning.
Browse Fishfinders and Marine Electronics
- Fishfinders — sonar, CHIRP, downscan, and fish-finding electronics
- Chartplotters, GPS units, radar systems, and integrated navigation displays
- Kayak accessories — mounts, rod holders, anchors, and gear
- Kayaks — fishing, touring, sit-on-top, and recreational
- Marine sealants, adhesives, and caulking products
- Electrical wiring tools — crimpers, strippers, and heat shrink
- VHF radios, AIS, and marine communication equipment
- Marine stereos, speakers, amplifiers, and audio accessories