A boater once shared how a simple fishing trip turned into an expensive afternoon on the highway. About an hour into the drive, he felt a vibration and saw smoke in his mirror. One trailer wheel had locked up—the bearings overheated, failed, and ruined the hub. The cause? Years of launching and retrieving without ever repacking his trailer bearings. To be sure, repacking trailer bearings can be a messy job, but it’s critical preventative maintenance for safe towing and stress-free trips.
In This Article
- Why Trailer Bearing Maintenance Matters
- How Often Should Boat Trailer Bearings be Repacked?
- Shop for the Trailer Parts You Need
- How to Repack Trailer Bearings (Step by Step)
- When Trailer Bearings Need Replacement (Not Just Grease)
- Final Tip for Trailer Bearing Safety
- Trailer Bearing Maintenance FAQ
- Related Articles
Why Trailer Bearing Maintenance Matters
Trailer wheel bearings support the full weight of your boat and trailer at highway speed and through launches and retrievals. Frequent water submersion, especially in saltwater, increases the risk of corrosion and bearing failure. Proper lubrication reduces friction and extends bearing life, while neglected bearings can lead to overheating hubs, bearing failure, and roadside strandings.
How Often Should Boat Trailer Bearings be Repacked?
Most boat trailer wheel bearings should be repacked at least once per year. For frequent towing or saltwater use, repacking every 6 months is a safer interval.
Repack bearings more often if you launch in saltwater, tow long distances, submerge the trailer frequently, or don’t know the trailer’s service history.
 Along with periodically repacking your bearings, we recommend that you install bearing protectors which reduce wear-and-tear by maintaining a slightly positive pressure inside your hubs to keep corrosion-causing moisture out.
The Role of Bearing Protectors
While bearing protectors help to safeguard against moisture intrusion, they don’t remove old, contaminated grease or allow you to inspect the bearings and races. Periodic repacking lets you replace contaminated grease and catch wear before it leads to failure.
Bottom line: Annual bearing repacks are the minimum for most trailers. More frequent service helps prevent overheating hubs, seized wheels, and roadside breakdowns.
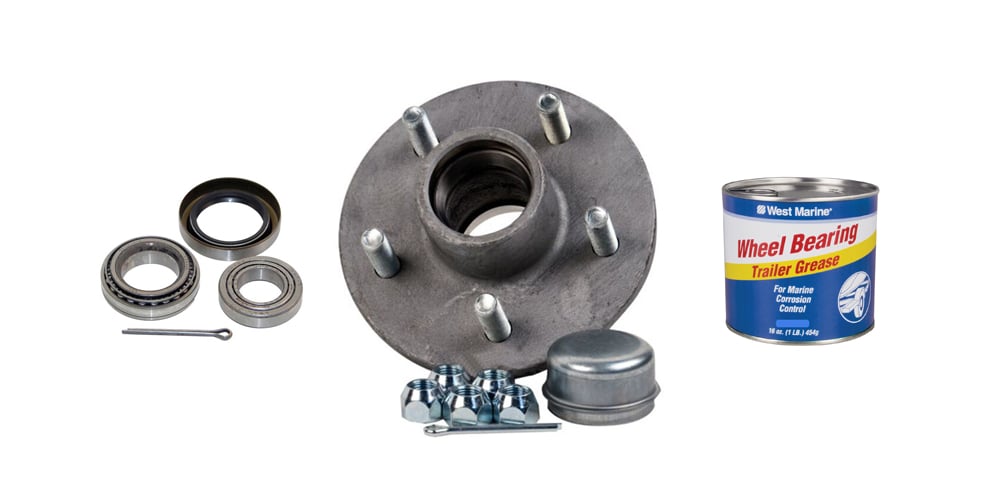
Shop for the Trailer Parts You Need
- Trailer Wheels and Tires
- Trailer Bearings, Bearing Grease, Hub Kits, Grease Guns
- Trailer Brakes and Axles
How to Repack Trailer Bearings (Step by Step)
What You’ll Need
- Marine-grade grease (waterproof)
- Grease gun
- Brake cleaner or mineral spirits for cleaning parts
- Small plastic tub
- Scissor jack or floor jack
- Jack stand
- Lug wrench
- Slip joint pliers
- Large flathead screwdriver
- Rubber mallet
- Roll of household paper towels or Scott Blue Shop Towels for greater strength.
- Nitrile disposable gloves
- Wheel chock(s)
1. Park safely and prepare.
Park the trailer on level ground, set the parking brake, and chock the opposite wheel(s) to prevent rolling. Make sure you have plenty of disposable shop wipes and all the tools, parts and materials you'll need within reach. Now, put on your gloves and wipe dirt off from around the hub and dust cap.
2. Loosen the lug nuts.
Slightly loosen the lug nuts while the wheel is on the ground—don’t remove them yet.
3. Lift and support the trailer.
Use a scissor jack or a floor jack to lift the trailer frame near the wheel and support it with a jack stand. Instead of a jack stand, you can use blocks of wood. Never rely on the jack alone.
4. Remove the tire and rim.
Remove the lug nuts and slide the tire off the hub.
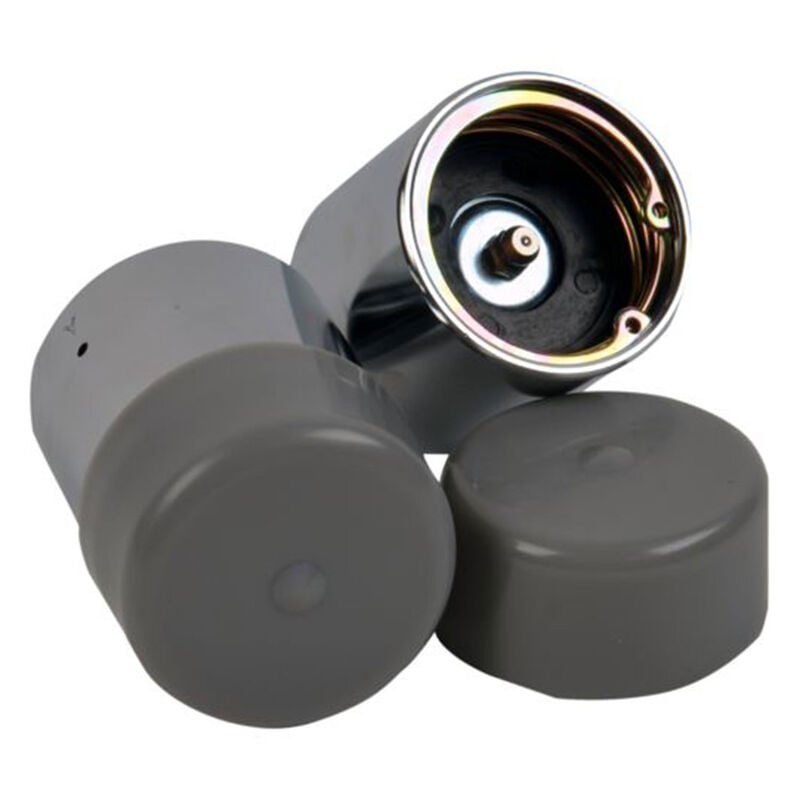
5. Remove the dust cap or bearing protector. (If so equipped)
Using slip joint pliers or a flathead screwdriver, gently pry off the dust cap or bearing protector. Remove all of the old grease from inside the dust cap or bearing protector and place it in a plastic tub. The hub retaining nut and washer will now be exposed. (This will usually be a castle nut held in place by a cotter pin.)
6. Remove the hub from the spindle.
Using pliers, straighten and remove the cotter pin, and discard it. Next, remove the castle nut and washer, wipe off the grease, and place them in a small plastic tub. Now, pull the hub off the spindle, and set it on a clean surface with the outer surface (the side with the studs) facing up. At this point, remove any trace of grease or dirt from the spindle and inspect it for signs of pitting, scoring, or other damage. (Since the focus of this article is preventative maintenance, we're going to assume that the spindle checks ok.)
7. Remove the outer bearing from the hub.
With your fingers, pull the outer bearing out of the hub, wipe off the grease, and place it in the plastic tub along with the castle nut and washer.
8. Remove the grease seal from the hub.
Turn the hub over so that the surface opposite the side with the studs is facing up. Being careful not to damage the bearing, use a large flathead screwdriver to pry the grease seal out of the hub. Once removed, discard it.
9. Remove the inner bearing from the hub
With the grease seal now removed, grab the inner bearing and pull it out of the hub. Wipe away the grease, and put it in the plastic tub.
10. Inspect the Bearing Races
With your fingers, remove the majority of old grease from inside the hub. Follow up with a wiping cloth moistened with brake cleaner or mineral spirits to remove all traces of remaining grease. Now, inspect the bearing races for scoring, pitting, or other damage. (Again, since the focus of this article is preventative maintenance, we're going to assume that the bearing races are ok.)
11. Clean and Inspect the Bearings
Thoroughly wash the bearings (which you have placed in a plastic tub along with the castle nut and washer) with brake cleaner or mineral spirits and a parts brush. Do the same for the washer and the castle nut. After allowing these parts to thoroughly dry, look for smooth, shiny bearing surfaces. (Again, since the focus of this article is preventative maintenance, we're going to assume that the bearings are ok.)
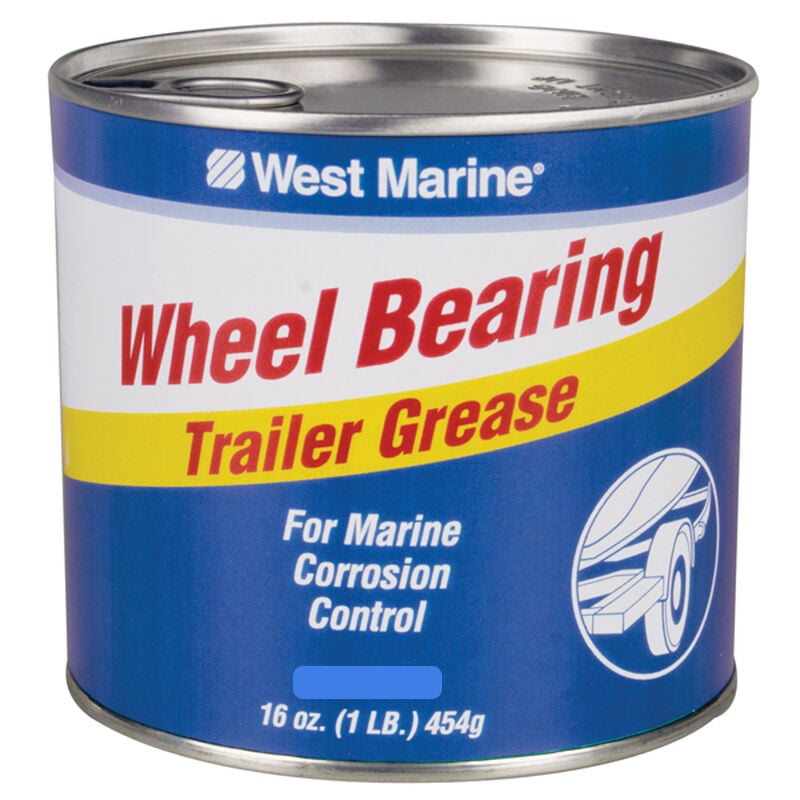 When repacking your wheel bearings by hand, you're going to need a tub of bearing grease rated for marine use like what you see here.
12. Repack the Bearings
Old School Method: Place a dollop of marine-grade waterproof grease into the palm of your hand. Then, while holding one of the bearings with the wide side facing down, press it firmly into the grease in your palm. Force grease up through the bearing cage until it squeezes out between the rollers on the opposite side. Rotate the bearing slightly and repeat until fresh grease emerges evenly all the way around. Finish by swabbing a layer of grease around the outside of the bearing. Repeat this process for the other bearing.
The Easier Way: Instead of using your hands, you can cut down on the mess by using a bearing packer, which is a relatively inexpensive device, available at most auto parts stores, that you can use to press new grease into your bearings.
13. Reinstall the inner bearing.
With your finger, swab a layer of grease around the inner bearing race and then press the inner bearing into the race. Make sure it seats evenly.
14. Install a new grease seal.
Place a new grease seal over the inner bearing and carefully tap it into the hub with a rubber mallet. Ensure that it seats evenly. Finish by swabbing a layer of grease into the gap between the grease seal and the inner bearing.
15. Reinstall the outer bearing.
Swab a layer of grease onto the surface of the outer race. Then, with your fingers, press the outer bearing into the race and ensure that it seats squarely.
16. Reinstall the hub.
First, with your hand, slather a layer of grease on to the spindle. Next, carefully put the hub on to the spindle, taking care not to dislodge the outer bearing. Next, slide on the washer and screw on the castle nut, and lightly snug the nut up with a wrench. You should see some grease squeezing out around the bearing. Lightly snug up the nut again while rotating the hub. Finish by backing off the nut so it is just finger tight. Then, slip in a new cotter pin and bend it around the nut.
17. Reinstall the dust cap or bearing protector.
Fill the dust cap or bearing protector with fresh grease and tap it on to the hub with a rubber mallet. If you are installing a Bearing Buddy bearing protector, add some grease to it with a grease gun until you notice the diaphragm beginning to press outward.
18. Reinstall the wheel.
Put the wheel back onto the hub, hand-thread on the lug nuts, lower the trailer until the tire lightly touches the ground, then tighten the lug nuts in a criss-crossing star pattern using a lug wrench.
19. Final Lowering and Torque
Lower the trailer fully, remove the jack stand, and then give the lug nuts a final tightening, again in a criss-crossing star pattern, using a lug wrench.
20. Repeat on the Other Side
Always service both sides of the trailer for balanced maintenance.
When Trailer Bearings Need Replacement (Not Just Grease)
Greasing bearings helps most minor issues, but some situations call for replacement parts instead of fresh grease:
- Rust or pitting on the bearings — Strong signs of corrosion requiring new parts.
- Milky or discolored grease — Indicates water intrusion and compromised grease.
- Grinding or rumbling noises when spinning the wheel.
- Excessive hub heat on short drives.
- Rough or uneven wheel rotation when the trailer is lifted.
- Metal shavings or debris in the grease.
Replace Bearings as a Complete Set
When replacing bearings, install both inner and outer bearings and a new grease seal for best results.
Age and Usage Considerations
Even if bearings appear okay, replacement is wise if you don’t know the service history, the trailer is frequently used in saltwater, or they haven’t been serviced in multiple seasons.
Final Tip for Trailer Bearing Safety
Repack your trailer bearings at least once per season—or more often for frequent use. Carry basic spares like a bearing kit, grease, and tools in your tow vehicle. For comprehensive boat trailer inspection and safety tips, visit West Marine’s DIY Safe and Trouble-Free Trailering Guide
Trailer Bearing Maintenance FAQ
How often should trailer bearings be greased?
Most boat trailers should have their wheel bearings repacked at least once per season or every 12 months. If you frequently launch in saltwater or tow long distances, greasing trailer bearings twice per year helps prevent corrosion and bearing failure.
What type of grease should I use for trailer wheel bearings?
Use a marine-grade, waterproof wheel bearing grease designed specifically for boat trailers. Marine trailer bearing grease resists water washout and protects against rust, corrosion, and heat buildup.
When using a grease gun, can I over-grease trailer bearings?
Yes. Overgreasing of bearings with a grease gun can create excess pressure inside the hub and blow out the grease seal. A damaged seal allows water to enter the hub and can lead to premature wheel bearing failure.
How do I know if my trailer bearings are failing?
Signs of failing trailer bearings include grinding or rumbling noises, excessive hub heat after towing, rough wheel rotation, grease leaking from the hub, or metal shavings mixed in the grease.
Should I replace trailer bearings or just repack them?
If the bearings show rust, pitting, discoloration, or make noise when spinning, replacement is recommended. Greasing or repacking trailer wheel bearings is only effective when the bearings are clean and undamaged.
Do trailer bearings need replacement after saltwater use?
Saltwater use accelerates corrosion, even with regular maintenance. Trailer bearings used in saltwater should be inspected more often and typically need replacement sooner than bearings used only in freshwater.
What happens if a trailer bearing fails while towing?
A failed trailer bearing can cause the wheel to overheat, seize, or separate from the axle. Bearing failure often damages the hub and spindle and may leave you stranded on the roadside.
Should I carry spare trailer bearings?
Yes. Carrying a spare trailer bearing kit, marine grease, and basic tools is strongly recommended, especially for long-distance towing. Spares can turn a potential breakdown into a manageable roadside repair.