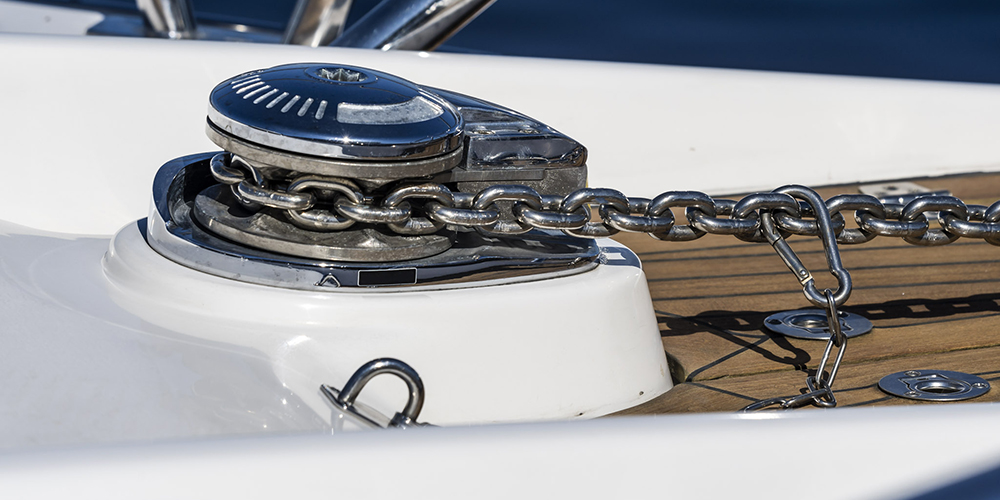
A windlass is a game-changer for boaters who anchor frequently, making it easy to raise and lower the anchor with the push of a button. But installing and wiring a windlass system isn’t as simple as connecting a couple of wires—it requires careful planning to ensure safe and reliable operation.
With this step-by-step guide, we walk you through how to wire a windlass system on your boat, covering everything from component selection to final testing.
- Understanding Your Windlass System
- Step 1: Choose the Right Wire and Components
- Step 2: Plan Your Wire Routing
- Step 3: Install the Circuit Breaker and Battery Connection
- Step 4: Wire the Solenoid
- Step 5: Connect the Windlass Motor
- Step 6: Install and Wire the Control Switches
- Step 7: Test the System
- Step 8: Secure and Protect the Wiring
- Conclusion
- How to Wire a Windlass on Your Boat FAQs
- We're Here to Help!
- Related Articles
Understanding Your Windlass System
An electric windlass system consists of several key components:
- Windlass—The electric motorized winch that raises and lowers the anchor. Shop all windlasses>
- Battery—Supplies the necessary power, usually from the boat’s deep cycle house battery or a battery dedicated to the windlass alone. Shop all marine batteries>
- Circuit Breaker or Fuse—Protects the wiring and motor from overcurrent situations. Shop all circuit breakers, fuses and fuse holders>
- Control Switches—These may include a deck switch (foot pedal), a helm switch, or a remote control. Shop all windlass switches and breakers>
- The Solenoid—Acts as a relay between the switch and the motor, allowing high current to flow without overloading the switch. Shop all windlass solenoids>
- Heavy Gauge Wiring—Depending on how many amps the windlass draws and the length of the wire run, this can be either heavy gauge primary wiring or battery cable, both of which are sold by the foot. Shop all marine wire>
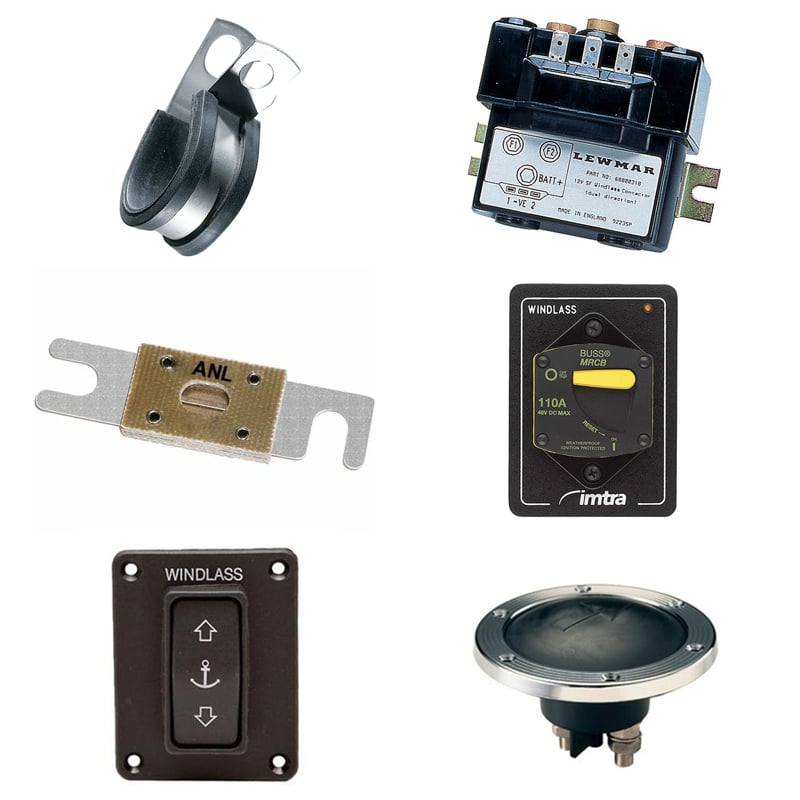 Examples of windlass system components: Top Row: Ancor Wire/Cable Clamp, Lewmar Dual-Direction Windlass Control Solenoid; Middle Row: Blue Sea Systems ANL Ignition-Protected Fuse, Imtra Bussmann Type III Class Thermal Circuit Breaker; Bottom Row: Lewmar Guarded Rocker Switch, West Marine Heavy-Duty Deck Footswitch.
Step 1: Choose the Right Wire and Components
Windlasses pull significant amperage, typically 40A–200A depending on the model and boat size. Using undersized wires can cause overheating, voltage drop, and system failure.
Wire Sizing Guidelines:
- Check the windlass manufacturer’s recommendations for proper wire gauge. In the absence of manufacturer recommendations, see our West Advisor article Marine Wire Size and Ampacity.
- Use only marine-grade, tinned copper wire to prevent corrosion.
- If your windlass is 20 feet or more from the battery, you may need 2 AWG or thicker cables.
Fuse and Circuit Breaker:
- Install a thermal circuit breaker or fuse rated for your windlass (typically 80A–150A).
- The fuse or breaker should be installed as close to the battery as possible.
Solenoid:
Most windlasses require a reversing solenoid, allowing the motor to run in both directions (up and down). Ensure the solenoid is rated for continuous marine use.
Step 2: Plan Your Wire Routing
Before cutting or running wires, decide on the best path from the battery to the windlass while avoiding hazards like:
- Sharp edges that can chafe wires
- Areas exposed to water or fuel
- Heat sources like engine compartments
Use cable clamps every 12–18 inches to secure wiring and prevent movement from vibrations.
Step 3: Install the Circuit Breaker and Battery Connection
- Mount the circuit breaker near the battery in an accessible location.
- Connect the positive cable from the battery’s positive terminal to one side of the circuit breaker.
- Connect another heavy-gauge cable from the circuit breaker to the solenoid’s main power input.
Pro Tip: Always install the circuit breaker as close to the battery as possible to protect the wiring from shorts.
Step 4: Wire the Solenoid
The solenoid acts as an electrical switch, allowing high current to flow to the windlass motor.
Wiring the Solenoid:
- Terminal 1 (Power In): Connect the positive wire from the circuit breaker.
- Terminal 2 (Power Out to Windlass): Run a heavy-gauge wire to the windlass motor’s positive terminal.
- Ground Terminal: Connect to the battery negative or a grounding busbar.
Ensure all connections are tight and corrosion-resistant by using marine-grade heat shrink connectors.
Step 5: Connect the Windlass Motor
- Run the positive cable from the solenoid output to the windlass motor’s positive terminal.
- Run a negative (ground) cable from the windlass motor back to the negative battery terminal or ground bus.
Step 6: Install and Wire the Control Switches
You need at least one control switch, but many installations include multiple switches:
- Deck Switches (Foot Pedals): Mounted near the windlass for easy access.
- Helm Switch: Allows operation from the boat’s console.
- Wireless Remote (Optional): For controlling the windlass from anywhere on board.
Wiring the Switches to the Solenoid:
- Connect the UP switch terminal to the solenoid’s UP control input.
- Connect the DOWN switch terminal to the solenoid’s DOWN control input.
- Run a ground wire from the switches to the negative bus or battery negative.
Most switches are low-current control circuits, so they use smaller gauge wires (typically 14 AWG or 16 AWG).
Step 7: Test the System
Before anchoring in deep water, test your windlass at the dock:
- Turn on the circuit breaker.
- Press the “Down” switch—the windlass should deploy the anchor.
- Press the “Up” switch—the windlass should retrieve the anchor.
If the windlass doesn’t move, check connections, fuses, and switch wiring.
Troubleshooting Tips:
- Windlass doesn’t work at all? Check the circuit breaker and battery connections.
- Only moves in one direction? Verify switch wiring to the solenoid.
- Motor sounds weak or slow? Check for voltage drop—your wire gauge may be too small.
Step 8: Secure and Protect the Wiring
- Use cable clamps to secure all wires.
- Apply dielectric grease to connections to prevent corrosion.
- Keep all wires away from heat sources and moving parts.
For added protection, install a manual windlass switch in the helm to cut power when not in use.
Conclusion
A properly wired windlass system makes anchoring effortless, but taking shortcuts in the installation can lead to electrical failures, overheating, or even a fire hazard. By using the correct wire size, circuit protection, and secure connections, you’ll have a safe and reliable system for years to come.
How to Wire a Windlass FAQs
What size wire do I need for my windlass?
The wire size depends on your windlass’s amperage draw and the distance from the battery. Most windlasses require 2 AWG or thicker if the run is 20 feet or more. Always follow the manufacturer’s wire gauge recommendations and use marine-grade, tinned copper wire to prevent corrosion.
Do I need a fuse or circuit breaker for my windlass?
Yes, installing a thermal circuit breaker or fuse is essential to protect the windlass motor and wiring from overcurrent situations. 80A–150A circuit breakers or fuses are common, with selection dependant on the draw of the windlass. The fuse or circuit breaker should be installed as close to the battery as possible.
How do I wire the solenoid for my windlass?
The solenoid acts as a relay between the control switches and the windlass motor. Wiring steps include:
- Terminal 1 (Power In): Connect to the positive wire from the circuit breaker.
- Terminal 2 (Power Out): Run a heavy-gauge wire to the windlass motor’s positive terminal.
- Ground Terminal: Connect to the battery negative or a grounding busbar.
Can I install multiple switches to control my windlass?
Yes! Many setups include:
- Deck switches (foot pedals) for easy access near the windlass.
- A helm switch to control the windlass from the boat’s console.
- A wireless remote (optional) for added convenience.
Each switch connects to the solenoid’s control terminals to allow operation from multiple locations.
Why is my windlass slow or not working?
Common issues include:
- No power at all? Check the circuit breaker, battery connections, and fuses.
- Moves in only one direction? Verify switch wiring to the solenoid.
- Slow or weak motor? Check for voltage drop—your wire gauge may be too small, or connections may be corroded.
How can I protect my windlass wiring from damage?
Secure all wiring with cable clamps every 12–18 inches to prevent movement. Use heat shrink connectors for corrosion resistance, apply dielectric grease to connections, and keep wires away from sharp edges, water, and heat sources. Installing a manual windlass switch at the helm can also prevent accidental operation.
We're Here to Help!
Whether you need windlass wiring supplies, life jackets, or anything else for your boat, West Marine has more of everything you need for great times on the water. Order online or visit one of our more than 230 stores. Use our store finder to locate the West Marine store nearest to you.

 Line OD, .006 Thickness, 1/2\" Width, #10 (5mm) Screw Size")

