It’s early morning. Coffee in hand, gear in the boat, and smooth water ahead—today’s the day you finally get your lines in the water before sunrise. You ease away from the dock and push the throttle forward—and suddenly the engine alarm screams. Steam replaces your tell-tale stream as your temperature gauge slams into the danger zone.
And just like that, your fishing or cruising trip is over before it started. The culprit? A worn-out outboard motor water pump impeller that you could have replaced in under an hour.
The good news: replacing an impeller is a straightforward outboard maintenance task for most small and mid-size marine engines—one that can save you frustration, costly repairs, and lost time on the water.
Table of Contents
- What the Water Pump Impeller Does—and Why It Matters
- Why Do Impellers Fail?
- How Often Should You Replace the Impeller?
- Symptoms of a Failing Impeller
- Can You Replace the Water Pump Impeller Yourself?
- Tools and Supplies You’ll Need
- Step-By-Step: Replacing an Outboard Water Pump Impeller
- Pump Disassembly
- Pump Reassembly
- Shop the Brands
- Final Thoughts
- Frequently Asked Questions
- Related Articles
What the Water Pump Impeller Does—and Why It Matters
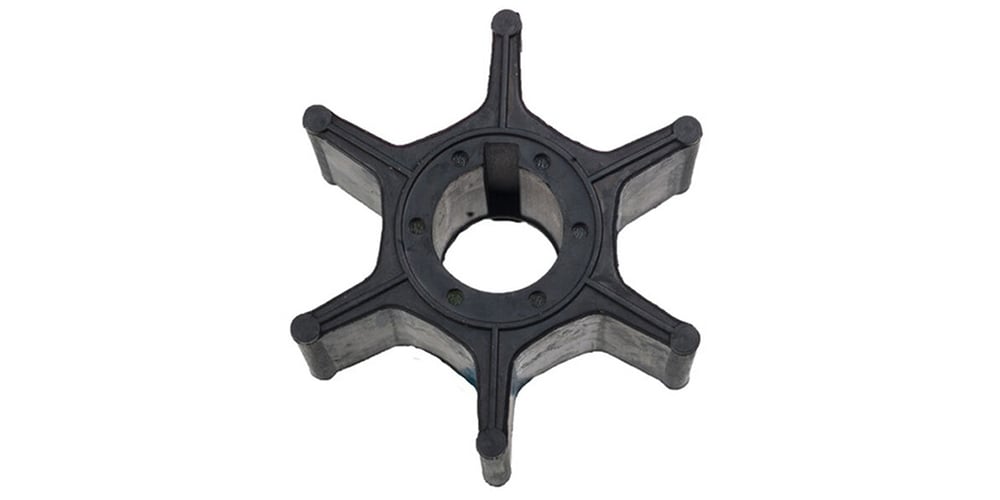
The impeller’s job is simple but critical: it pumps cool water through your marine engine to prevent the motor from overheating.
Inside a tight water pump housing, a star-shaped neoprene impeller spins rapidly. Its flexible blades squeeze water and push it upward through the cooling passages. Without proper water flow, engine temperatures rise quickly, leading to overheating, melted seals, damaged pistons, or a seized engine.
Most impellers are made of rubber or neoprene—materials flexible enough to maintain a tight seal while spinning thousands of times per minute. The impeller assembly is generally located in the lower unit, just above the gearcase, which is why the entire lower unit must be removed to access it.
Why Do Impellers Fail?
Even though impellers are inexpensive, they have a tough job. Common causes of impeller failure include:
Age
Rubber dries, cracks, and loses flexibility over time—especially in hot climates.
Hours of Use
Even in clean water, the blades slowly wear down, reducing pumping efficiency.
Running Dry or Blocked Intakes
If the engine is started without water—or if weeds, mud, sand, or debris block the intake—the impeller overheats quickly. Friction generates instant heat, causing melting or tearing.
Long-Term Storage
When an outboard sits unused, the impeller blades stiffen and take a permanent “set” in the bent shape they rest in. Once started, they cannot flex enough to create full water pressure, reducing cooling efficiency.
How Often Should You Replace the Impeller?
Most manufacturers recommend replacing the impeller every 2–3 years, and more often for outboards run in silty, sandy, or very shallow water.
Bottom line: Always follow the replacement interval in your engine’s service manual for proper maintenance.
Symptoms of a Failing Impeller
Watch for these signs that your outboard water pump impeller may need attention:
- Weak, intermittent, or sputtering tell-tale stream
- Steam coming from the tell-tale
- Overheating alarms, especially at idle
- No water flow despite clear intakes
- Squealing or rubbing noises from the pump housing
- Engine running hotter than normal
Any of these symptoms should prompt an immediate shutdown and inspection to prevent damage to your marine engine.
Can You Replace the Water Pump Impeller Yourself?
If you’re comfortable with basic outboard maintenance, replacing an impeller on small and mid-size motors is often very manageable.
However, the job may be better left to a professional if:
- Your outboard is large and you’re not equipped to handle the heavy lower unit
- Removing the lower unit exposes complex or hidden shift-rod linkages
- Specialized tools are required (pullers, alignment tools, torque wrenches)
- Saltwater or corrosion has seized fasteners
Saltwater corrosion in particular can turn a “quick job” into a challenging project. There’s no shame in calling a marine technician.
Tools and Supplies You’ll Need
Before you begin, gather:
- Socket set and extensions
- Set of combination (open end/box) wrenches
- Screwdrivers
- Torque wrench (recommended)
- Replacement impeller or full water pump kit
- Marine grease
- Dish soap or manufacturer-approved impeller lubricant
- Extra-Fine Grade 3M Scotch-Brite pad + vinegar
- Shop rags and gloves
- Flushing muffs
Having all tools and supplies ready prevents mid-project surprises.
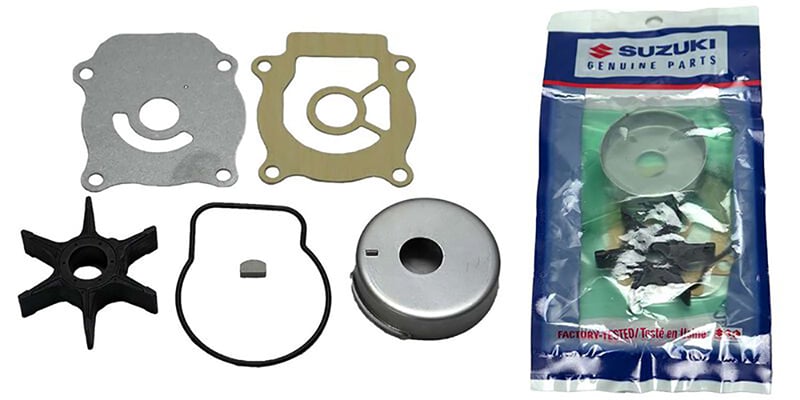 Impellers can be purchased individually, or as part of complete kits that include all the parts you need to rebuild your outboard motor's water pump.
Step-By-Step: Replacing an Outboard Water Pump Impeller
This guide covers general steps for most outboard manufacturers. Engine designs vary, so always supplement this with your service manual. Some engines have hidden bolts, shift-rod couplers, or specialized hardware. Larger outboards may require lifting assistance.
Pump Disassembly
Step 1 — Get Set Up to Work Safely
With the boat on a trailer (or otherwise supported), disconnect the battery. Make sure the engine is in neutral. Tilt the outboard up and lock it in that position.
Step 2 — Remove Covers or Anodes
Some motors require removing the trim-tab anode or other covers to access lower-unit bolts. Keep hardware organized.
Step 3 — Remove the Lower Unit
Remove all but one of the bolts securing the lower unit to the midsection.
Brace the lower unit with one hand while removing the final bolt, then carefully slide the lower unit down. Watch for linkages or water tubes that must be disconnected before the lower unit comes free.
If it won’t drop: Do not pry or force—it typically means a hidden bolt or shift-rod linkage has been missed.
Step 4 — Remove the Water Pump Case
The pump assembly sits at the top of the lower unit. Remove the pump-case bolts and slide the housing upward and off the driveshaft. Some housings may require gentle wiggling or light prying.
Step 5 — Remove the Old Impeller
The impeller sits on the wear plate. Note the direction the blades are bent for reassembly. Pull the impeller straight up and off the woodruff key.
Pump Reassembly
Step 1 — Clean the Wear Plate and Liner
Use a fine-grade Scotch-Brite pad moistened with vinegar to remove salt or mineral deposits from:
- Wear plate
- Pump case liner (cup)
- Drive shaft surface
Wipe old grease off the drive-shaft splines. Replace any worn O-rings, seals, or gaskets.
Step 2 — Lubricate Components
Apply dish soap or manufacturer-approved impeller lubricant to:
- New impeller
- Pump case liner
- Wear plate
Lightly coat the drive-shaft and shift-rod splines with marine grease (avoid top surfaces to prevent hydraulic lock). Also lightly grease:
- Lower-unit bolts
- Pump-case bolts
Step 3 — Install the New Impeller
The impeller has an internal slot that fits over the woodruff key. Position it just above the key, align the slot, and slide it onto the wear plate without dislodging the key.
Step 4 — Install the Pump Housing
Slide the pump case with the liner down until it contacts the impeller. Align the housing with the pins. Press down while rotating the driveshaft clockwise to seat the vanes. Snug the pump-case bolts to spec.
Step 5 — Reinstall the Lower Unit
Lift the lower unit and guide the drive shaft, shift rod, and water tube into position. If the driveshaft stops short, slightly rotate it until the splines mesh. Once aligned, tighten all lower-unit bolts to the manufacturer’s torque specs.
Step 6 — Test Water Flow
Lower the outboard, reconnect the battery, attach flushing muffs, and turn on the water. Start the engine. You should see a strong, steady tell-tale stream. Confirm:
- Proper forward and reverse gear engagement
- Smooth idle temperature
- No leaks around the lower unit
Shop the Brands
- Sierra impellers and water pump kits>
- Quicksilver impellers and water pump kits>
- Yamaha impellers and water pump kits>
- Mercury Marine impellers and water pump kits>
- Suzuki impellers and water pump kits>
Final Thoughts
Replacing your outboard motor water pump impeller isn’t just maintenance—it’s peace of mind. A healthy cooling system keeps your marine engine running reliably, giving you more time cruising, fishing, tubing, or exploring without overheating.
If you can change your engine oil, you can likely replace your impeller. A little prep prevents big problems on the water.
Frequently Asked Questions
How often should I change my impeller?
Every 2–3 years, or more often in sandy or silty environments.
Can I run the motor without water?
No. Even brief dry starts can damage or destroy the impeller.
What if only one vane breaks off?
Broken pieces can clog cooling passages. Inspect and remove debris.
Do I have to replace gaskets and seals?
Yes, every 2–3 years, or sooner if worn.
Is aftermarket okay?
Yes—choose reputable brands compatible with your outboard engine.
What causes no water from the tell-tale?
Blockage, impeller wear, debris, or pump failure. Shut down immediately.
Is this job hard for beginners?
Not usually on small and mid-sized outboards. Large or corroded units are more challenging.
Should I lubricate the impeller?
Yes—use manufacturer-approved lubricants.
Why did my impeller fail suddenly?
Running dry or long-term storage are most common.
Can I replace just the impeller, or should I replace the whole pump?
Replacing just the impeller is fine if wear plate and housing are in good condition. Otherwise, install a full impeller kit.
Do I need to align the shift rod during reassembly?
Some engines require precise alignment to prevent gear issues.
Will replacing the impeller myself void the warranty?
Generally no, as long as the work is done correctly and manufacturer procedures are followed. Always consult your service manual.
Is this worth doing myself?
Yes for most small and mid-sized outboards. For large or heavily corroded engines, consider a professional marine technician.