Engine Oil Change — Quick Expert Summary
-
Change marine engine oil every 50–100 hours or at least annually
-
Always warm the engine before draining oil
-
Use oil that meets manufacturer API and SAE specifications
-
Replace the oil filter during every oil change
-
Oil extraction pumps simplify most marine installations
-
Dispose of used oil at an approved recycling facility
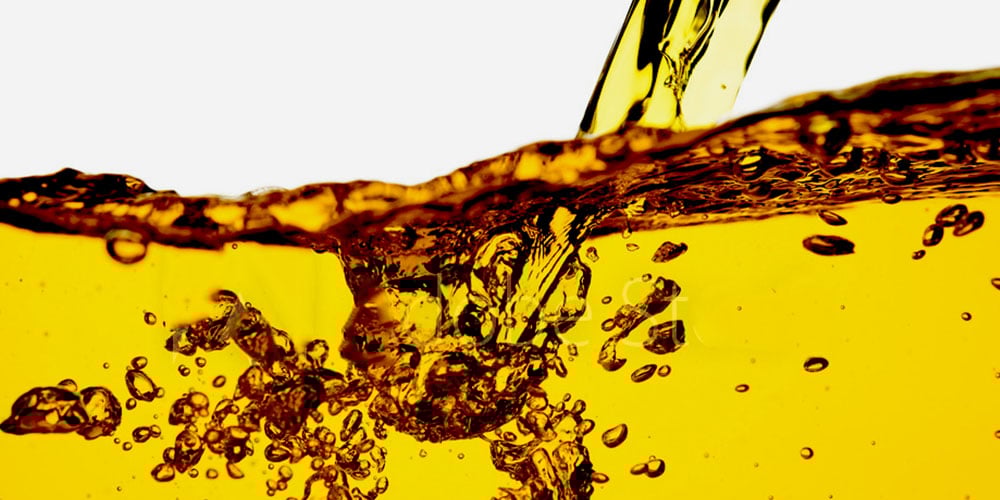
Changing engine oil is one of the most important routine maintenance tasks for any boat. Clean oil protects internal engine components, prevents corrosion, and ensures reliable performance. While marine installations can make the process more challenging than automotive oil changes, the right tools and preparation allow most boat owners to complete the job safely and efficiently.
Ready To Change your Inboard Engine Oil?
If you have found changing your inboard engine oil to be a difficult, time consuming and messy process, you are not alone. The sump plug is incredibly hard to reach in many installations and even if the plug is accessible, there’s often not enough room for a container to catch and hold the oil as it drains out. We'll walk you through how to overcome difficult installations so you can save time and money when changing your boat’s engine oil.
- How Often Should You Change Your Boat Engine Oil?
- How to Choose the Right Engine Oil For Your Boat
- How to Change Your Oil Without an Oil Change Pump
- How to Choose the Right Oil Change Pump
- How to Change the Oil on Your Boat
Signs Your Boat Engine Oil Needs Changing
Even if you have not reached the recommended service interval, these warning signs indicate your engine oil should be changed soon:
-
Oil appears dark, dirty, or milky
-
Engine hours exceed manufacturer recommendations
-
Boat has been idle for long periods
-
Frequent short engine runs that do not reach full temperature
-
Fuel smell present in the oil
-
Evidence of water contamination
-
Increased engine noise or rough operation
Changing contaminated oil promptly helps prevent corrosion, wear, and costly engine damage.
How Often Should You Change Your Boat Engine Oil?
Owner’s manuals vary in their recommendations, typically every 50 to 100 operating hours, but regardless of what yours says, total run time cannot always be used as a reliable guide for when to change engine oil. Actually, the amount of time that your engine sits idle is equally important. This is because dirty oil in idle engines combines with water to form caustic acids, which can damage inner-engine surfaces. In addition, other operating conditions unique to the marine environment may dictate more frequent oil changes.
Sailboat auxiliaries in particular are often used for short duration motoring, running the engine just to get into or out of the marina, which does not allow the engine to reach operating temperature for any length of time. This contributes to the contamination of the oil, due to condensed water, which turns to acid in the crankcase, and to an inability to get particulates into circulation where they can be removed by the oil filter.
For this reason, it is critical to operate your sailboat engine long enough to allow it to warm up, and to keep it on a frequent oil change maintenance program. At a minimum, we recommend that in addition to changing oil per the manufacturer’s recommendation, that you change engine oil prior to winter lay-up and/or at the beginning of a period of non-operation.
How to Choose the Right Engine Oil for Your Boat
Before purchasing new oil, remember that oil that is great for a gasoline inboard is not always right for a diesel. Your owner’s manual should state the API (American Petroleum Institute) and SAE (Society of Automotive Engineers) ratings that denote the correct oil for your engine. These ratings should appear on the container of the oil you buy. API ratings that begin with the letter C are formulated for use in diesel engines. Ratings that begin with the letter S are formulated for gasoline engines.
The letters C or S are followed by a second letter that indicates the complexity of the additive package. These letters ascend up the alphabet. Oils containing more complex additive packages can, in general, be used with prior formulations. For example, if you own a diesel and the manual says, “use CD”, oil rated CE will be fine. Many oils are now formulated for use with both gasoline and diesel engines. For example, Chevron’s 30 and 40 weight Delo 400 is currently rated CF-2 and SJ. The SEA rating for the oil’s viscosity should also appear on the container. Single viscosity oil is better for engines that operate within a narrow temperature range. Multi-viscosity oils are good for engines that operate within a comparatively wider temperature range. Two- and four-stroke engine oil are also different so make sure you get the right kind for your engine.
Viscosity
Viscosity is a measure of an oil’s thickness and ability to flow at certain temperatures. Higher numbers indicate thicker oil, which protects better in high temperatures.
- Follow engine manufacturer recommendations
- If you operate your boat in consistent temperatures, choose a single-weight oil (e.g. SAE 30).
- If you operate your boat in a wider temperature range, select multi-viscosity oils (e.g. SAE 10W-30). They behave like thin oils in cold weather, making it easier to crank the engine. In high temperatures they work like heavier oils, increasing the level of protection.
API Ratings
- These ratings indicate the oil’s performance and protection for either gasoline (S, or Service) or diesel (C, or Commercial).
- Check with your engine manufacturer to determine what API rating is required for your engine. This information can be found in the owners manual for your engine or on your engine manufacturers website.
- Gasoline service ratings include SL, SJ, SM and SN.
- Diesel service ratings include CK-4. CJ-4, CI-4, CH-4, CG-4, CF-4, CF-2, and CF.
- For 4-stroke outboards select special 4-stroke outboard oil.
How to Change Your Oil Without an Oil Change Pump
The right oil changing method for you depends on how your engine is install. If there is space under the engine but the shape of the hull gets in the way of using a standard catch pan then you can use the following workaround:
- Line the area under the sump with oil-absorbent cloths
- Cut down the sides of a small cardboard box so that it will fit under the engine sump
- Fill the plastic-lined box with water to check the capacity and make sure it is large enough to catch all the oil
- Double line the box with two plastic garbage bags
- Fill the plastic-lined box with water to check the capacity and make sure it is large enough to catch all the oil
- Slide the box underneath the sump, bending the box to shape as necessary
- Remove the sump plug and drain the oil
- After the oil has fully drained replace the sump plug and carefully draw the bags shut and knot off
- Dispose of the oil at the nearest recycling facility
If there isn't enough space in your engine bay to use the workaround above, use an off-the-shelf system such as an Oil Changer.
How to Choose the Right Oil Change Pump for Your Boat

Our Flat Tank Oil Changer uses a 12V diaphragm pump, with a dipstick extraction tube.
Oil changers vary in capacity, convenience and cost. The most basic are manual hand pumps like the Little Pal, which withdraw the oil via the dipstick tube and deposit it into a separate container. Somewhat more sophisticated are self-contained manual systems, such as our West Marine Oil Extractor, which also include a container into which the oil is deposited. Due to the small diameter of the withdrawal tube, these systems require patience and manual dexterity on the part of the user.
Moving up the ladder of convenience are 12-volt systems, like our West Marine Professional Oil Changer and Flat Tank systems, which replace muscle-power with an electric pump. For ultimate convenience, many owners with larger engines or multiple installations prefer the convenience of systems that plumb directly to the sump drain itself. These systems, represented by products from Reverso and Groco, quickly drain the oil at the flick of a switch. Many employ a manifold design making them more convenient for multiple engine installations. In addition to removing dirty oil from an engine, they can also be used to refill the crankcase with fresh oil.
Oil Change Differences by Engine Type
Oil change procedures vary depending on your propulsion system.
Inboard Engines
Often require oil extraction pumps because sump plugs are difficult to access.
Sterndrives
Similar to inboards, though some installations allow partial gravity draining.
Four-Stroke Outboards
Typically drained through a crankcase plug. Engine tilt position can affect drainage.
Diesel Engines
Require diesel-rated oil and usually hold larger oil volumes, making pump systems especially helpful.
Always consult your owner’s manual for engine-specific procedures.
Tools & Supplies Needed for an Engine Oil Change
Gather everything before you begin to make the job cleaner and more efficient:
-
Correct marine engine oil meeting manufacturer specifications
-
Replacement oil filter
-
Oil extraction pump or drain system
-
Oil absorbent pads or cloths
-
Funnel for clean refilling
-
Oil filter wrench
-
Container for used oil
-
Protective gloves and safety gear
Having the right equipment ready reduces the risk of spills and incomplete servicing.
How to Change the Engine Oil on Your Boat
While changing the oil on your boat is more complicated than changing it on your car, with the right prep and the right tools you can make it as easy as possible. Let's get started.
Step 1: Run the Engine First

Jabsco's Little Pal hand pump lets us get the oil out of the hard-to-reach Atomic Four engine (and the transmission) of our Newport 30.
The engine should be run up to operating temperature first, before you begin the oil change. Warm oil is thinner so it is easier to withdraw through whatever method you use—especially if you’re using a dipstick tube. Plus, running the engine mixes all the gunk and contaminants into suspension, so you’ll be able to get all of the dirt out of the engine.
You also need to be prepared with oil-absorbent pads to keep even small drops of oil out of your bilge. Meticulous attention to cleanliness is important, not only to keep your bilge looking and smelling fresh, but also to prevent any oil from going into the water when the bilge pump operates. The authorities will hold you responsible for cleanup costs if you discharge oil that causes a sheen on the water’s surface in your marina.
Step 2: Extract the Oil Using an Oil Change Pump
Most manual and electrical oil change pumps remove the oil from the engine using a skinny tube that feeds through the dipstick tube on your engine. Follow these steps to remove all oil from the engine.
- Remove dip stick, wipe it down and set it aside
- Feed the extraction tube down the dip stick tube as far as it will go
- Pump the oil out
- Pull the extraction tube out once all engine oil is removed and put the dipstick back in
Your used engine oil can serve as an indicator of engine health. For example, a milky color indicates that water has entered the crankcase, and the presence of metal particles may indicate excessive wear. When in doubt, consider having your oil analyzed. Periodic oil analysis can give you a very good idea of engine health. For the location of a testing lab, consult an engine surveyor.
Step 3: Change Your Oil Filter
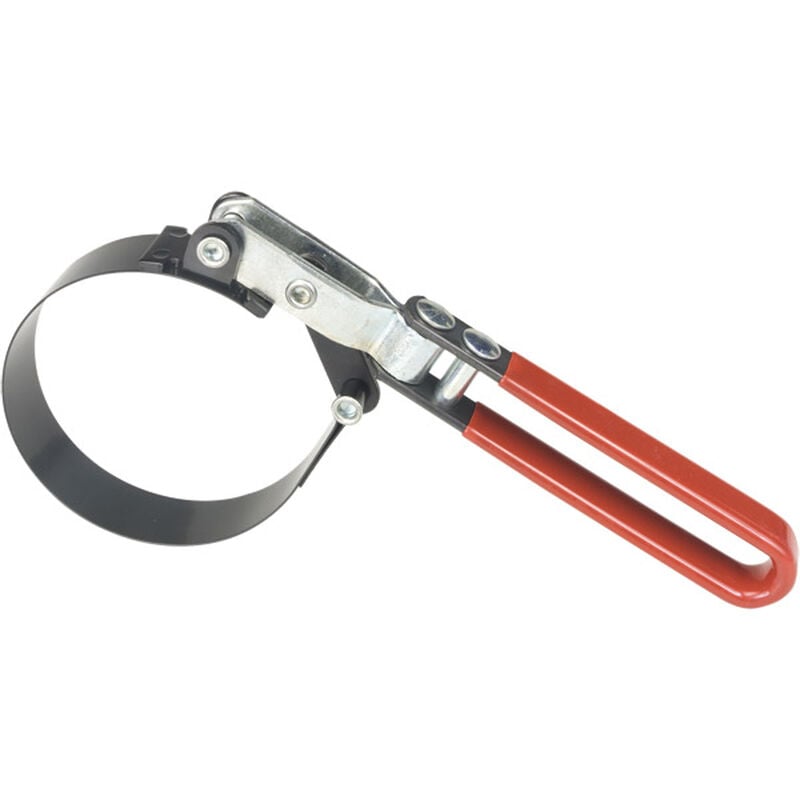
An oil filter wrench is great to have on hand to help remove your old filter.
You should always change your oil filter when changing the oil on your boat. Your oil filter will still have old oil it which will contaminate your fresh oil once it starts circulating. Luckily, replacing your old filter can be done with a few simple steps.
- Remove the old oil filter. Make sure you have something underneath the oil filter to catch any oil in the filter that spills
- Lightly coat the gasket on the new oil filter with clean engine oil
- Hand tighten the filter on the engine giving it a three-quarter turn beyond the point where the seal makes contact with the flange.
Step 4: Refill Your Engine Oil
Refill your oil according to the engine manufacturer specifications. Owner's manuals usually specify the oil capacity, but you should check your oil level before running the engine to make sure the level is adequate. Make sure you have a funnel on hand as well to avoid spills when refilling.
Step 5: Run the Engine and Check Oil Level Again
Start your engine and let it get up to operating temperature then shut it off and wait 5-10 minutes before checking the oil level again to make sure it's correct. If it is low, top it off.
With that your oil change is complete and you're ready to hit the water!
How Long Does a Boat Oil Change Take?
Actual time varies based on engine type and equipment:
-
First-time DIY: approximately 1–2 hours
-
Experienced DIY: 30–60 minutes
-
Engines with built-in drain systems: 20–30 minutes
Allow additional time for cleanup and proper disposal of used oil.
Safety and Environmental Tips
Protect both your vessel and the environment while performing maintenance.
-
Prevent oil spills in the bilge using absorbent pads
-
Never discharge oily water overboard
-
Allow the engine to cool slightly to avoid burns
-
Wear gloves and eye protection
-
Dispose of used oil and filters at approved recycling facilities
-
Clean any spills immediately to prevent contamination
Improper disposal can result in fines and environmental harm.
Common Oil Change Mistakes to Avoid
Avoiding these errors will help ensure a successful service:
-
Draining oil while the engine is cold
-
Using incorrect oil type or viscosity
-
Overfilling the crankcase
-
Reusing an old oil filter
-
Forgetting to check for leaks after refilling
-
Failing to warm the engine before extraction
-
Improper disposal of used oil
Careful attention to detail improves engine longevity and reliability.