How difficult is it to install your own fishfinder or multifunction display? Do you need to be a professional electronics installer to successfully complete this project?
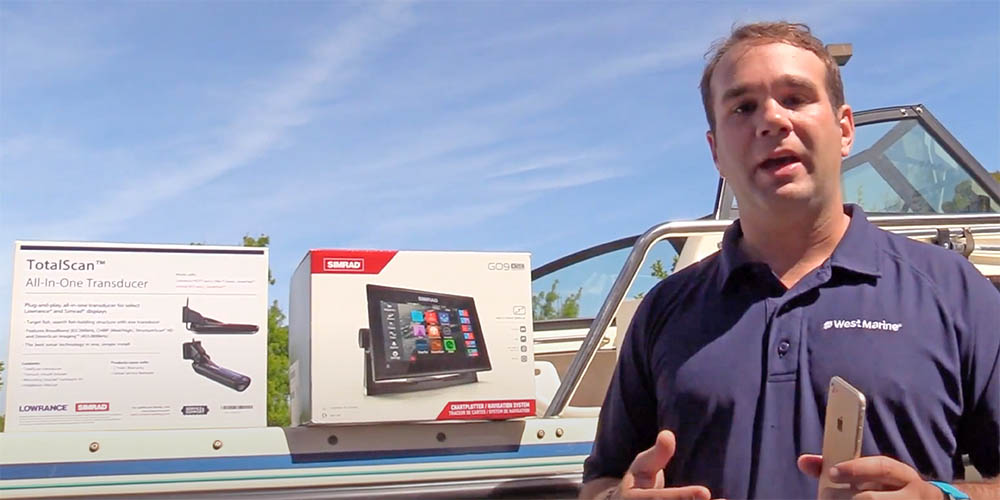
Our answer is that you can handle this DIY project without being an electronics wizard. West Marine product specialist Mike Montgomery demonstrates a complete Simrad GO9 installation on his center console Arima in the video below — covering display mounting, 12V wiring, and TotalScan transducer placement from start to finish. The job took about four hours on a real boat, with real challenges. Watch the full installation, then read the notes below on the decisions that matter most before you start your own.
Before You Start: Key Decisions That Affect the Whole Install
Display location is the first decision and the one with the most downstream consequences. The GO9's 9-inch screen needs to be readable in direct sunlight from your normal helm position — hold a piece of cardboard at your planned mounting location and check it at different times of day before drilling anything. The bracket needs solid backing material behind the dash surface; fiberglass over a thin substrate will crack under vibration. If you are replacing an older unit, confirm the new bracket footprint covers any existing holes from the old mount before committing to that location.
Power wiring on a standalone GO9 installation is straightforward: the unit runs on 12V DC and requires a positive (red) and negative (black) wire connected to a 12V source with a 3-amp fuse on the positive lead — the Simrad installation manual specifies 3 amps. The best practice is to wire directly to the fuse block rather than tapping into an existing circuit. Keep the power cable run as short as practical and route it away from bilge areas and heat sources. The GO9's power connector uses two discrete cables — the thicker pair carries power, and a yellow wire controls the unit's power state if you want it to switch on and off with the ignition. Connect the positive to the fused terminal and the negative to a clean ground point, not to another device's ground.
Transducer placement is typically where first-time installers make mistakes that hurt fishfinder performance. The TotalScan transducer needs to be mounted on the transom in clean, undisturbed water — away from propeller wash, strakes, and any hull features that create turbulence or air bubbles. Position it at least 15 inches from the centerline plus half the propeller diameter on a single-engine installation, clear of any hull protrusions. The bottom face of the transducer should be flush with or very slightly below the bottom of the hull — not angled, and not projecting far below. An angled transducer will not shoot a true vertical signal, degrading depth readings and imaging quality at speed. Once you have identified the right location, verify clearance for the transducer bracket's full range of angle adjustment before drilling.
Cable routing is what separates a clean installation from a problem installation. Every cable that passes through a bulkhead or the transom needs a properly sealed cable gland — an unsealed hole admits water and allows bilge gases to reach the helm. Run transducer cables and power cables separately where possible to minimize signal interference. Use nylon cable ties to secure cables along their route, leaving enough slack at connection points for future service access. Seal all transom penetrations below the waterline with 3M 4000 UV or equivalent below-waterline sealant; use marine silicone for penetrations above the waterline.
| Skill Level Description | |
|---|---|
| Removing the old fishfinder: 2 out of 10 | |
| Locating and installing the display bracket: 4 out of 10 | |
| Wiring the display to 12V power: 4 out of 10 | |
| Finding the best location for the transducer: 4 out of 10 | |
| Installing the transducer and running the cable: 5 out of 10 | |
| Tools Required | Shopping List |
Installing the GO9 and the TotalScan™ transducer:
|
|
Common Mistakes to Avoid
Skipping the sealant on transom penetrations. Every hole drilled in the transom for the transducer bracket screws and cable must be sealed. Unsealed holes in a fiberglass transom allow water to wick into the core material, causing delamination over time. Apply sealant to each fastener and to the bracket footprint before tightening. Below the waterline, use a sealant rated for permanent underwater use — 3M 4000 UV is the standard choice. Marine silicone is correct for above-waterline penetrations.
Incorrect transducer angle. The transducer face must be parallel to the water surface when the boat is on plane — not when it is sitting at rest. Many transom angles tilt the motor inward when at rest, which means the transducer bracket needs to be shimmed or adjusted so the face is level at running trim, not static trim. Test the angle at the dock by tilting the engine to its normal running position before finalizing the mounting angle.
Running power from an existing device tap. Sharing power with another high-draw device introduces voltage fluctuation that can affect display performance and readings. Run a dedicated circuit from the fuse block with the correct 3-amp fuse on the positive lead, as specified in the GO9 installation manual.
Not routing the transducer cable away from power cables. A transducer cable running parallel to a power cable over a long distance can pick up electrical interference that appears as noise on the sonar display. Route them separately where possible, and cross them at right angles rather than running them side by side.
Frequently Asked Questions: Installing a Fishfinder or Chartplotter
How long does it take to install a fishfinder like the Simrad GO9?
A straightforward installation on a center console or similar boat — new display mount, 12V wiring to the fuse block, and transom-mount transducer — typically takes three to five hours for a first-time installer working methodically. The video above documents Mike's four-hour installation in real time. The majority of that time goes to planning the transducer location, running and securing cables cleanly, and making watertight penetrations. Replacing an existing unit in an already-wired location can be done in under two hours.
Do I need to be an electrician to wire a fishfinder?
No. A standalone fishfinder like the GO9 requires only two wire connections: positive (red) to a fused 12V terminal and negative (black) to a clean ground. The Simrad GO9 installation manual specifies a 3-amp fuse on the positive lead. If you can use a wire stripper, a crimper, and identify the positive and negative terminals on your boat's fuse block, you have the electrical skills needed for a basic installation. Networked installations that integrate engine data, autopilot, or radar add complexity, but a standalone fishfinder-chartplotter is a legitimate first boat electrical project.
Where is the best place to mount a transducer on a center console?
On a center console with a single outboard, mount the transom-mount transducer on the starboard side of the transom, at least 15 inches from the engine centerline plus half the propeller diameter, clear of any strakes or hull features that create turbulence. The transducer face should be flush with or very slightly below the bottom of the hull, and angled so it shoots vertically when the boat is at running trim. Avoid mounting directly behind the engine where propeller wash will overwhelm the sonar signal. Test your chosen location for clearance of the bracket's full range of angle adjustment before drilling.
What sealant should I use for a transducer installation?
Use 3M 4000 UV or an equivalent below-waterline marine sealant for any penetrations at or below the waterline — transducer bracket screws and the cable entry point on the transom. For penetrations above the waterline, marine-grade silicone is the standard choice. Do not use standard household silicone, which is not rated for the UV exposure and water immersion of a marine environment and will fail prematurely. Apply sealant to each fastener hole and to the footprint of the bracket before tightening, not after.
Can I install a Simrad GO9 myself or do I need a professional?
A standalone GO9 installation — new mount, power wiring to the fuse block, and transom transducer — is within the capability of most boat owners who are comfortable with basic hand tools and can follow installation instructions. The skill levels documented above (2 to 5 out of 10 for individual tasks) reflect a realistic assessment of the difficulty. If your installation involves integrating the unit into an existing NMEA 2000 network, adding radar, or wiring through a complex helm with limited access, a professional marine electronics installer can save time and prevent wiring errors that cause problems later.
Browse All Marine Electronics & Navigation Gear
- Chartplotters, GPS units, radar systems, and integrated navigation displays
- Sonar, CHIRP, downscan, and fish-finding electronics
- Marine stereos, speakers, amplifiers, and audio accessories
- VHF radios, AIS, satellite communication equipment
- Autopilot systems and steering control components
- Wind, depth, speed, and multifunction instruments
- Marine binoculars for navigation and low-light use
- Thermal and night-vision devices for situational awareness
- Onboard monitoring and security systems
- Magnetic and electronic compasses
- Paper and electronic navigation charts
- Regional cruising and harbor guides
- Traditional navigation plotting tools