Got a shiny new boat stereo and speakers but don’t know where to start? We’ve got you covered. We’ll walk you through the installation and have you cranking your favorite songs in no time.
- What You Need to Install a Boat Stereo
- How to Install a Boat Stereo Receiver
- How to Install Boat Speakers
- How to Wire Boat Stereos and Speakers
- Browse All Marine Electronics & Navigation Gear
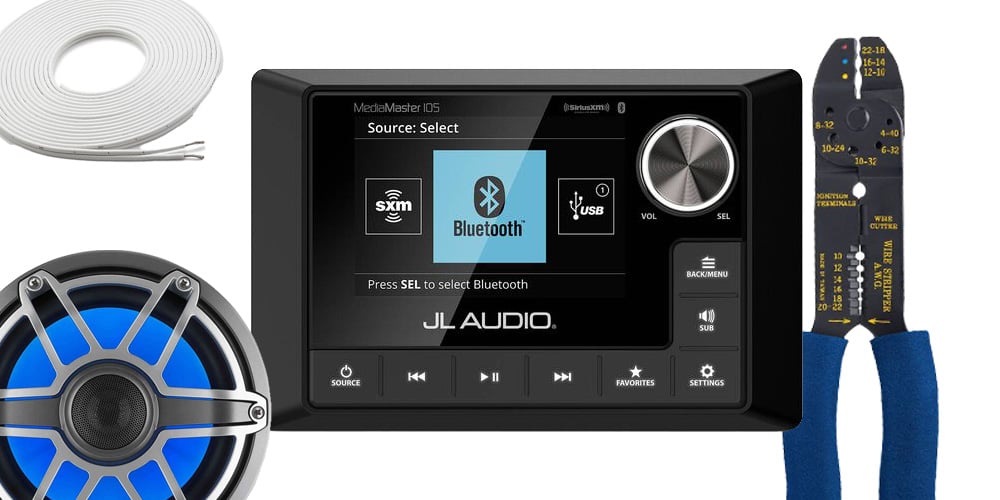
What You Need to Install a Boat Stereo
- Boat Stereo Receiver
- Boat Speakers
- Marine-Grade Speaker Wire
- Red and black marine-grade wire to power the stereo
- Marine-Grade Shrink Wrap Butt, Blade and Ring Electrical Terminals
- Wire Stripper and Crimper Tool
- A Fish Tape for Routing Wires
How to Install a Boat Stereo Receiver
Step 1: Decide where to mount your receiver
If your boat has a cabin, you can mount the stereo receiver inside the cabin and run a remote control to the helm to keep the receiver out of the elements and help it last longer. If not, mount the receiver where it has the lowest chance of getting hit by spray. Marine stereos are built to live on your boat, but the less water that hits it the better. You should also make sure that there is enough room behind your mounting location for the back of the stereo to fit. The last thing you want is to cut a hole in your boat only to find out you don’t have enough room to slide the receiver all the way in.
Step 2: Mark your cutout location
Mark your cutout hole using the bevel (the metal cage piece) or the included template if the manufacturer included one with the receiver.
Step 3: Cut out the mounting hole
Drill a hole in the corner of the area you need to cut out to get started and then use a jigsaw or rotary tool to cut out the rest of the hole. Make sure to mask around the cutout hole to avoid scuffing the paint around the cutout.
Step 4: Mount the stereo
How the stereo is mounted will vary from model to model. Some slide into a bevel and are secured similarly to many car stereos while others are screwed to the boat through the face of the stereo and the screws are then hidden with a screw cover. Follow the manufacturer installation instruction to get yours mounted correctly.
How to Install Boat Speakers
Step 1: Decide where to mount it
Think about where you want the sound to be the best on the boat and mount your speakers accordingly. Keep in mind that the sound quality will be better if you mount the speakers up high or at ear level. Like the receiver, make sure there is enough room behind the mounting location to fit back end of the speaker and make sure that there is a way to cleanly route wires from the receiver to your speakers.
Step 2: Mark your cutout location
Many speakers include a template you can use to cut your mounting hole. Mask off the area around the cutoff, drill a hole to make a starting point and then use a jigsaw or rotary tool to cut out the hole. If your speakers didn’t come with a cutout template, measure the back end cone of the speaker and cut your hole just big enough for the cone to slide through. This should leave the most amount of face material possible to screw in the speaker.
Step 3: Mount the speakers
Slide the speaker into the mount hole and secure it using the screws included with your speakers.
How to Wire Boat Stereos and Speakers
Step 1: Wire the Speakers
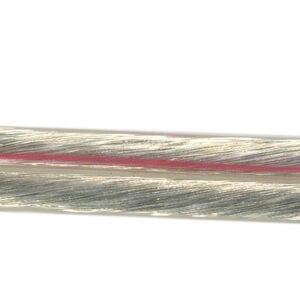
Use marine-grade speaker wire and electrical terminals to make sure your install will last. We can cut you the exact length you need in-store!
Your stereo should have included a wiring harness and a diagram detailing what the wires relate to. Speaker wires on a wiring harness are usually paired as a solid color wire for the positive and the same colored wire with a black stripe for negative. Once you’ve found the pair for your first speaker, strip the end of one of the wires, twist the exposed wire and crimp on a heat shrink butt connector. Repeat for the other wire in the pair.If you want to protect the connection even more, you can slip a piece of heat shrink tubing over the connection now before attaching your speaker wire to the other end of the butt connector and shrink it down over the connection later.
Grab the speaker wire you’ll be using to make the run to the speaker and strip the ends off both wires. Match the positive wire coming from the harness to the positive wire from your speaker wire and match negative to negative. Wire manufacturers handle this differently, but most of the time there will be a solid colored wire and a striped or dotted wire.
Use a fish tape to route the wire to each speaker. From experience, this step can be a pain if you’re going through tight areas. If the wire gets caught on something, back up and try again rather than forcing it so you don’t risk damaging the insulation on the wire. Once you made it to the speaker, strip the end of both wires, crimp a female heat shrink blade connector on each wire, use a heat gun to shrink the shrink wrap around the connection and connect to the male blades on the speaker.
Repeat these steps for each speaker you’re wiring in.
Step 2: Powering Your Boat Stereo Receiver
Your speakers might be hooked up, but you won’t be getting any sound out of them without power. Refer to the wiring harness diagram again and determine which wires are your power positive and negative wires. This is generally a red wire for positive and a black for negative, just like your battery cables.
Strip the ends off the positive and negative wires on the harness and attach a shrink wrap butt connector to each. Connect red and black marine grade wire to other side of the each butt connector for the matching color The red cable should be spliced into the ignition if you want your stereo to always be on when the boat is on, but many boaters prefer to route the power wire to a suitable switch on the helm so the radio can be switched on and off regardless of the key position. Route the black wire to the negative terminal of the battery and connect it to the negative battery connector using a ring terminal.
Need More Help?
West Marine has what you need for any install from the latest marine audio gear to marine-grade wire and connectors to complete your project. Plus, with a crew of boaters ready to help in-store, we have all your questions covered. Find your store here.
Related:
- How to Select a Marine Stereo
- Our Top 10 Picks for Marine Speakers
- Why You Should Choose Marine Grade Speakers For Your Boat
- Choosing Marine Speakers
Browse All Marine Electronics & Navigation Gear
- Chartplotters, GPS units, radar systems, and integrated navigation displays
- Sonar, CHIRP, downscan, and fish-finding electronics
- Marine stereos, speakers, amplifiers, and audio accessories
- VHF radios, AIS, satellite communication equipment
- Autopilot systems and steering control components
- Wind, depth, speed, and multifunction instruments
- Marine binoculars for navigation and low-light use
- Thermal and night-vision devices for situational awareness
- Onboard monitoring and security systems
- Magnetic and electronic compasses
- Paper and electronic navigation charts
- Regional cruising and harbor guides
- Traditional navigation plotting tools


