
Your sailboat’s rigging is essential to both safety and performance. A little routine maintenance can prevent unexpected failures, costly repairs, and even losing your rig. This guide covers inspections, corrosion and essential upkeep.
- Understanding Sailboat Rigging
- Corrosion and Metal Fatigue in Rigging
- Rigging Inspections and Maintenance
- Conclusion
- Rigging Maintenance FAQs
- We're Here to Help!
- Related Articles
Understanding Sailboat Rigging
Sailboat rigging consists of standing rigging and running rigging:
- Standing Rigging: This includes the fixed components such as the mast, shrouds, stays, and spreaders that support the mast. Shrouds and stays are typically made of stainless steel wire or rod.
- Running Rigging: This includes all the movable lines used to control the sails, such as halyards, sheets, and other control lines, which are usually made of Dacron or high-tech fibers.
Regular maintenance of standing and running rigging is required to ensure optimal sailing performance and safety.
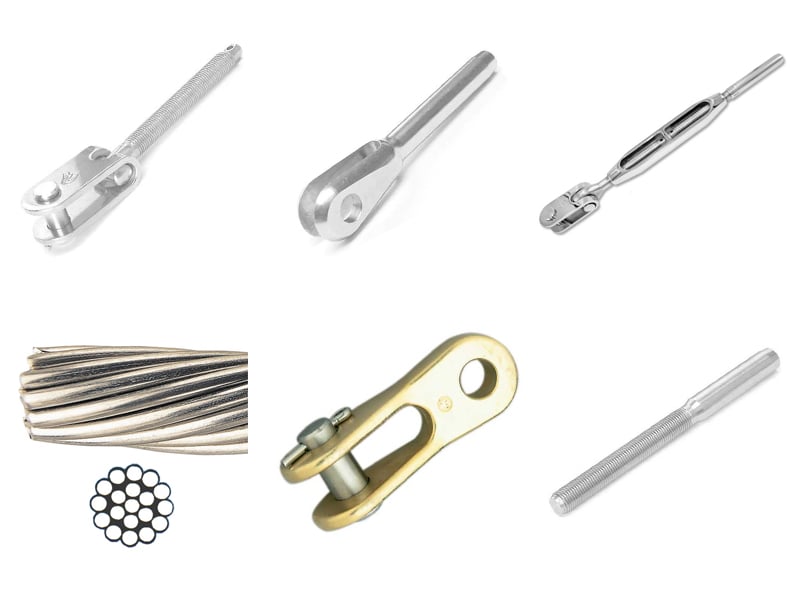 West Marine offers a full selection of standing rigging wire and components.
Corrosion and Metal Fatigue in Rigging
Corrosion and metal fatigue are two processes that can compromise the integrity of your rigging.
Corrosion in Stainless Steel Rigging
While stainless steel is highly resistant to rust, it is not completely immune to corrosion. The key to its corrosion resistance lies in the passivation layer—a thin, protective layer of chromium oxide that forms on the surface. This passivation layer shields the metal from oxidation and rust.
Factors That Can Damage the Passivation Layer:
- Exposure to chlorides (such as saltwater) can weaken the protective layer.
- Mechanical wear, such as rubbing or scratching, can remove the protective layer.
- Contamination from carbon steel tools or particles can lead to localized corrosion.
- Acid-based cleaners can strip away the passivation layer, leaving the metal vulnerable to corrosion.
Once the passivation layer is compromised, stainless steel is vulnerable to corrosion, which can significantly weaken rigging components over time.
Crevice Corrosion: A Hidden Threat
Crevice corrosion occurs when stainless steel is deprived of oxygen, preventing the passivation layer from regenerating. Once the passivation layer is gone, stainless steel can rust. This often happens in tight spaces where moisture is trapped, such as:
- Where chainplates pass through the deck.
- Inside the swaging of wire terminals where saltwater can seep in.
- Between metal surfaces bolted together without proper sealing.
Unchecked crevice corrosion can lead to sudden rigging failures, making regular inspections crucial for identifying early signs of damage. Keeping hardware properly sealed, regularly cleaning fittings, and ensuring good ventilation around metal components can help prevent this issue.
For more on crevice corrosion, read our West Advisor article Stainless Steel Rigging in which West Marine alumnus Tom Burden recounts the near catastrophe he and some friends experienced on San Francisco Bay.
Metal Fatigue: The Silent Failure
Unlike corrosion, metal fatigue is not always visible. It occurs due to repeated stress cycles that gradually weaken the metal, leading to cracks and eventual failure. Look for:
- Hairline cracks near swaged fittings and chainplates.
- Distorted or deformed rigging components.
- Unusual creaking or popping sounds under tension.
 Time for new halyards? Choose from our selection of pre-spliced wire-to-rope and all-rope halyards, or order a custom halyard from West Marine Rigging Services. (Click on the link at the bottom of this article.)
Rigging Inspections and Maintenance
Before you begin, gather the following tools and materials:
- Binoculars (for mast-top inspections from deck level)
- Wrenches and screwdrivers
- Lubricants (for turnbuckles and fittings)
- Marine-grade stainless steel cleaner
- Rigging tape and cable ties
- Replacement cotter pins and clevis pins
- Tension gauge (for precise standing rigging adjustments)
- A magnifying glass or flashlight (for close inspections)
- Winch handle (for testing halyard functionality)
Visual Inspections and Maintenance
1. Visual Inspection
Routine inspections help detect wear before failure occurs. Perform a full visual check at least twice a season, especially before long voyages.
Standing Rigging Inspection
- Look for rust, cracks, or corrosion on stainless steel wires and terminals.
- Check turnbuckles for corrosion or seized threads; lubricate if necessary.
- Inspect chainplates and deck fittings for signs of leaks or stress cracks.
- Examine spreader ends for wear or damage from shrouds.
- Use binoculars to check the masthead for missing pins or worn sheaves.
 Have your control lines seen better days? West Marine has you covered with a full selection of low-stretch, high-tech rope for running rigging.
Running Rigging Inspection
- Look for chafing, fraying, or UV damage on all lines.
- Check blocks, fairleads, and sheaves for smooth operation and wear.
- Inspect clutches and cam cleats to ensure they grip properly.
- Run halyards and sheets through their full range to check for smooth operation.
2. Cleaning and Lubrication
Keeping your rigging clean reduces wear and extends its lifespan.
- Stainless steel rigging: Use a marine-grade cleaner to remove salt and grime and maintain the passivation layer. Avoid acid-based cleaners, as they can strip away this protective layer.
- Turnbuckles and fittings: Apply a small amount of lubricant to prevent seizing.
- Blocks and sheaves: Wash with fresh water and apply a dry lubricant.
- Halyards and sheets: Soak ropes in fresh water and mild detergent, then rinse thoroughly and dry before reinstallation.
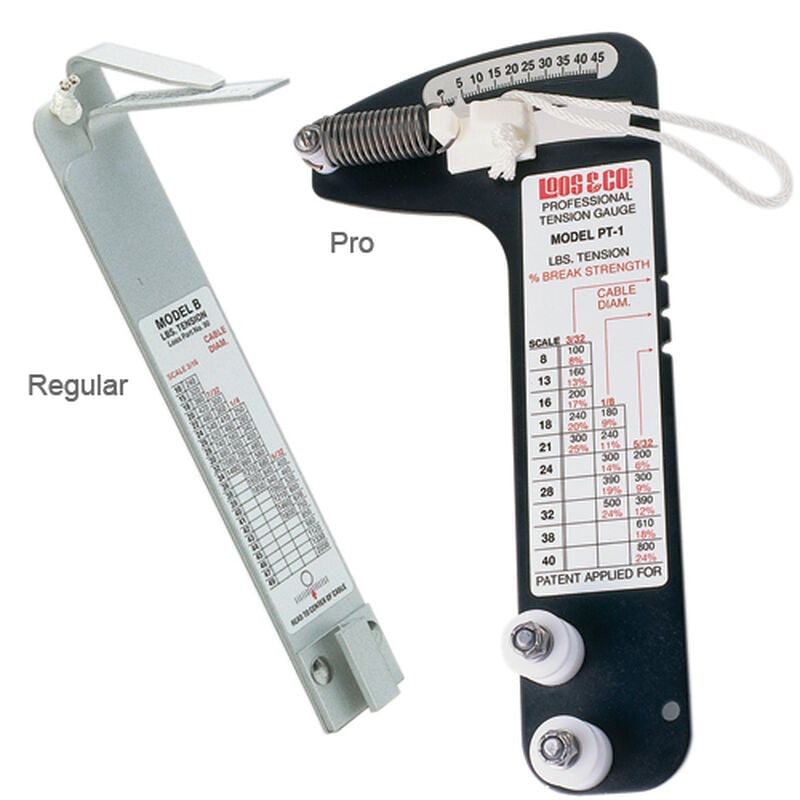 Regular and Pro Loos brand rigging tension gauges.
3. Tuning the Standing Rigging
Properly tuned rigging enhances sail shape and boat handling.
Basic Rig Tuning Steps:
- Mast Alignment: Ensure the mast is straight by sighting up from the deck.
- Initial Tensioning: Hand-tighten shrouds and stays evenly.
- Use a Tension Gauge: Follow manufacturer-recommended tension settings.
- Check for Evenness: Ensure equal tension on both port and starboard shrouds.
- Final Adjustments: After sailing, recheck and adjust as needed.
4. Replacing Worn Rigging
Even with maintenance, rigging will eventually need replacement.
- Standing Rigging: Replace every 10-15 years or sooner if signs of fatigue appear.
- Running Rigging: Replace halyards and sheets every 3-5 years, depending on usage and exposure.
- Cotter Pins and Clevis Pins: Replace whenever they show signs of corrosion or wear.
5. Safety Checks Before Sailing
Before heading out, perform a final safety check:
- Ensure all rigging components are secure.
- Verify that cotter pins are in place and properly bent.
- Make sure cotter pins do not protrude outside of turnbuckles and cover with rigging tape.
- Confirm halyards and sheets run freely without snags.
- Check that sails hoist and lower smoothly.
Conclusion
DIY rigging maintenance is a crucial part of sailboat ownership, helping to ensure safety, reliability, and performance. By conducting regular inspections, cleaning and lubricating components, properly tuning the rigging, and replacing worn parts, you can extend the life of your rigging and enjoy trouble-free sailing adventures. Stay proactive, and your rigging will reward you with safe and smooth sailing for years to come!
Rigging Maintenance FAQs
What is passivation in stainless steel?
Passivation is a chemical process that enhances stainless steel’s corrosion resistance by forming a thin, protective chromium oxide layer on its surface.
How can I tell if my rigging is suffering from metal fatigue?
Metal fatigue is not always visible, but signs can include hairline cracks near swaged fittings and deformed rigging components. Regular inspections and early replacements can help prevent failures.
What causes crevice corrosion, and how can I prevent it?
Crevice corrosion occurs when stainless steel is deprived of oxygen, preventing its protective passivation layer from regenerating. To prevent it, inspect and clean fittings regularly, seal connections properly, and allow ventilation where possible.
How often should I replace my standing and running rigging?
Standing rigging should generally be replaced every 10-15 years, while running rigging should be replaced every 3-5 years.
Can acid-based cleaners damage stainless steel rigging?
Yes, they can strip away the passivation layer, making the metal more susceptible to corrosion.
What’s the best way to maintain my rigging between inspections?
Rinse rigging with fresh water after each sail, lubricate moving parts, and check for wear.
We're Here to Help!
Need the right gear to keep your rigging in top shape? West Marine has you covered with a wide selection of rigging hardware, lubricants, and maintenance tools—plus everything else you need for smooth and safe sailing. Shop online or visit one of our 230+ stores. Use our store locator to find the nearest West Marine location!
Related Articles
- Selecting Line for Running Rigging
- Stainless Steel Rigging
- Internal Halyard Replacement Made Easy
- Sailboat Winch Handle Selection
- Do-it-Yourself: Climbing Your Sailboat’s Mast with a Bosun's Chair


