The snow has melted, green grass is reaching for the sun, and it’s time to get your inboard/outboard ready for the season ahead.
This article assumes your engine and outdrive were winterized with antifreeze and that the engine was treated with fogging oil prior to winter layup. While this guide does cover changing engine oil and gear lube oil, these tasks ideally should be part of fall winterization — dirty engine oil forms acids that can damage internal engine parts over winter, and gear lube contaminated with water can allow the drive to corrode before spring service. This article is general in nature and should not replace the recommendations in your inboard/outboard engine’s service manual.
For other spring prep tasks, check out our extensive guide on how to dewinterize your boat.
- What You Will Need
- Steps to Wake Up Your Motor
- 1. Inspect engine belts and hoses
- 2. Reconnect the battery
- 3. Change the spark plugs
- 4. Inspect the outdrive
- 5. Inspect the propeller
- 6. Change the outdrive gear lube oil
- 7. Change the engine oil
- 8. Change the fuel filter element
- 9. Optional: Install a 10-micron fuel filter
- 10. Inspect and replace sacrificial anodes
- 11. Replace the water pump impeller
- Exhaust Manifolds and Risers
- FAQs
- Related Articles
What You Will Need
- Engine oil
- Fresh engine oil filter
- Water pump impeller kit (annually or every other year)
- Oil absorbent sheets
- Gear lube oil for the outdrive
- Fresh gaskets for the gear lube drain/fill and vent holes
- Lube oil pump for the outdrive (one-time investment)
- Fuel pump inline fuel filter element
- Disposable nitrile gloves
- Battery charger
- Multimeter
- Hand tools, including ratchet and spark plug socket, large slotted screwdriver
- Set of new sacrificial anodes (need depends on condition of existing anodes)
Steps to Wake Up Your Motor
1. Inspect the Engine Belts and Hoses
Give the engine a thorough visual inspection before anything else. Examine engine belts for signs of fraying, glazing, or excessive wear. If in doubt, replace the belt — a failed belt at the wrong time can strand you. Inspect cooling water and exhaust hoses for cracking, abrasion, and stiffness. Hoses should be pliable and supple, not hard or brittle to the touch. Squeezing or bending the hoses can reveal cracks not visible to the eye. Confirm all hoses are securely clamped with marine-grade stainless steel hose clamps. Then inspect fuel lines and hoses for cracking or vibration-related wear. Fuel hoses must be rated for marine use and should be replaced at any sign of deterioration.
2. Reconnect the Battery to the Battery Cables
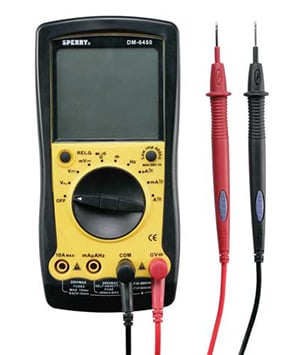
After charging the battery, check its voltage with a multimeter.
If your battery was disconnected for winter storage — which is recommended — reconnect the cables and any other wires that were removed. Clean any corrosion from the terminals with a wire brush. Apply dielectric grease or spray after installation to prevent future corrosion. If your battery terminals have wing nuts, replace them with hex nuts and lock washers to ensure connections stay tight.
Check the battery voltage with a multimeter. If it needs charging, charge it fully before proceeding. After charging, verify the resting voltage: flooded batteries should read 13.1–13.4 volts; gel batteries 13.1–13.3 volts; AGM batteries 13.2–13.8 volts. A battery that will not hold a full charge after a complete charging cycle should be replaced before the season begins.
3. Change the Spark Plugs
Spark plug replacement is straightforward, though access can be limited on some engines. Consult your owner’s manual for the best approach. Most replacement plugs come pre-gapped, but always verify the gap against the specification in your owner’s manual before installation. Thread plugs in by hand first to avoid cross-threading, then torque to spec. Do not over-tighten — spark plug threads in aluminum heads are easily damaged.
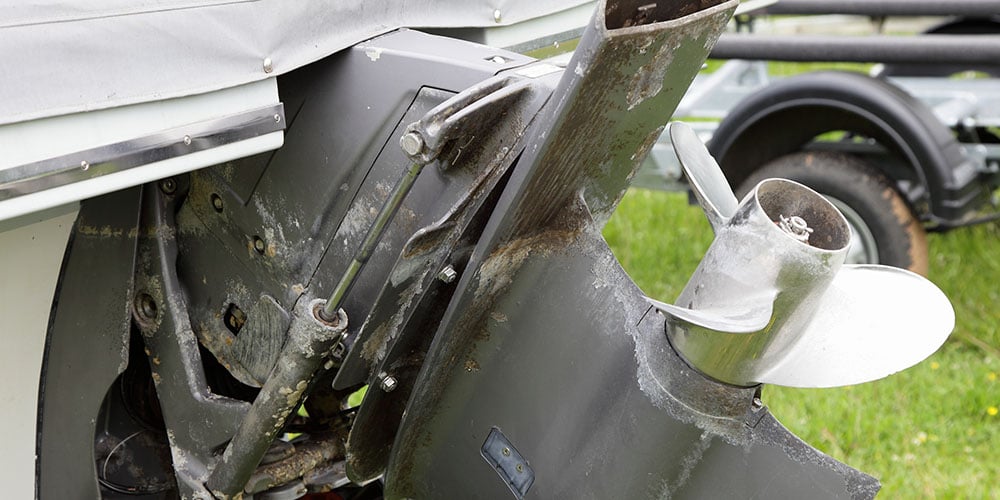
4. Inspect the Outdrive
Start by checking the fluid level in the trim/tilt reservoir and testing trim/tilt operation. Inspect the trim cylinders for leaks. Next, examine the drive shaft/U-joint bellows — the accordion-like rubber boot that surrounds the engine’s output shaft. Look carefully for splits, cracks, or any deterioration, especially in the folds. Also inspect the exhaust bellows (if present) and the shift cable bellows. If any bellows needs replacement, replace all of them at the same time.
A compromised bellows can allow water to enter the boat and potentially sink it. This is not a minor maintenance item. If you are not comfortable with bellows inspection and replacement, have a professional evaluate them. Bellows replacement typically requires specialized tools and knowledge of the specific outdrive design.
5. Inspect the Propeller
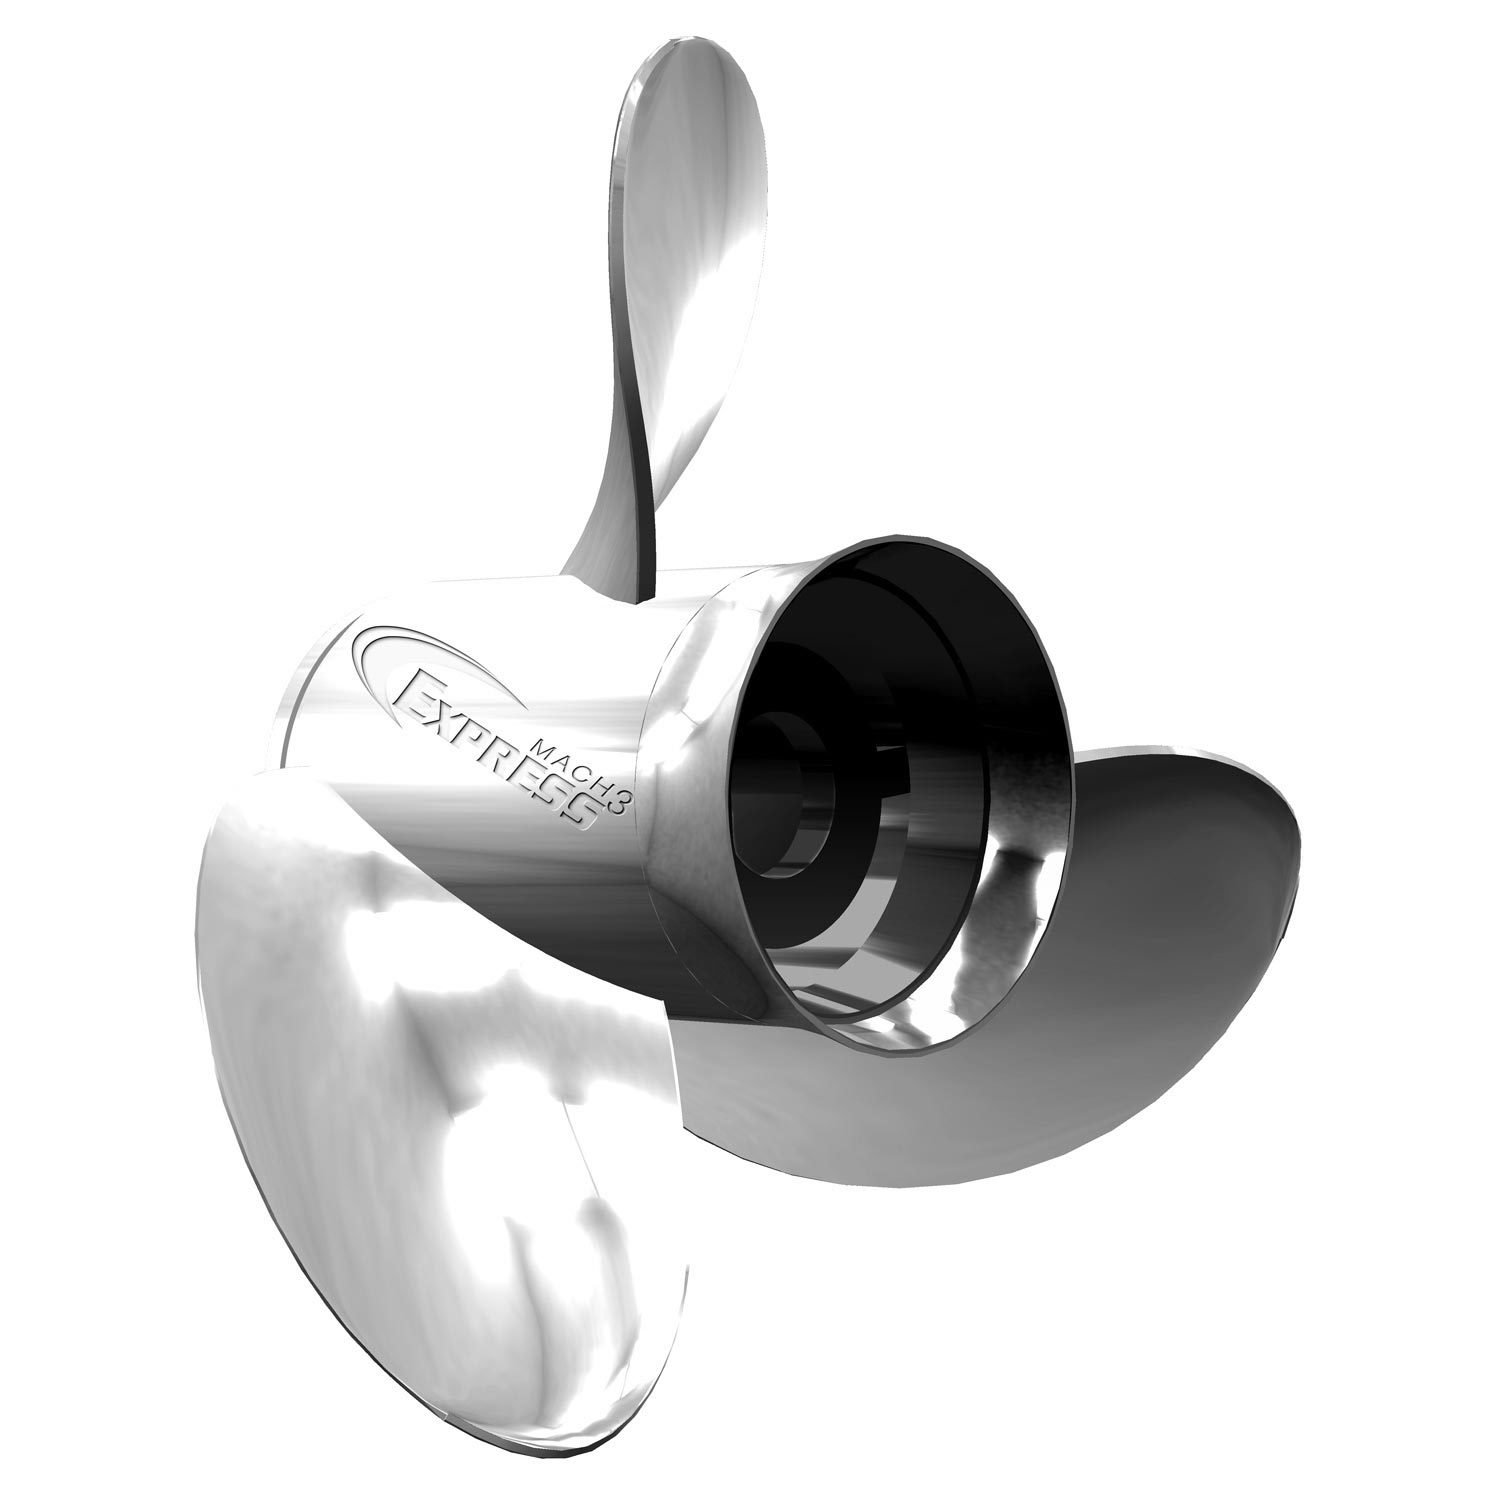
West Marine offers a complete selection of propellers.
Verify that the propeller is not chipped, bent, or showing cracks and that it rotates smoothly. If it passes inspection, remove the propeller, lubricate the shaft with quality water-resistant marine grease, and reinstall. Confirm the cotter pin or prop nut lock is correctly installed.
While the prop is off, check your engine’s RPM at wide-open throttle (WOT) against the optimum range in your owner’s manual. If the engine revs too high or too low at WOT, a different pitch propeller may be needed. See Selecting a Propeller for guidance.
6. Change the Outdrive Gear Lube Oil
As noted at the start, changing gear oil is best done in the fall as part of winterization. Water-contaminated gear oil — indicated by a milky or creamy appearance — can cause corrosion and damage if left in the drive over winter. If you find milky oil when you drain in spring, have a professional inspect the drive before putting the boat back in service.
Because outdrive designs vary, consult your owner’s manual for the specific gear oil change procedure for your drive. Some outdrives have a single drain/fill port at the bottom and a vent port above; others have three ports. Some have a reservoir in the engine compartment; others do not.
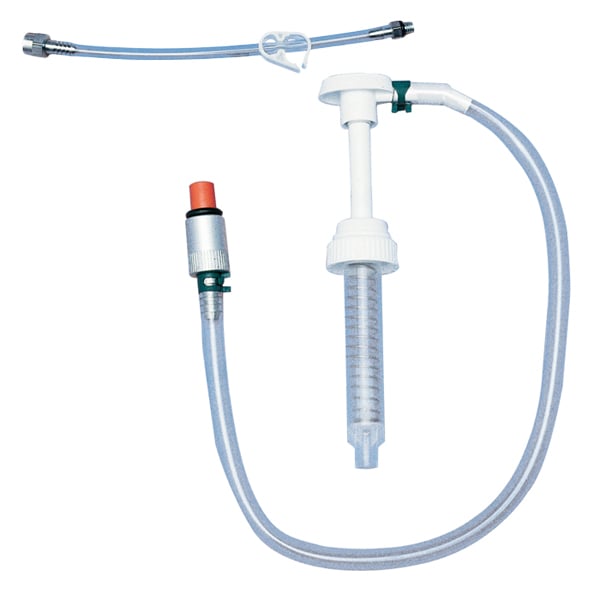
Example of a gear lube pump.
Regardless of outdrive design, always use a gear lube pump to fill from the bottom up. Pump slowly — heavy, viscous gear oil needs time to flow into all cavities as it rises. Always use new gaskets on fill and vent plugs when reinstalling — reusing old gaskets is a common cause of water intrusion. When removing fill or vent plugs, watch for old gaskets stuck against the port face and carefully remove them before installing new ones.
When you remove the drain/fill plug, examine the magnet on the plug for metal particles. Fine metallic filings on the magnet indicate normal gear wear and are not a concern. Metal chips or larger fragments indicate internal damage and require professional inspection before the drive is put back in service.
7. Change the Engine Oil
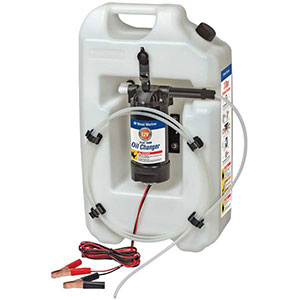
West Marine’s Flat Tank Oil Changer includes a 3.5-gallon polyethylene tank and a 12-volt pump.
Before draining, run the engine briefly to warm the oil — warm oil drains more completely. Attach flushing muffs to a garden hose, place them squarely over the water intake ports at the bottom of the outdrive, and turn on the water before starting the engine. Confirm the drive is in neutral, start the engine, and run it for five to ten minutes. The fogging oil from winterization will burn off as white smoke — this is normal. Shut the engine off and drain the oil immediately while it is still warm.
On many inboard/outboard installations, there is insufficient clearance below the drain plug for a drain pan. An oil extraction system that removes oil through the dipstick tube is the practical solution. For a full overview of extraction options, see Do-it-Yourself: Changing Engine Oil.
After draining, replace the oil filter: place an absorbent sheet underneath to catch drips, unscrew the old filter, coat the new filter’s O-ring with a thin film of clean oil, and install hand-tight. Fill the engine with fresh oil to the “full” mark on the dipstick. Start the engine, run for 30 seconds, shut off, and check the level again — it will drop slightly as the new filter fills. Top off as needed. Dispose of old oil and filter at a recycling center.
8. Change the Fuel Filter Element
Replace the factory-installed fuel filters according to the manufacturer’s recommendations. Use our Boat Engine Parts Finder to locate an OEM-equivalent filter element for your specific engine.
9. Optional Upgrade: Install a 10-Micron Fuel Filter
Consider adding an inline 10-micron fuel filter/water separator upstream of the stock engine filter. The stock filter on most engines filters at approximately two microns, but a 10-micron pre-filter catches the larger contaminants before they reach and load up the stock filter — extending its service life and providing an additional stage of water separation. For installation guidance and more on why this upgrade is worthwhile, see Multi-Stage Fuel Filtration.
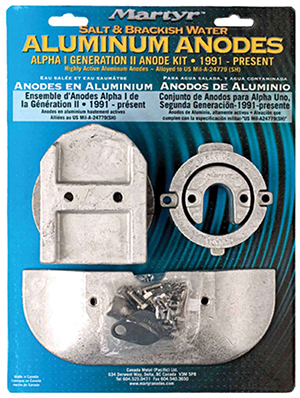
Available anode kits include a complete set of OEM-equivalent anodes for your outdrive or outboard.
10. Inspect and Replace Sacrificial Anodes
Sacrificial anodes protect against galvanic corrosion and must be the correct material for your water type: zinc for saltwater, aluminum for brackish water, and magnesium for freshwater. Using the wrong anode material reduces protection or can actually accelerate corrosion in some conditions.
Consult your owner’s manual for the location of all anodes — both on the outdrive and on the engine itself. Anodes that are more than 50% consumed should be replaced. Do not paint over anodes — they must have bare metal contact with the water to function. If zinc anodes were exposed to freshwater (rain or snow) over winter, remove the white oxidation buildup from their surface before putting the boat back in service — the white layer insulates the anode and prevents it from working.
11. Replace the Water Pump Impeller
Most outdrive manufacturers recommend replacing the water pump impeller annually or after no more than two seasons. The flexible rubber impeller blades degrade over time even when not in use — rubber that has been compressed against the pump cam all winter can take a permanent set and fail quickly on startup. Replace the impeller proactively at spring commissioning rather than waiting for symptoms of reduced cooling water flow. Follow your outdrive manufacturer’s specific replacement procedure. For a complete step-by-step guide, see our Impeller Replacement 101 article.
Exhaust Manifolds and Risers
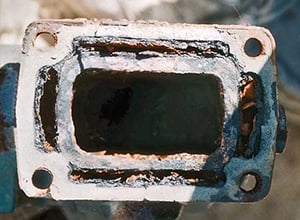
Water jacket of manifold port seriously obstructed by rust. Photo courtesy BoatUS.
Corroded manifolds and risers are a persistent problem for owners of boats with raw-water-cooled inboard or inboard/outboard engines. Manifolds and risers are made of cast iron, which is highly susceptible to rust and corrosion — particularly in saltwater. Their purpose is to cool the hot exhaust gases from the engine and direct them to the riser where they combine with cooling water and are expelled overboard. Over time, rust and mineral buildup restrict water flow through the manifold’s water jacket, causing overheating problems or, in the worst case, allowing water to back-flood into the cylinders and destroy the engine.
In saltwater environments, the life of a manifold can be as short as three years according to BoatUS. Engine overheating may indicate a failing manifold or riser, though it can also be caused by a bad thermostat, blocked water intake, or a faulty water pump. The outward appearance of a manifold gives no reliable indication of its internal condition. Two diagnostic methods:
- Water evaporation test: Drip a small amount of water on each riser. If the water evaporates at noticeably different rates, one riser may have restricted flow.
- Infrared thermometer check: A marine mechanic can identify temperature differences between cylinders along the manifold with a digital infrared thermometer. This is the more accurate method.
Manifold and riser replacement is generally a job for a professional. If your engine is freshwater-cooled (running coolant through a heat exchanger), manifold corrosion is largely eliminated — but the risers are still raw-water-cooled and can fail for the same reasons.
Waking Up Your Inboard/Outboard Engine FAQs
What should I do before starting my inboard/outboard engine after winter storage?
Inspect engine belts, cooling hoses, and fuel lines for wear or cracking. Reconnect and charge the battery and verify it holds a full charge. Confirm the engine was properly winterized with antifreeze and fogging oil — if not, address any missed steps before starting. Also confirm the flushing muffs are attached and the water is running before you start the engine, since running the raw water cooling system dry even briefly can damage the impeller.
How often should I replace the water pump impeller?
Most outdrive manufacturers recommend annually or every two seasons at most. Rubber impeller blades that have sat compressed in the pump housing all winter often take a permanent deformation and fail quickly on startup. Annual replacement at spring commissioning is the practical standard for any frequently used boat.
What does milky gear lube indicate?
Milky or creamy gear oil indicates water intrusion into the lower unit through a failed seal. If you find milky oil when draining, drain and refill with fresh gear lube — but also have a professional inspect the drive for seal failure and potential corrosion damage before returning the boat to service. Running a drive with compromised seals will cause rapid bearing and gear corrosion.
How do I know if my sacrificial anodes need replacing?
Inspect all anodes at spring commissioning. Any anode more than 50% consumed should be replaced. Also check that zinc anodes have not developed a white oxidation layer from freshwater exposure during winter storage — this layer must be removed for the anode to function. Make sure you are using the correct anode material for your water type: zinc for saltwater, aluminum for brackish, magnesium for freshwater.
What are the signs of a failing exhaust manifold or riser?
Engine overheating is the primary symptom, though other issues (thermostat, water pump, blocked intake) can also cause overheating. The water evaporation rate test and infrared thermometer check by a mechanic are the most reliable diagnostic methods. Do not ignore overheating — continued operation with a failed manifold can result in water backing into the cylinders and destroying the engine.
Why should I add a 10-micron fuel filter?
A 10-micron pre-filter upstream of the stock engine filter catches larger fuel contaminants and water before they reach the primary filter, extending filter life and providing an additional stage of protection against fuel-related engine problems. Ethanol-blended fuel absorbs water more readily than pure gasoline, making fuel system water separation increasingly important for most boaters.
How do I determine if my propeller pitch is correct?
Check your engine RPM at wide-open throttle (WOT) against the optimum range specified in your owner’s manual. If the engine revs above the maximum WOT RPM, the propeller pitch is too low — try a higher-pitch prop. If the engine cannot reach the minimum WOT RPM even at full throttle, the pitch is too high — try a lower-pitch prop. Running consistently above or below the WOT RPM range reduces efficiency and can shorten engine life.
We’re Here to Help
At West Marine, we’re passionate about powering your boating adventures. Beyond engine oil, fuel filters, and sacrificial anodes for your inboard/outboard, explore boating’s best selection of gear online or in over 220 West Marine stores. Use our store locator to find the West Marine store near you.


