Dewinterizing a Boat — Quick Expert Summary
-
Dewinterizing means flushing antifreeze and safely bringing systems back online after storage
-
Always follow your engine and equipment owner’s manuals first
-
Start with inspection + batteries, then do engine, then water/plumbing, then sanitation, then A/C, then safety + controls
-
Use a clean water supply for test-running engines (muffs/flushers) and confirm strong water flow immediately
-
Replace worn hoses, belts, impellers, and anodes before launching
-
Dispose of antifreeze and oily waste properly—never into the bilge or overboard
Dewinterizing a boat involves taking it out of winter storage and preparing it for spring and summer use. This process is the flip side of winterization, wherein boat engines, freshwater, air conditioning and sanitation systems are drained of water and treated with antifreeze to protect them against expensive freeze damage. As the reverse of winterizing a boat, the dewinterizing process involves flushing the antifreeze out of engine, freshwater, air conditioning and sanitation systems.
Note: The advice we give is not intended to replace the recommendations found in the owner’s manuals for the systems covered by this guide.
Dewinterizing Tasks Can Vary
The dewinterizing tasks you perform will vary according to the type of boat you have, how it is equipped and the procedures you completed when it was winterized in the fall.
- How to Dewinterize Inboard and Inboard/Outboard Engines
- How to Dewinterize Outboard Motors
- How to Dewinterize a Freshwater System
- How to Dewinterize a Sanitation System
- How to Dewinterize a Marine Air Conditioning System
- Other Tasks
Before You Start: What You’ll Need
-
Owner’s manuals for engine, A/C, water pump, head, and heater
-
Battery charger + distilled water (if using flooded lead-acid batteries)
-
Basic hand tools + flashlight
-
Oil-absorbent pads (bilge protection)
-
Flush muffs or inboard flusher + hose with good water flow
-
Spare hose clamps, zip ties, and rags
-
Replacement items as needed: impeller, fuel filter(s), spark plugs, anodes, belts
Safety Notes (Do This Every Time)
-
Ventilate the engine space before starting
-
Keep absorbent pads in place so no fluids reach the bilge
-
Never run an engine without proper cooling water supplied
-
If water flow is weak or missing at the exhaust, shut down immediately
How to Dewinterize Inboard and Inboard/Outboard Engines
Try the interactive SONAR parts finder for the engine parts you need.
If you have an inboard or an inboard/outboard motor that was winterized in the fall, and wish guidance on how to bring it back online for the boating season ahead, below is a basic list of tasks. Of course, tasks that were performed in the fall as part of winterization can be omitted. For more on how to dewinterize an inboard/outboard motor, see our West Advisor article Waking up Your Inboard/Outboard Engine.
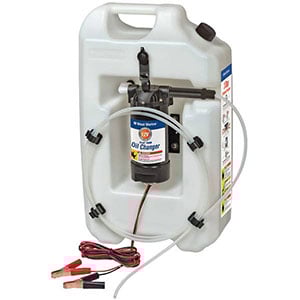
Oil change pumps like West Marine's Flat Tank Oil Changer make oil changes easy.
- Inspect the engine belts. Edge fraying or cracking warrants replacement.
- Inspect the fuel system hoses. Look for signs of leakage and inspect for cracking. Replace as necessary.
- Inspect the cooling system hoses. Inspect for cracks and pliability. Rock hard hoses that don’t give when squeezed, even a little, need further inspection and possible replacement.
- Reconnect and charge the battery (or batteries). Add distilled water to traditional lead acid batteries if needed. Fill to top of charging plates.
- Inspect the propeller. For inboard/outboard motors: Inspect the propeller. If chipped or bent have it serviced or replace it. Also, if it does not turn freely, remove it and check for fishing line or debris that may be wrapped around the prop shaft behind the hub. Make sure the drive shaft seal is not damaged. Then, after lubricating the propeller shaft with waterproof grease, reinstall the propeller. For inboard motors: Inspect the propeller and check for excessive shaft play.
- Change the outdrive gear lube oil. For inboard/outboard motors: Change the gear lube oil. Inspect and if necessary, replace the gear lube fill and overflow port seals. Note: This step should have been completed at winterization. If not replaced, inspect gear lubricant for signs of water, which will either separate out to the bottom or will cause the gear lube to be milky.
- Consider replacing the water pump impeller. We recommend yearly replacement. For inboard/outboard motors: To access the impeller, you will need to drop the bottom end of the outdrive. For inboard motors: Inspect the raw water pump impeller and replace if necessary. While some boaters do this every two years, we recommend yearly replacement.
- Connect the motor to a source of water. For inboard/outboard motors: Attach flushing muffs over the outdrive’s water intake ports and turn on the water supply. For inboard engines: Affix West Marine’s Adjustable Inboard Engine Flusher over the raw water strainer on the outside of the hull and turn on the water supply.
- Start the engine. For inboard/outboard and inboard engines: After starting the engine, immediately check the oil pressure gauge and verify oil pressure; and look over the stern to verify that water (along with the antifreeze from winterization) is exiting out the exhaust. If water is not exiting out the exhaust, immediately stop the engine and consult with a service professional. If the engine is running ok, check the transmission by carefully shifting from neutral into forward and then into reverse.
- Change the engine oil and the oil filter. While doing this, inspect the oil drain plug gasket and replace if necessary.
- Inspect and change the spark plugs if fouled.
- Change the engine’s fuel filter element.
- Optional: Install a 10-micron fuel filter. For the reason behind this recommendation, please read out West Advisor article Do-it-Yourself: Adding a Second Fuel Filter.
- Inspect all sacrificial anodes and replace as necessary. Anodes should be replaced when 50 percent or more of their material is worn away.
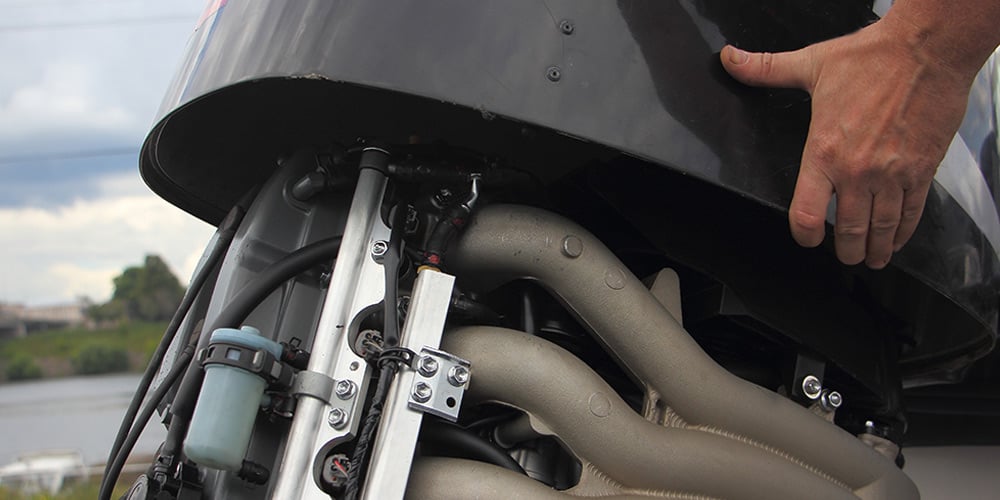
How to Dewinterize Outboard Motors
If you properly winterized your outboard motor in the fall, your outboard’s dewinterizing task list will be short. However, if you did not winterize your outboard motor, there are some extra actions you will need to take. Outboard owners who are wondering what they should have done in the fall, please read our West Advisor article Winterizing Your Outboard Motor.
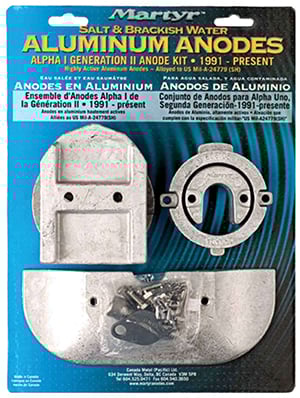
Available anode kits include a complete set of OEM-equivalent anodes for your outdrive or outboard motor.
For those who properly winterized their outboard motors in the fall, dewinterizing is easy:
- Remove the cover and give the power head a thorough inspection. Look for any evidence of a rodent infestation. Chewed wires or fuel hoses are a dead giveaway of this. Make sure that nothing is cracked, leaking or loose.
- Start the motor. If your outboard was winterized correctly, the motor is ready to be started. To start the motor you will need to connect your motor to the fuel tank, charge and reconnect the battery (for electric start models), attach flushing muffs to the water intake and turn on the water. If you fogged the motor in the fall, when you start the motor, you will notice some smoke, which is a normal consequence of the fogging oil burning off.
- Make sure the propeller is free of obstructions. While the motor is running, shift it into forward, neutral and reverse. Then check the steering by turning the steering wheel (or pushing the tiller) from right to left. If the motor shifts and steers OK, your outboard dewinterizing job is done.
However, if the motor was not correctly winterized, you have some additional tasks to perform. All of the tasks below can be performed in the fall as part of winterization.
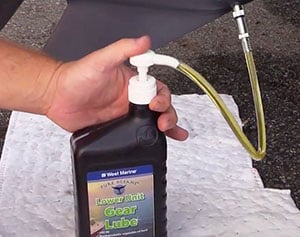
Example of gear lube pump in use.
- Locate the stock fuel filter/water separator on the outboard. Remove it, open it up, dump out whatever fuel it has inside it, clean it and reinstall it. Consider installing an inline 10 micron fuel filter, which will become the primary fuel filter. The existing stock fuel filter then will provide secondary filtration. For more about this recommendation, see our West Advisor article Do-it-Yourself: Adding a Second Fuel Filter.
- For 4-stroke models, change the crankcase oil and change the oil filter.
- Change the bottom end gear oil. You will need a gear lube pump to do this. Note: To avoid possible catastrophic damage, this step should always be completed at the time of winterization.
- Check the spark plugs and replace if fouled.
- Check the carburetor. For carbureted (not EFI) models, make sure the carburetor is not gummed up with visible signs of leakage. If leakage is occurring, the carburator needs to be serviced. Note: Depending on your skill set, this may require a service professional.
- Check the prop and repair or replace it if damaged. Damaged stainless-steel props, warrant inspection of the propeller shaft for an out-of-round condition that can cause catastrophic damage. Have prop shaft inspected by marine professional.
- For EFI outboards equipped with a VST tank. If the outboard fails to start, the problem may be bad fuel in the VST tank. In this case you should drain the fuel out of the VST tank, clean the VST tank, replace the VST fuel filter and service as necessary. Note: Depending on your skill set, you may need a service professional to do this.
How to Dewinterize a Freshwater System
Dewinterizing a freshwater system involves reversing the steps that were taken in the fall to winterize the system with antifreeze. To review how to winterize a freshwater system, please read our West Advisor article Winterize Your Potable Water System. The following instructions assume that your boat is equipped with a pressure activated water pump.
- Add a couple of gallons of water to the water tank. There is no need to completely fill the tank.
- Turn on the freshwater pump. Purge the air out of the system. Open the faucets to let the air purge out of the system. Let the water flow until the tank is empty and the pump runs dry. This should remove any residual antifreeze from the system.
- Turn the water pump off and close the faucets.
- Completely fill the water tank with fresh water.
- Turn the water pump back on and open the faucets.
- Wait while the air purges again out of the lines and the water runs smoothly out of all faucets.
- Close the faucets and top off the tank with fresh water.
- If desired, add a water treatment to the tank.
How to Dewinterize a Sanitation System
West Marine offers a complete selection of sanitation system upgrades and repair parts.
- Inspect the system. If you are not sure if your sanitation system was properly winterized, please read our West Advisor article Do-it-Yourself: Winterize Your Marine Sanitation System. To dewinterize your system, begin by inspecting all sanitation hose and hose connections to ensure that the hoses are sound and that there are no leaks.
- Flush the toilet and verify the macerator pump works. Flush the toilet until the water runs clear through the toilet. If you have an electric toilet ensure that the macerator pump is working properly.
- Rinse out the holding tank. Rinse the holding tank with fresh water and pump out its contents out at a pumpout facility. Rinsing and pumping out the holding tank is essential, since many holding tank treatments are rendered ineffective by antifreeze.
- Add a holding tank treatment to the tank.
How to Dewinterize a Marine Air Conditioning System
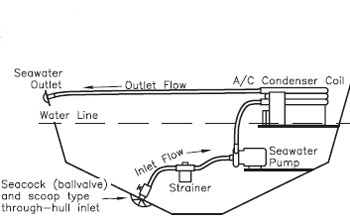
Seawater circulation and air conditioning components.
The following steps assume that the air conditioner seawater cooling circuit was winterized with antifreeze in the fall. For how to perform that task, please read our West Advisor article Winterizing Marine Air Conditioning.
- Remove seawater discharge hose from discharge fitting and place hose in bucket. If boat is not in the water, remove hose from seawater intake fitting and place in separate bucket of fresh water.
- Run the air conditioner. This will expel antifreeze from winterization out of the system and into the empty bucket. When the water runs clear into the bucket turn off the air conditioner and reclamp the discharge hose on to the discharge fitting. For boats that are not in the water, reclamp the intake hose on to the intake fitting.
- Dispose of used antifreeze. Do this in accordance with local, state and federal regulations.
Other Tasks
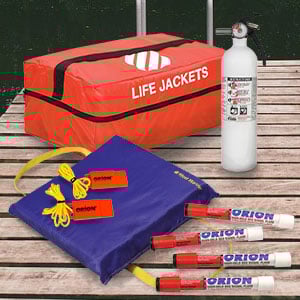
For most boats, Coast Guard required gear includes signaling devices, a horn or whistle, throwable flotation, life jackets and one or more fire extinguishers.
- Inspect the electrical system. Before launching your boat, give your boat’s electrical system the once over. Make sure all electrical connections are tight, corrosion free and if necessary, coat with dielectric grease. Ensure that all navigation lights are working.
- Inspect the steering system. If your boat has manual steering, grease the cables and ensure that the steering wheel turns easily lock to lock in both directions. If your boat has a hydraulic steering system, inspect the fluid at the helm for water, look for any leaks, inspect hoses for cracks. and service if necessary. Steering should be smooth and not “spongy” which may mean air or contaminants are in the system which require a visit to a marine professional.
- Inspect the shift Mechanism. Grease the cable(s) and the shift mechanism. Make sure it operates smoothly. Inspect shift cable(s) for cracks or signs of cable fraying at connection points on engine. Replace if necessary.
- Antifoul the boat’s bottom. Doing this in the fall makes preparing your boat in the spring a lot easier. For guidance on how to get this job done, please read our West Advisor articles Top Ten Antifouling Paint Buying Questions and How to Paint the Bottom of Your Boat .
- Nip mold and mildew in the bud. Since mold and mildew thrive on dirt and grime, thoroughly cleaning your boats interior in the fall and keeping it ventilated during storage will help to reduce its occurrence in the spring. West Marine offers a number of mold and mildew removers and blockers.
- Wash and wax the boat. West Marine offers a complete selection of cleaning supplies, polishes and waxes for your boat.
- Meet USCG Requirements. Make sure your boat is outfitted with all USCG required safety equipment and gear. For questions in this regard, please read our West Advisor article U.S. Coast Guard Required Equipment for Recreational Vessels .
- IF YOU STORED YOUR BOAT WITH THE TRANSOM DRAIN PLUG REMOVED, BE SURE TO REPLACE IT BEFORE YOU PUT YOUR BOAT IN THE WATER!
Dewinterizing a Boat FAQs
How long does it take to dewinterize a boat?
Most boat owners spend 2–6 hours dewinterizing, depending on whether the boat has an outboard, sterndrive, or inboard engine and how many systems were winterized. Boats with freshwater plumbing, generators, or air conditioning systems may require additional flushing and inspection time. Planning ahead and having replacement parts like impellers and oil on hand speeds up the process.
What’s the biggest mistake during dewinterizing?
Starting the engine without verifying cooling water flow is the most common and most damaging mistake. Always ensure a proper water supply using muffs or a flush port, then confirm strong exhaust water discharge immediately after startup. Running dry can destroy an impeller in seconds and lead to overheating.
Do I have to change oil during dewinterizing?
If the engine oil wasn’t changed before winter storage, it should be replaced before running the engine for the season. Used oil contains acids and moisture that can cause internal corrosion during storage. Fresh oil protects bearings, camshafts, and internal components during spring startup.
How do I know antifreeze is fully flushed from the freshwater system?
Run each faucet and fixture until water flows clear and the antifreeze color and odor are completely gone. After flushing once, refill the tank with clean water and flush again to remove any residue. This ensures safe water use and prevents taste contamination.
What does milky gear lube mean?
Milky or cloudy gear lube indicates water intrusion, usually from a failing lower unit seal. Water contamination reduces lubrication and can cause gear damage under load. Replace the gear lube and pressure-test the lower unit before running at high speed.
Should I replace the impeller every year?
Many boaters replace the raw-water impeller annually as preventative maintenance, especially after winter storage. Rubber impellers can take a set or crack during long periods of inactivity. Annual replacement reduces the risk of overheating and unexpected failure.
Can I pour antifreeze or oily water into the bilge?
No. Antifreeze, oil, and contaminated water must be disposed of properly at an approved facility. Discharging fluids into the water can result in environmental damage and significant fines. Always use proper containment and disposal practices during spring commissioning.


