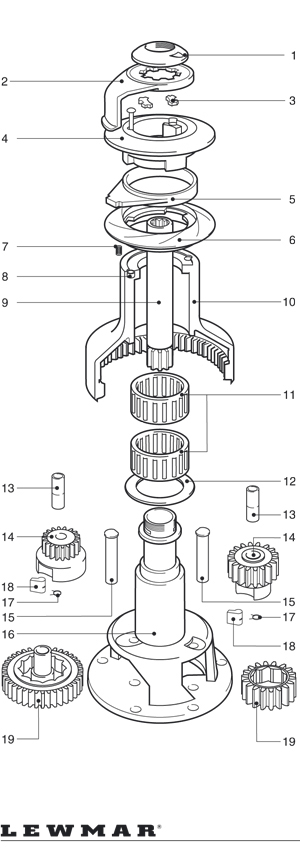
Know your winch
1. ‘O’ Ring 2. Feeder arm 3. Collet 4. Upper crown 5. Stripper ring 6. Lower crown 7. Spring 8. Spring cup 9. Main spindle 10. Drum 11. Roller bearing assembly 12. Drum washer 13. Gear spindle sleeve 14. Pawl gear 15. Gear spindle 16. Center stem 17. Pawl spring 18. Pawl 19. Ratchet gear.
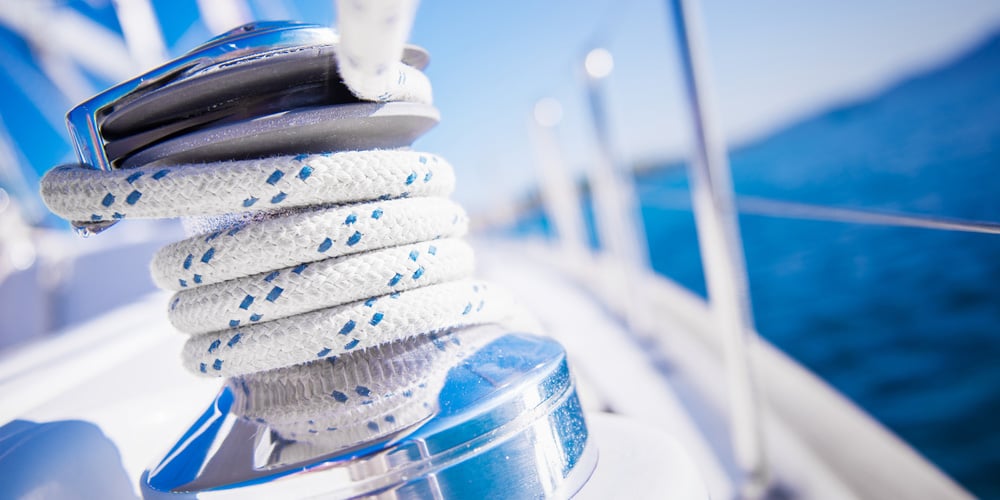
Keep your winches in top shape without denting your wallet by servicing them yourself. Regular maintenance prolongs the life of these expensive machines and keeps them functioning properly. Although they may look just fine on the outside, poor maintenance results in friction and inefficiency and allows corrosion to set in. Dirt and metal grind down surfaces every time the winch is used. Your boat’s winches should be serviced at least once or twice during the sailing season depending on the frequency and extent of your sailing endeavors, and again in the fall when the boat is hauled. Service them immediately if:
- Ratcheting seems sluggish or sticky: Pawls may have been greased instead of oiled. Clean any grease off and then oil pawls.
- The winch doesn’t turn freely: Refer to the winch manual and clean, grease and oil the winch. Check for damaged springs, pawls or bearings to make sure nothing else is wrong.
- The winch can be turned in both directions: Indicates a problem with the pawls. They may be stuck in grease or damaged.
Here are some tips to perform a complete overhaul so your winches run smooth season after season.
Preparation
Winches are different from manufacturer to manufacturer. Their designs also differ depending on how many speeds they have, so having your winch service manual handy is important. If you don’t have a service manual, most manufacturers offer a .PDF version that’s easily obtainable online, as well as YouTube videos with step-by-step instructions. Some older winches may need extra tools such as circlip pliers, Allen wrenches or an adjustable wrench.
Replacement parts in the form of a service kit are necessary and should be purchased before starting the job. Anyone who has ever serviced a winch has seen pawls fly by and springs leap into the deep. A helpful tip to make losing parts less frequent is to set your parts down only in a box, and never on the deck (a shallow soda-can box from the local grocery store works well). Cut a hole the diameter of the winch drum in the center of the parts box. Slip this over the winch before you begin working on it and secure with masking tape.
To reduce confusion when reassembling the winch, put your parts down in the order in which you disassembled them, then clean them in that order. This makes reassembly quick and easy. You may also shoot photos with your smartphone. Taking pictures to record where all the pieces fit as you take your winch apart will aid in reassembly. A pair of disposable nitrile gloves will keep grease, solvent degreaser, oil and dirt off your hands.
Disassembly, Cleaning and Inspection
Disassembly will be different for each make and model and there will be more parts to dismantle if your winch has multiple speeds or a self-tailer. Refer to the manufacturer’s service manual for details for your model of winch. The following account may help guide you through dismantling basic winches.
The first step is to remove the drum. On Lewmar models, just unscrew the cap at the top of the drum that surrounds the winch handle socket (modern Lewmar winches require no tools for servicing). With Harken winches, use a flat screwdriver to unscrew the top screw found in the bottom of the winch handle socket. Remove the top cap and lift off the drum. If you have a self-tailing winch, you’ll need to remove the stripper arm and/or self-tailing jaws before you can remove the drum. When you pull the drum off, be careful that the bearings aren’t stuck inside, ready to fall out, roll overboard and ruin your day.
Remove and clean the drum, bearings and washer, then remove the spindle retaining collets, or “keys” (in Lewmar winches), and lift out the main spindle. If you have a two-speed winch you might need to use a small screwdriver to lift out the gear spindle and remove the gears. This is where it is important to place your parts in the box or on a sheet of paper (still in the box) in the order you removed them. When you clean each piece, set it down in its spot on the paper. That way, the parts are always in order for quick reassembly.
To clean winch parts, use a bucket or tub with some solvent-based cleaner (mineral spirits, diesel, or any commercial degreaser, but not gasoline, which can damage plastic parts) and a lint free cloth to remove existing grease. Small gears are the most challenging to clean (old tooth brushes work well for this).
Remove, clean and inspect pawls and springs. While inspecting these, look for any signs of wear, pitting or distortion and replace them as needed. Check for broken springs. Lewmar recommends replacing the pawls every five years, and installing new springs every time you service the winch. Also check bearings, gears and spindles for wear and corrosion. Inspect the winch base. Look for rot in teak winch pads and cracks around bolt holes. Look at the inside of the drum and inspect it for wear, especially if it is made of anodized aluminum. Remember to dry your parts thoroughly before applying any oil or winch grease. If there is any leftover solvent, it can promote the breakdown of your newly-applied lubricant.
Lubrication
Once everything is completely dry and all leftover solvent is wiped away, lubricate pawls with light machine oil (do not use grease, which could cause the pawl to stick). Use a brush to spread a light even coat of winch grease over spindles, gears and bearings. Take care to lightly grease all gear teeth, including those inside the winch drum, and bearing surfaces. Keep in mind that too much grease can cause salt and water deposits to become trapped inside the winch.
Reassembly
Now that everything has been dismantled, cleaned, inspected and re-lubricated, it is time to put it all back together. If you were careful to place your parts in successive order, you will have your winch back together and working in no time.
When all your winches have been serviced, you are ready to enjoy sailing again!
Don’t forget about them until next year, however. In order to keep your winches happy, flush them frequently with fresh water, especially after each outing. Washing the winch drum prevents dirt and grit from being ground in when lines are wrapped around it. Cover the winches when not in use. If you make it a habit to protect your winches, they’ll remain a pleasure to use for years and you’ll stave off expensive and badly timed breakdowns. Properly maintained, they really will last for decades, as we have seen from the many “plastic classic” boats we sail on that still have their 1970s-vintage Barient winches that are working perfectly.
How to Service an Anderson Winch
Here is a video on how to service an Anderson winch. Some of the parts might not fit together in exactly the same way as with a Lewmar, Harken or other manufacturer's winch, but the process is essentially the same.