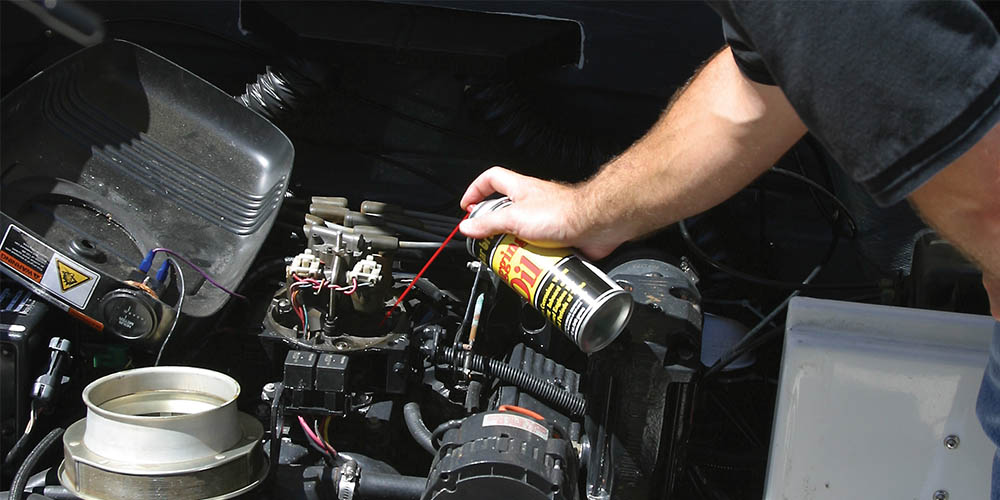
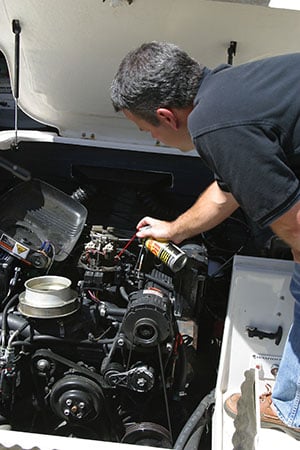
Kevin is spraying Star brite Fogging Oil into the carburetor of this Volvo Penta engine
Winterizing your power train extends the life of your engine, and prevents the most costly repairs from freeze damage. There are four primary tasks, which we present here in the order you should complete them:
- Clean Fuel and Clean Filters
- Adding Antifreeze
- Adding Antifreeze to a Stern Drive
- Fogging the Engine on a Stern Drive
- Adding Antifreeze and Fogging the Engine on an Inboard
- Change Engine and Transmission Oil
- Other Preventative Maintenance
Clean Fuel and Clean Filters
Step one of winterizing is to fill the tank with gas and add the fuel stabilizer of your choice like Star brite EZ-To-Start (or what’s recommended by your Owner’s Manual). Expert opinion regarding ethanol-enhanced gas is to keep the tank full to reduce the amount of air in the tank. Since air holds moisture, as the temperature drops, this moisture condenses and ends up as water in the bottom of your tank. This can fill up your fuel-water separator and cause starting problems in the spring.
A fuel stabilizer also prevents varnish buildup in fuel lines, carburetors or fuel injectors, during the long period of inactivity. This is also a great time to replace the filter element in your fuel filter-water separator.
Adding Antifreeze
The next job is winterizing the engine block with antifreeze, to prevent any residual water from freezing and cracking your block as it expands. Some boatyards avoid this step by opening all the petcocks in the block, then blowing compressed air through the entire raw water cooling system. There’s some risk in winterizing this way, as any leftover water remaining in the block could cause a crack. That’s why we believe that flushing with antifreeze is both an easier and safer winterizing plan.
Two Types of Antifreeze
There are two types of antifreeze. One is the common automotive antifreeze like Prestone. It’s great for cars, but only a good choice for boats that have a closed, freshwater cooling system, like a car’s. These cooling systems use a heat exchanger, much like your car’s radiator, and dissipate the heat into the raw water side of the cooling system.
Most boats only have a raw water cooling system, pulling water in from the lake or ocean, circulating it through the engine block, and then discharging it overboard. Because automotive-type antifreeze is highly toxic, we’ll need to use a non-toxic variety for this application. That way it can be used more safely, in case some of it ends up next spring in storm drains or the water where you use your boat.
This less-toxic antifreeze is made from propylene glycol. West Marine antifreeze is premium “virgin” antifreeze, meaning it has not been recycled. It also has corrosion inhibitors to protect the engine and cooling system.
Three Levels of Concentration
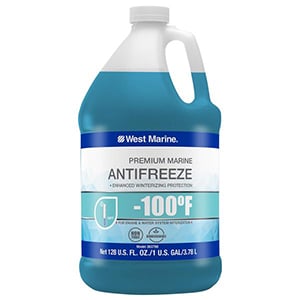
Non-toxic West Marine propylene glycol antifreeze is recommended for winterizing potable water systems and all engines.
With -50, -60 and -100 degree antifreezes available, which should you choose? For use in winterizing your engine, we recommend the highest concentration available, the -100. Why use this product when the temperature never dips below -50°F? Simply because there’s always some leftover residual water inside the engine, that dilutes the antifreeze you pour in. What goes in as -50 may not come out as -50, so that the resulting freezing point may be much higher than the rated temperature.
A final note about non-toxic propylene glycol antifreeze concerns its “slush point,” which is plus 11°F for the -50 antifreeze. Slushing is OK and will not harm your engine or other systems. For more technical info about understanding burst point and freeze point, and about our West Marine Antifreeze, click on the link at the bottom of this article.
Putting in the Antifreeze—Sterndrives
If your boat is a sterndrive, West Marine sells a do-it-yourself winterizing kit to make this job simpler. Begin by connecting your garden hose to a faucet, hooking it to a motor flusher, placing this over the raw water intake, turning on the freshwater and starting your boat’s engine. Let the engine warm up to operating temperature, so the thermostat will open and let coolant circulate through the entire engine. Warming the engine up is important, as it also lets the fuel stabilizer circulate through all fuel lines plus the carburetors or injectors.
Fogging the Engine
After warming the engine up, turn it off and hook up the winterizing kit to the motor flusher, in place of your garden hose. You will next remove the flame arrestor from the carburetor, so that you can add the antifreeze and complete the next winterizing step, adding fogging oil to the engine.
Start the engine up again, open the valve to the tank of the winterizing kit, and watch the antifreeze level drop in the tank. You should begin to see antifreeze discharging from the exhaust.
When the tank is nearly empty, begin spraying fogging oil into the carburetor. This will usually cause lower-horsepower engines to stall, while higher horsepower engines may cough and sputter, but continue running while emitting white smoke. Spray a good amount of fogging oil through the intake and then turn the engine off. There’s another way to spray in the fogging oil. Remove the spark plugs, one at a time, and spray the fogging oil directly into each combustion chamber. Both options work just fine.
Adding Antifreeze and Fogging Oil to an Inboard engine
The procedure is a little different for an inboard power plant. Warm the engine up to operating temperature, just like with a sterndrive. Instead of using a winterizing kit, you’ll need a five-gallon bucket, and enough antifreeze for your engine and related plumbing (at least two gallons). If your engine takes a lot of antifreeze, you might also need a helper to add antifreeze to the bucket as needed. To circulate antifreeze through the engine:
- Fill a five-gallon bucket with undiluted non-toxic antifreeze. Have additional antifreeze handy if you know your boat takes more than that or if you’ve never winterized before. You can use any leftovers in the boat’s plumbing systems.
- If the boat is in the water, close the intake seacock.
- Remove the raw water intake hose from the seacock (this is sometimes difficult, as hose clamps and hoses may be mechanically frozen in place) and insert the end into the antifreeze in the bucket.
- Start the engine and run at idle until antifreeze discharges from the exhaust outlet for 30 seconds or more.
- When the bucket is nearly empty, begin fogging the carburetor, as with the sterndrive. Spray plenty of the mist in while the engine coughs and complains, and turn the ignition off when the antifreeze runs out.
- Secure the intake hose back on the seacock.
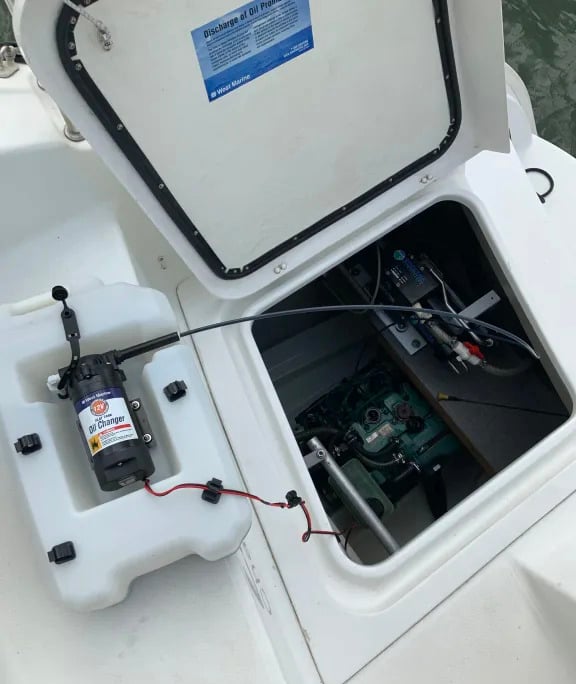
Oil change pumps like the West Marine Flat Tank Oil Changer make restricted access oil changes easy.
Changing the Engine and Transmission Oil
Now that the engine is warmed up, the next job is to change the engine’s oil and replace the oil filter. Why do this now, instead of waiting until spring? Because the old, dirty oil contains contaminants and acids that will harm the engine during the lay-up. Clean oil is a must for the health of your engine. Change the oil in the transmission too, for similar reasons. Changing the oil while it’s warm helps drain all the contaminants and gunk away with the oil. If you can’t change the oil for some reason, you should add Crankcase Oil Stabilizer before you begin winterizing.
Check the Exhaust System
There are a few more jobs left, but we’re nearly done. Break the exhaust loose from the water lift muffler or exhaust manifold and inspect for carbon buildup or corrosion. Take the raw water injection hose off the injection nipple and see if it has become blocked by debris or scale.
Inspect Hoses
Check all hoses for evidence of softness, bulging or cracking. Pay extra attention to the hot side of the exhaust and cooling systems. Check all of the hose clamps to be sure they are tight, and look for signs of corrosion.
Seal Engine Openings
Seal all of the openings that go into the engine to prevent the damp air from getting inside. Make caps out of plastic containers and tape to cover the air inlet, transmission and crankcase breathers and exhaust outlets. Leave a note for yourself listing all the openings you have sealed, so you’ll remember to uncap them in the spring.
Miscellaneous Jobs
- If your inboard boat will be stored in the water, you should tighten the stuffing box to eliminate all dripping, and of course leave a prominent reminder note so you’ll remember to loosen it in the spring.
- Inspect the motor mounts, and check their flexible rubber elements for softening caused by leaks of oil or diesel fuel.
- Lube all grease points on the engine.
- Remove control cables from their housings and coat them with grease.
Note all damage you found in your inspections, or needed repair or maintenance. Get the repairs done before spring, if possible. Touch-up paint, remove rust, clean up grease. These small items are easy to neglect in the rush of recommissioning!