How is your lower back feeling these days? Raising an anchor by hand can be a real workout. Whether you own a fishing boat, power cruiser or sailboat, a windlass makes boating easier on your back. Windlasses can be DIY-installed by a boat owner with intermediate mechanical and electrical skills. We'll walk you through installing one on your boat.
- Anchor Rollers and Alignment
- Choosing a Windlass that Fits Your Chain Locker
- Backing Plates
- Sealing Install Holes
- Electrical Considerations
- Electrical Components
- Installation Options
- Wire Size
Mechanical Considerations
Anchor Rollers and Alignment
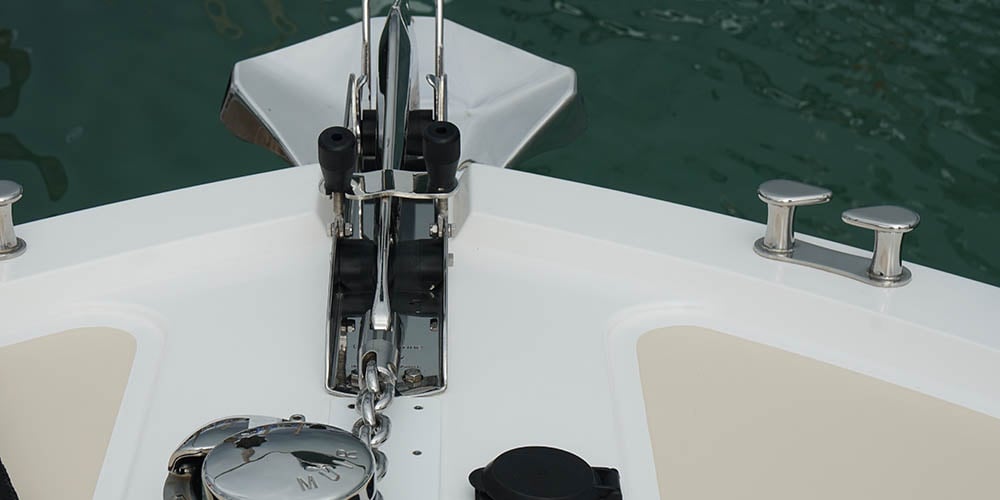
Your anchor roller/mount should be of a size and type correct for the anchor you will use. Powerboats commonly place anchor rollers on their centerline, since they have no headstays. For sailboats, the anchor roller should be located as close to parallel with the centerline of the boat as possible—while avoiding a conflict with stem fittings, headstays, furling drums and other installations.
Wooden blocks may be required to raise the anchor roller above the toerail and place it outboard so the anchor won’t bang against the boat when weighed. Some windlasses may require shimming to a point where the rode runs parallel to the deck. Side-to-side alignment is also important for vertical windlasses, which may need to be offset in relation to the boat’s centerline to achieve a fair lead through the anchor mount. You need a straight, clean run for the anchor rode, all the way down to the chain locker.
Choosing a Windlass That Fits Your Chain Locker
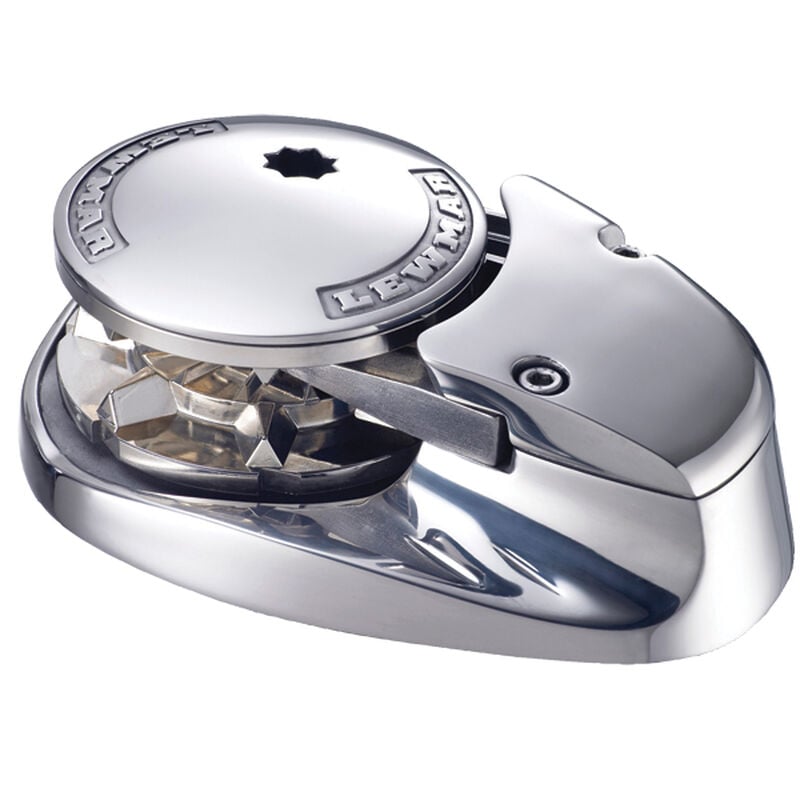
This vertical windlass has a sleek, flush-mount design that hides the motor below deck.
Vertical windlasses generally require a larger hole for the motor, which hangs below the deck. They’re suitable for boats with larger chain lockers; they require a longer fall for the chain.
Horizontal windlasses: Most of the self-contained windlass is located on deck. You only need to drill holes in the deck for the chain pipe, wire and thru-bolts. Installation is easier than with vertical windlasses. Horizontal models are good for boats with small or unusually shaped chain lockers, usually needing a minimum fall of only 12". Very large yacht windlasses and most manual windlasses are also horizontal. Side-to-side alignment of horizontal windlasses is critical since they cannot accept rodes leading from off-center angles.
Backing Plates
To distribute the loads encountered when weighing anchor or when attempting to break an anchor free, be sure to install hefty backing plates under all the hardware in your ground tackle system.
Sealing the Installation Holes
The mounting holes where you install the windlass must be sealed properly to prevent water from migrating into the plywood or balsa core of the deck. You can remove about half an inch of the core material surrounding the inside of the hole using a dremel tool, saturate the core with unthickened epoxy resin, and then add some peanut butter-thick epoxy. See WEST System’s information on hardware bonding for more details. Of course, you should also caulk the base of the windlass with a sealant such as Multi-Caulk, which will allow later removal of the windlass but keep the water out.
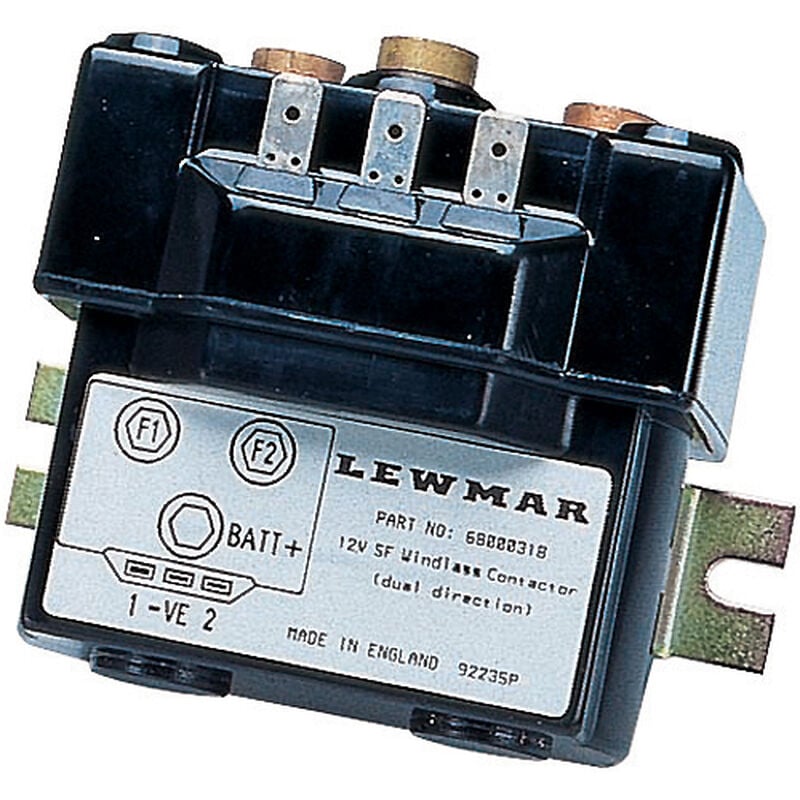
Dual-direction windlass solenoid for three-wire split field motor.
Electrical Considerations
Three Installation Questions
Proper windlass installation depends on three factors. First, determine whether you have a series-wound or permanent-magnet motor in your windlass.
Permanent-magnet motors have two wire terminals on the motor. You change direction on the motor by reversing the polarity of the terminals. Series-wound motors have three terminals on the motor—two positive and one negative. Which direction the motor runs depends on which positive terminal is energized. The motor type dictates which type of switching mechanism can be used to operate the windlass.
Second, determine whether you want single-direction (up only) or dual-direction (up/down) operation. Many windlasses give you no choice—they are power-up/power-down by design. Others have a manual clutch that allows you to control the down direction, while some simply have free-fall. Since most boaters prefer the convenience of power-up/power-down operation, single-direction windlasses are becoming less common.
Finally, determine whether or not you want to be able to operate the windlass from a remote location. Sailors commonly weigh anchor from the bow, but on many powerboats it may be inconvenient to operate the windlass from the bow.
On any boat it may be unsafe to stand on the deck in rough weather. Deck-mounted foot switches, located near the windlass, are useful even if remote operation is not desired. Panel switches at the helm are popular on powerboats, and handheld remotes (either wired or wireless) can be used on sail or powerboats when remote operation is desired.
Electrical Components

Panel-mount windlass circuit breaker.
Covered 4" diameter windlass foot switch.
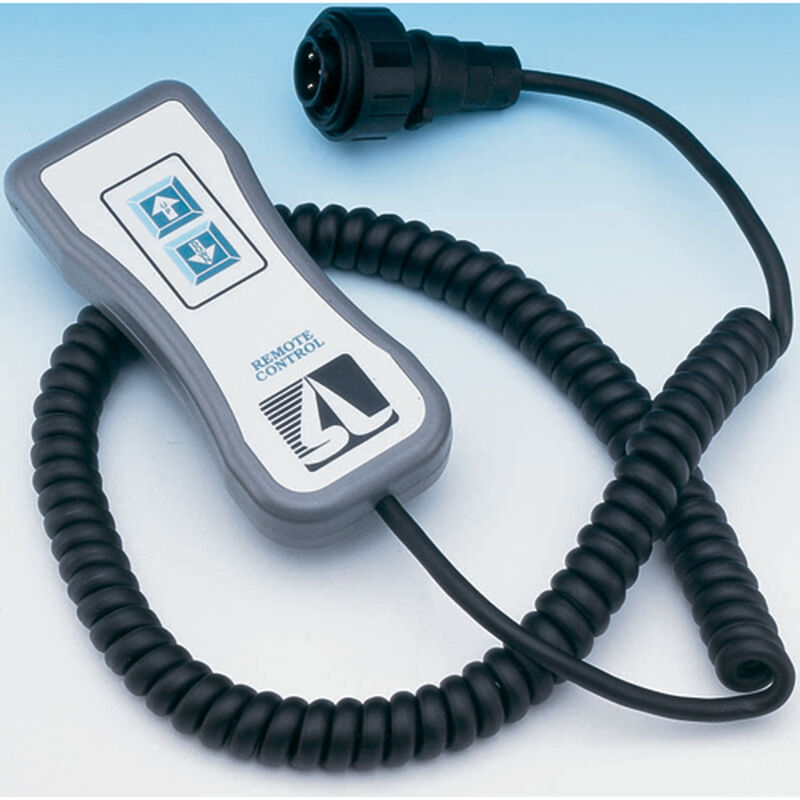
Handheld up-down windlass remote.
Circuit breaker: At the very least, every electric windlass circuit must have some sort of appropriately sized circuit protection, such as a heavy-duty circuit breaker located as close as possible to the battery bank in a dry place that’s easily accessible. The breaker must be sized to handle the expected operating load, yet protect the wiring from a very high current draw and/or a short circuit. Remember that circuit protection will not protect the motor from sustained high load usage, which can cause heat buildup in the motor without tripping a breaker. Windlasses are designed to operate for short periods of time only.
Windlass switches differ in their current-carrying ability and style. Current-carrying switches, like a foot switch on the foredeck, handle the full current of the windlass, which may be 200 amps. Switches that carry low current, like panel switches or hand remotes, turn solenoids on or off and must simply handle the solenoid current. A solenoid is an electric relay switch that opens or closes a main circuit when activated by a remote switch. Because windlasses draw large amounts of current, a solenoid allows the circuit to be “energized” from a remote location without having to pass full current through the remote switch. A dual-direction control box is made up of two solenoids and special switching gear capable of directing the current to make the windlass go up or down.
Installation Options
Many variations exist, depending on the configuration of the boat. Use our guidelines to determine what components you’ll need, then consult the windlass manufacturer or a marine electrician to determine the specifics of your installation.
For a permanent-magnet motor, there are three basic installation options. For up-only operation, use a foot switch or a heavy-duty single throw switch at the helm. For up/down operation, use a double-pole/double-throw switch capable of handling the current that the windlass requires. For up/down remote operation, use a dual-direction control box designed for permanent-magnet motors plus remote switches, either foot switches, a panel switch, a hand remote or a combination.
Series-wound motors also have three basic options. For up-only operation, use a foot switch capable of handling full current. For up/down operation from the windlass location, use two foot switches—one for up and one for down. For up/down remote operation, use a dual-direction switch box designed for series-wound motors in conjunction with any combination of foot switches, a panel switch or a hand remote.
Wire Sizing
Because windlass current draw can be 300 amps or greater at near-stalling load, wiring must be appropriately sized to avoid excessive voltage drop (more than 10 percent), overheating, or failure. Any way you slice it, windlasses require large diameter cables. Even small windlasses will require 2ga. or 1ga. cables and most larger windlasses will require 2/0ga. or 4/0ga.
Other Articles on Anchoring
The actual diameter is based upon the distance (round trip—in both directions) of the cable run and the maximum load. Use your windlass owner’s manual or our Marine Wire And Ampacity Guide (in the Electrical section) to determine the right size for your installation. You’ll also need a heavy cable crimping tool and some heat shrink tubing for making your connections as waterproof as possible. Remember to support your wire run every 18" so it won’t flex as the boat moves.
A dedicated battery in the bow?
Though some experts may disagree, we believe that the best way to power a windlass is from the existing house battery bank, rather than from a separate battery in the bow. Not only does a dedicated battery add to the already appreciable weight of the windlass, anchor and rode, it presents charging and maintenance difficulties. Charging cables for a bow battery would be almost as large as those required to power the windlass from the house bank. Also, charging a battery over a long distance can involve large amounts of current flow for extended periods, which in turn can lead to a drop in voltage, heat build-up and/or a large electromagnetic field. In contrast, a windlass draws current in short bursts, so the cables supplying it will not be under continuous use.